
manual
Olfo
Follow the instructions below.
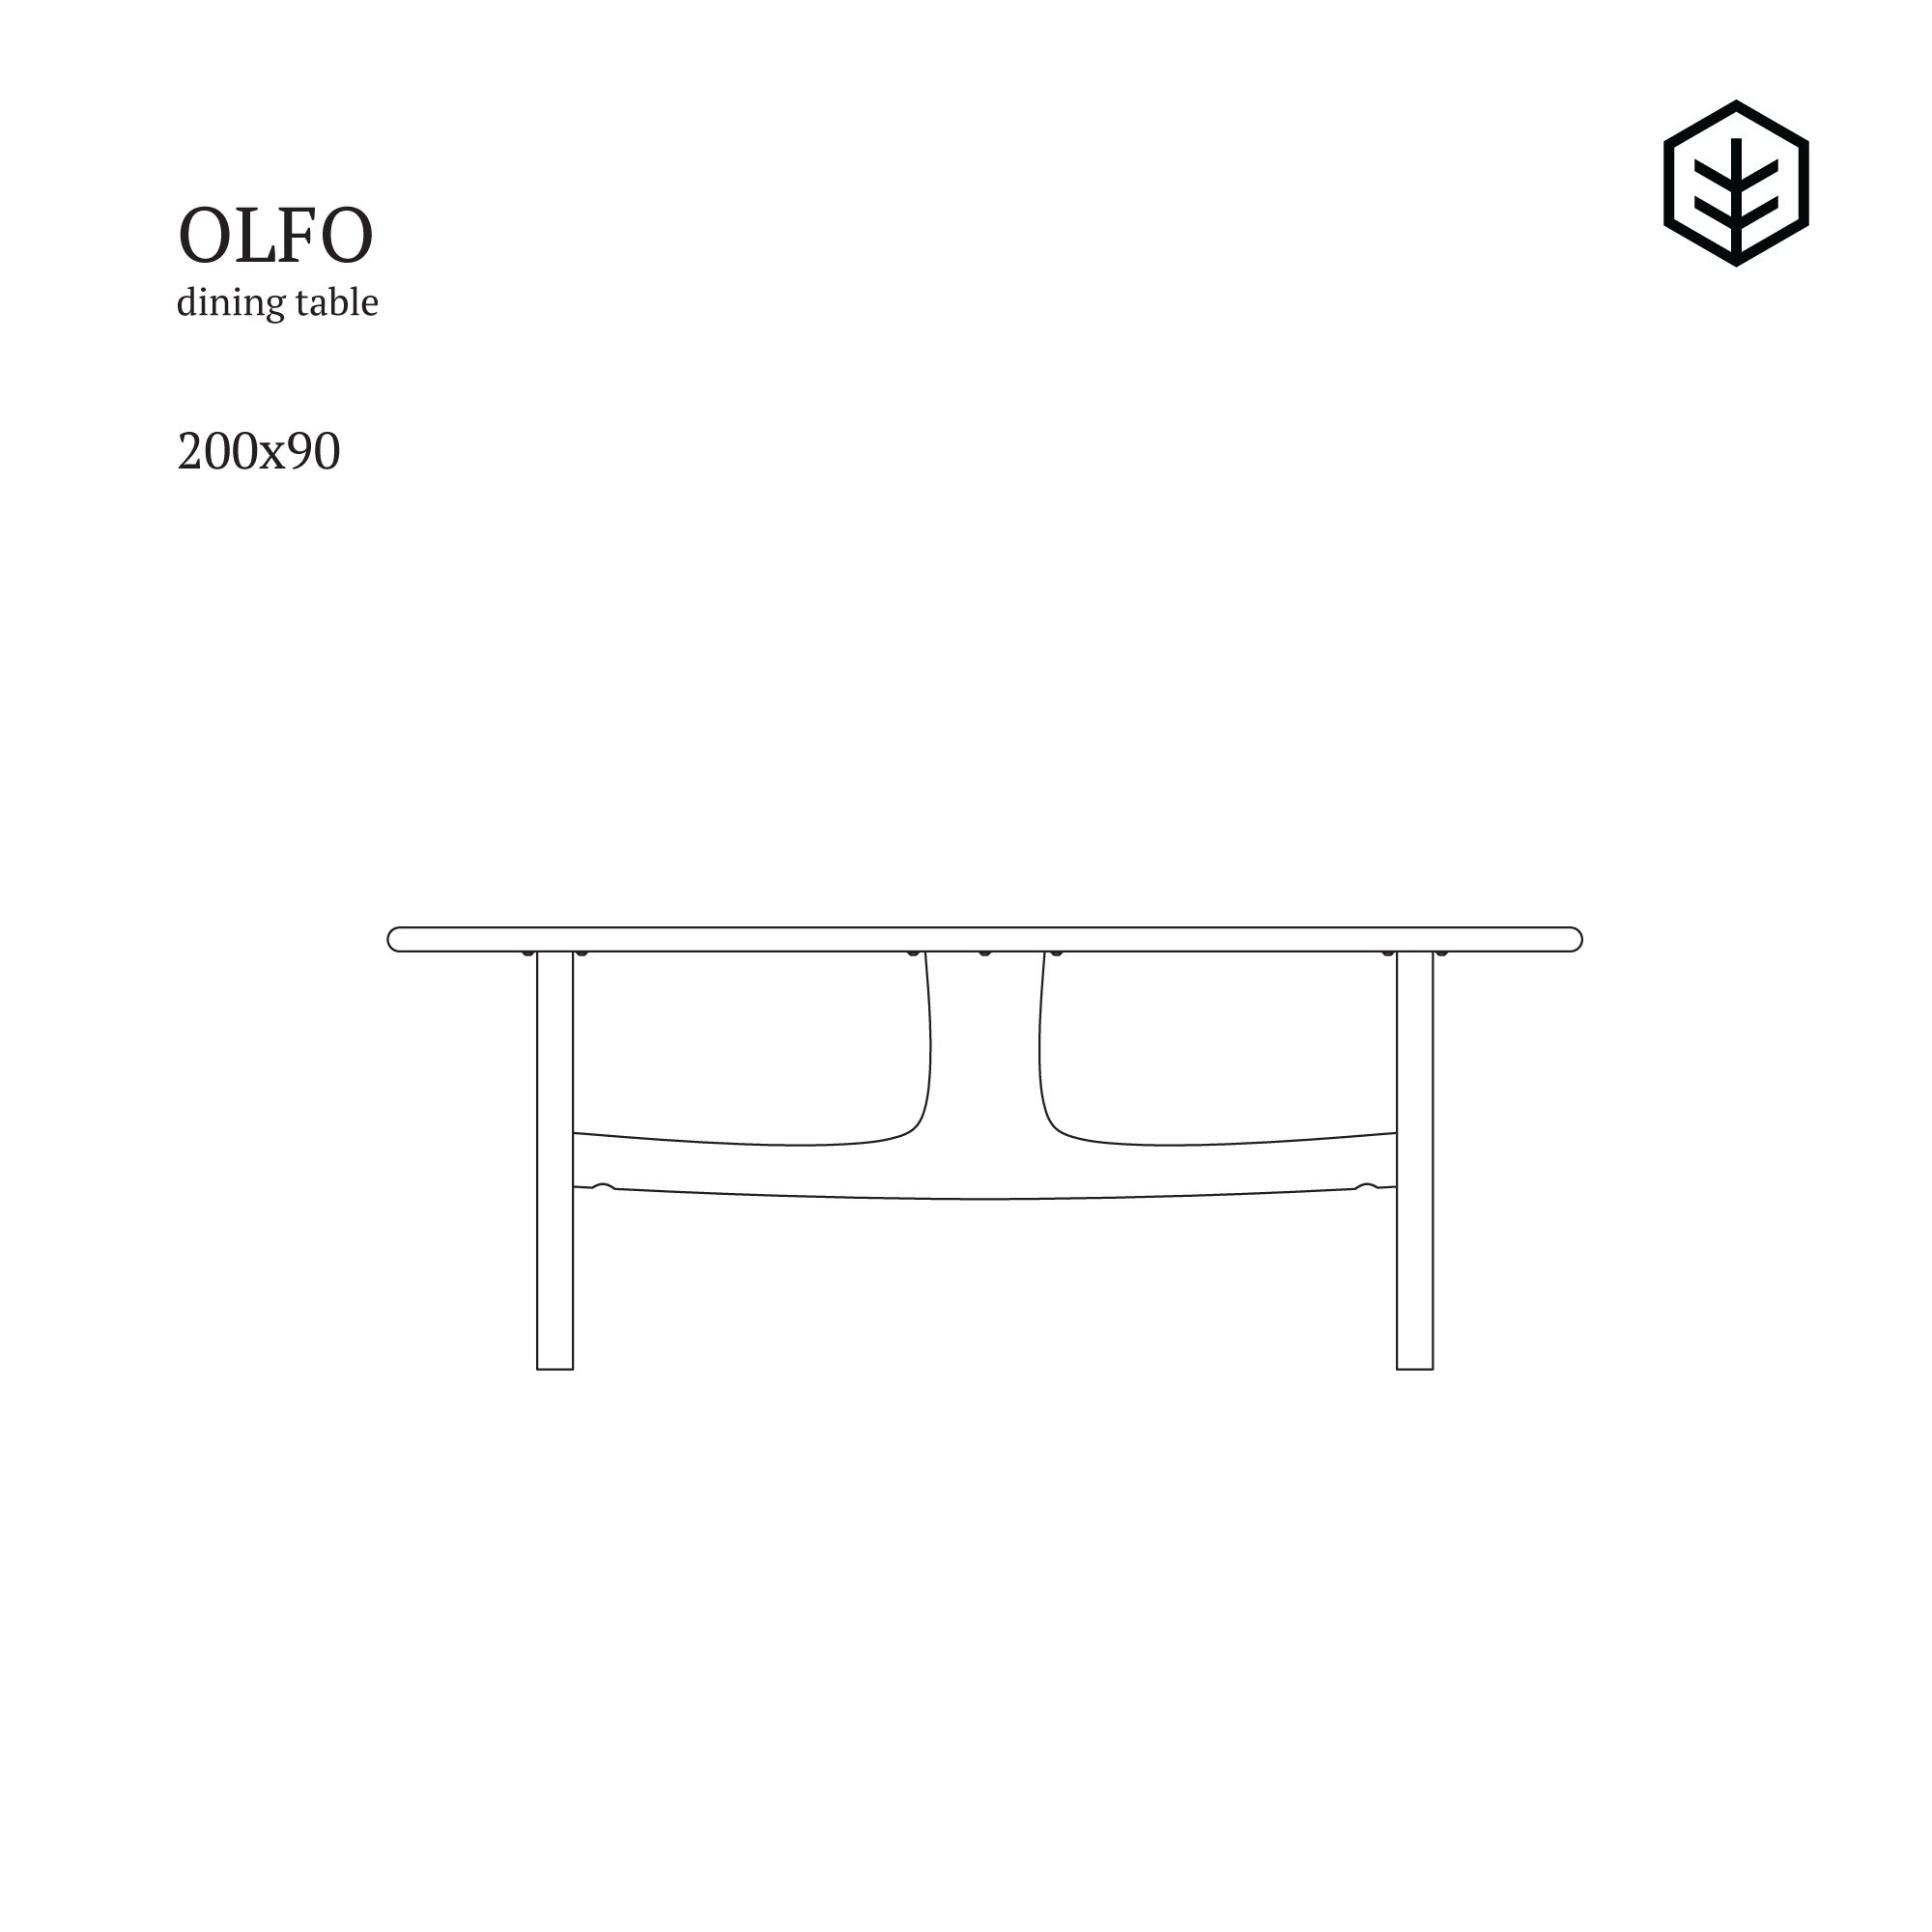
Prepare a place to assemble the OLFO table. Make sure you have enough
space for comfortable assembling and the surfaces you will use are
clean. We recommend using a rug or blanket on which the parts can be
safely put.

Unpack all parts. Check quantities.

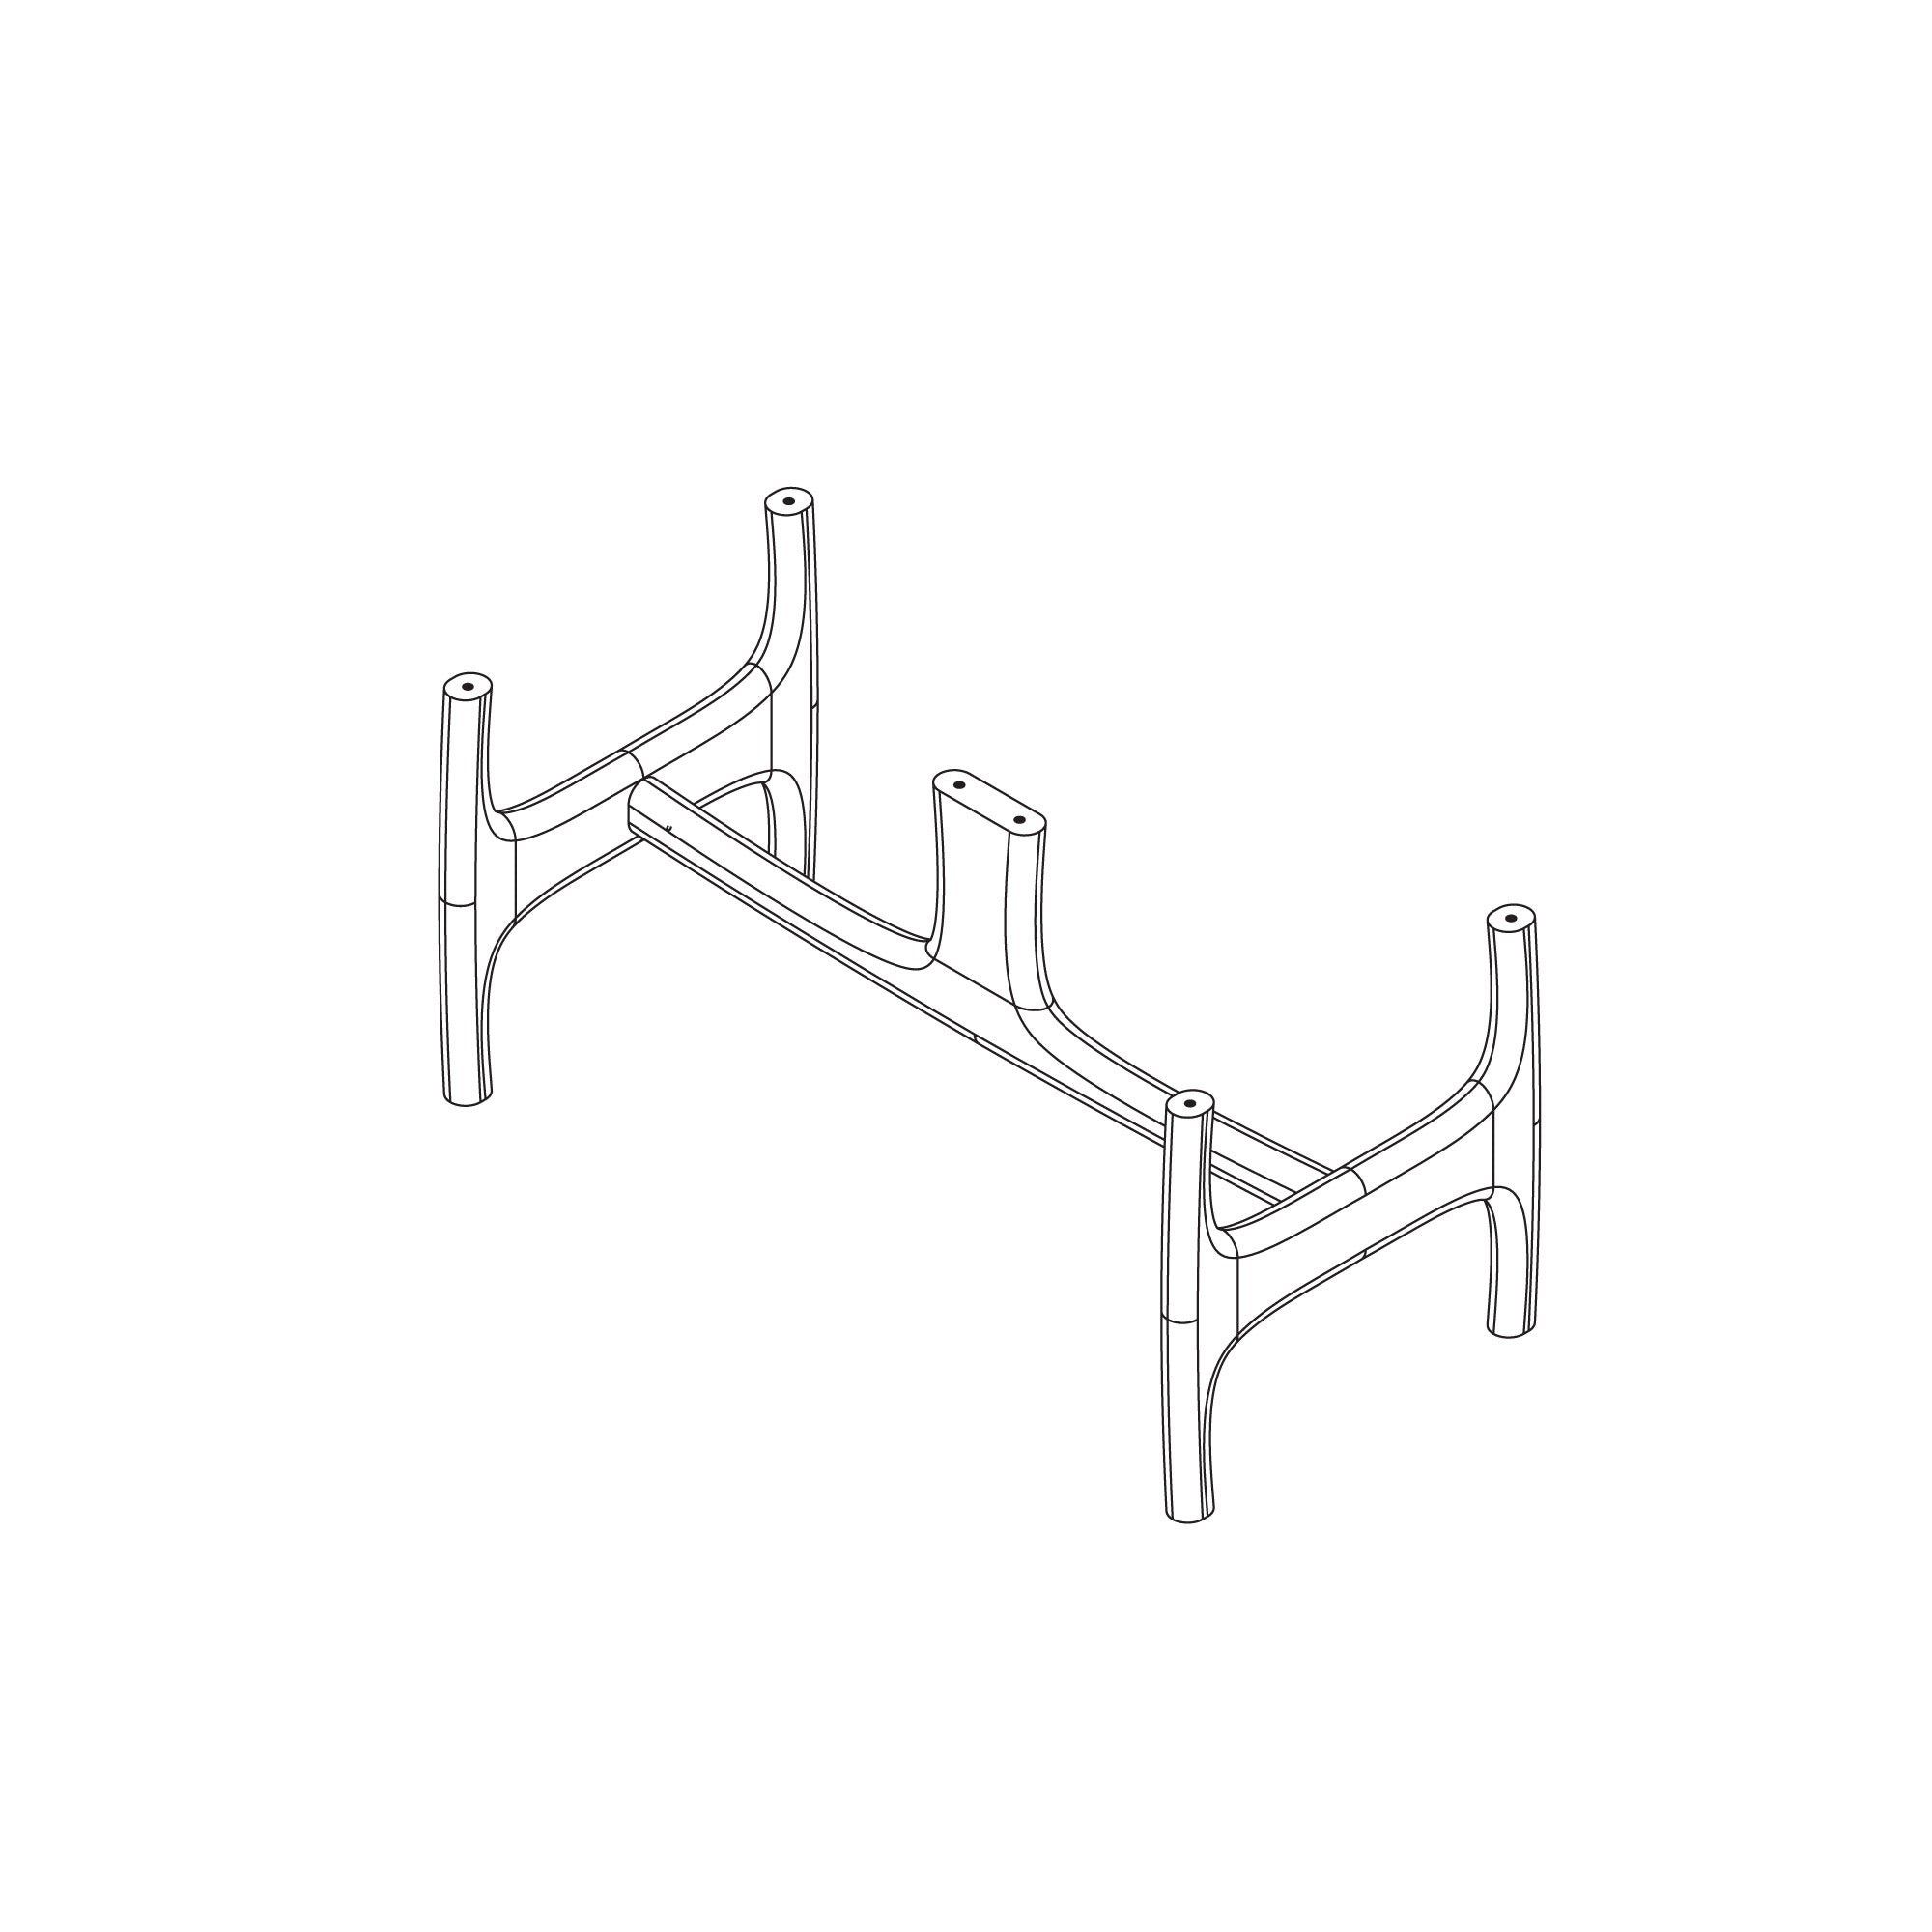
Let's start by preparing the legs. Both the left and right legs have
holes drilled in the center. In one of them there is a thread. In the
two holes without thread, insert the dowels. If you encounter
resistance, use a hammer or other tool with which you can easily embed
the dowels in the holes. Screw an M8 threaded pin into the threaded
hole. (thread)
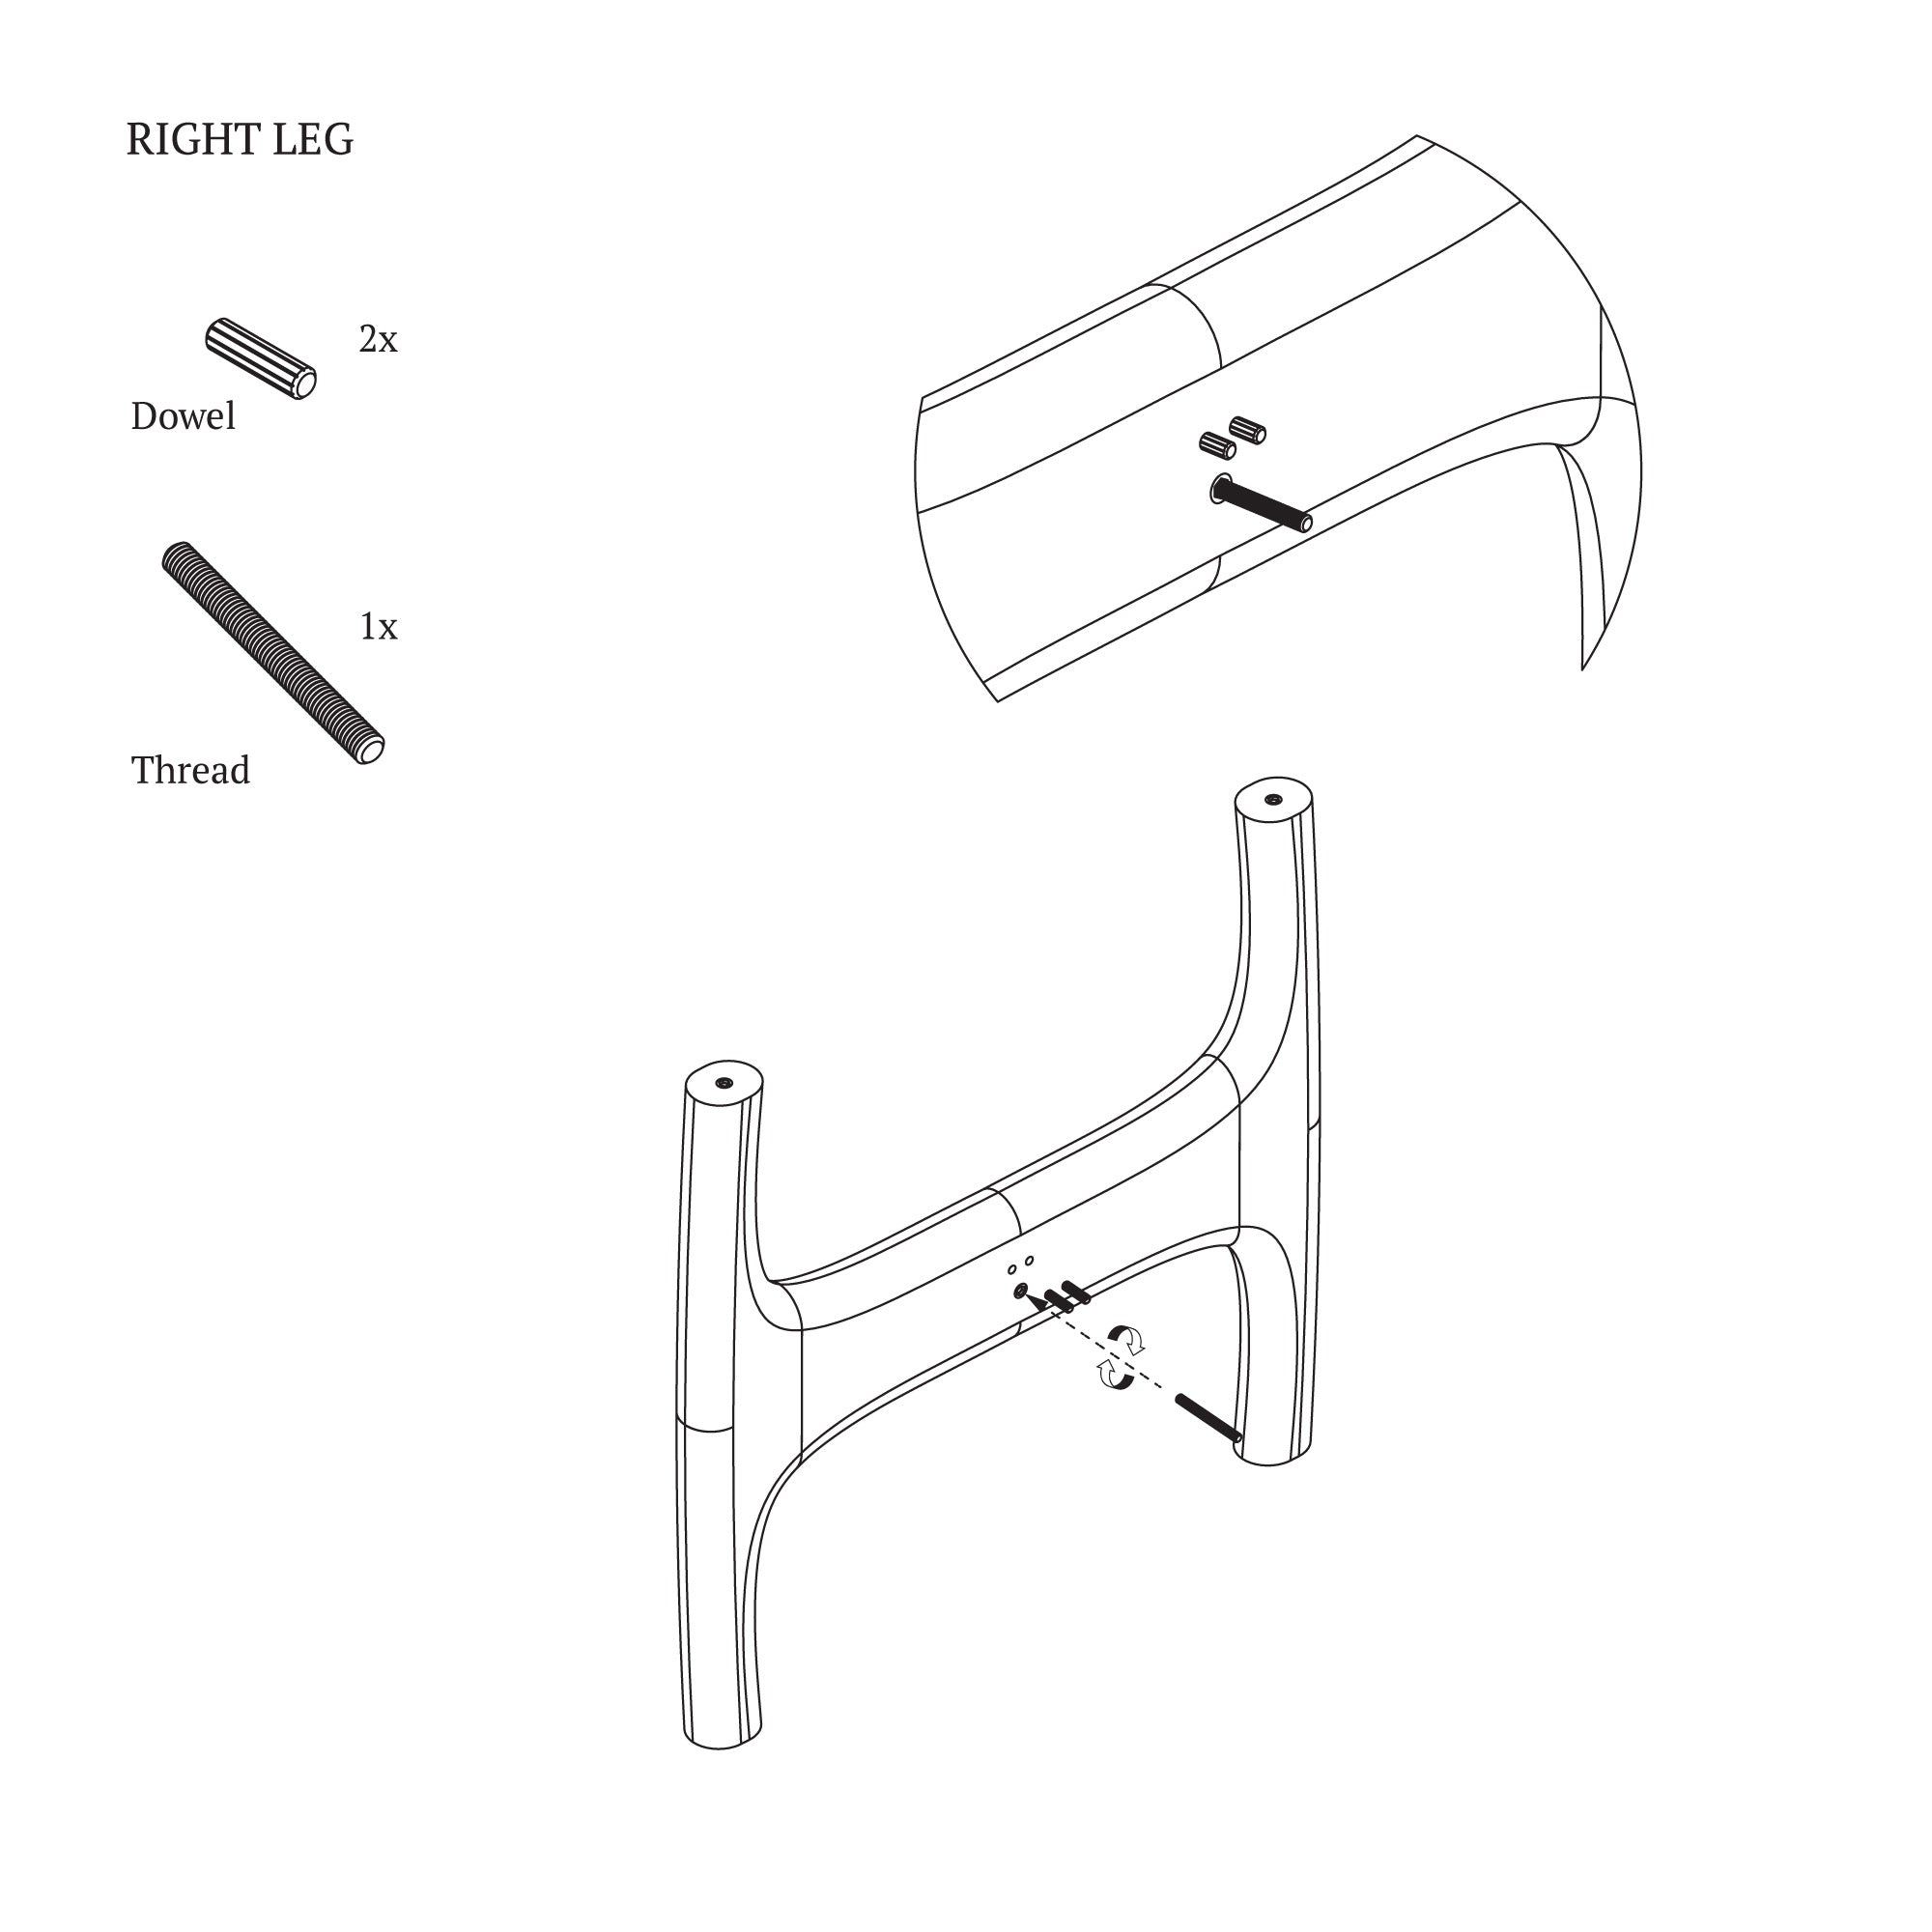
Perform the same steps for the right leg.
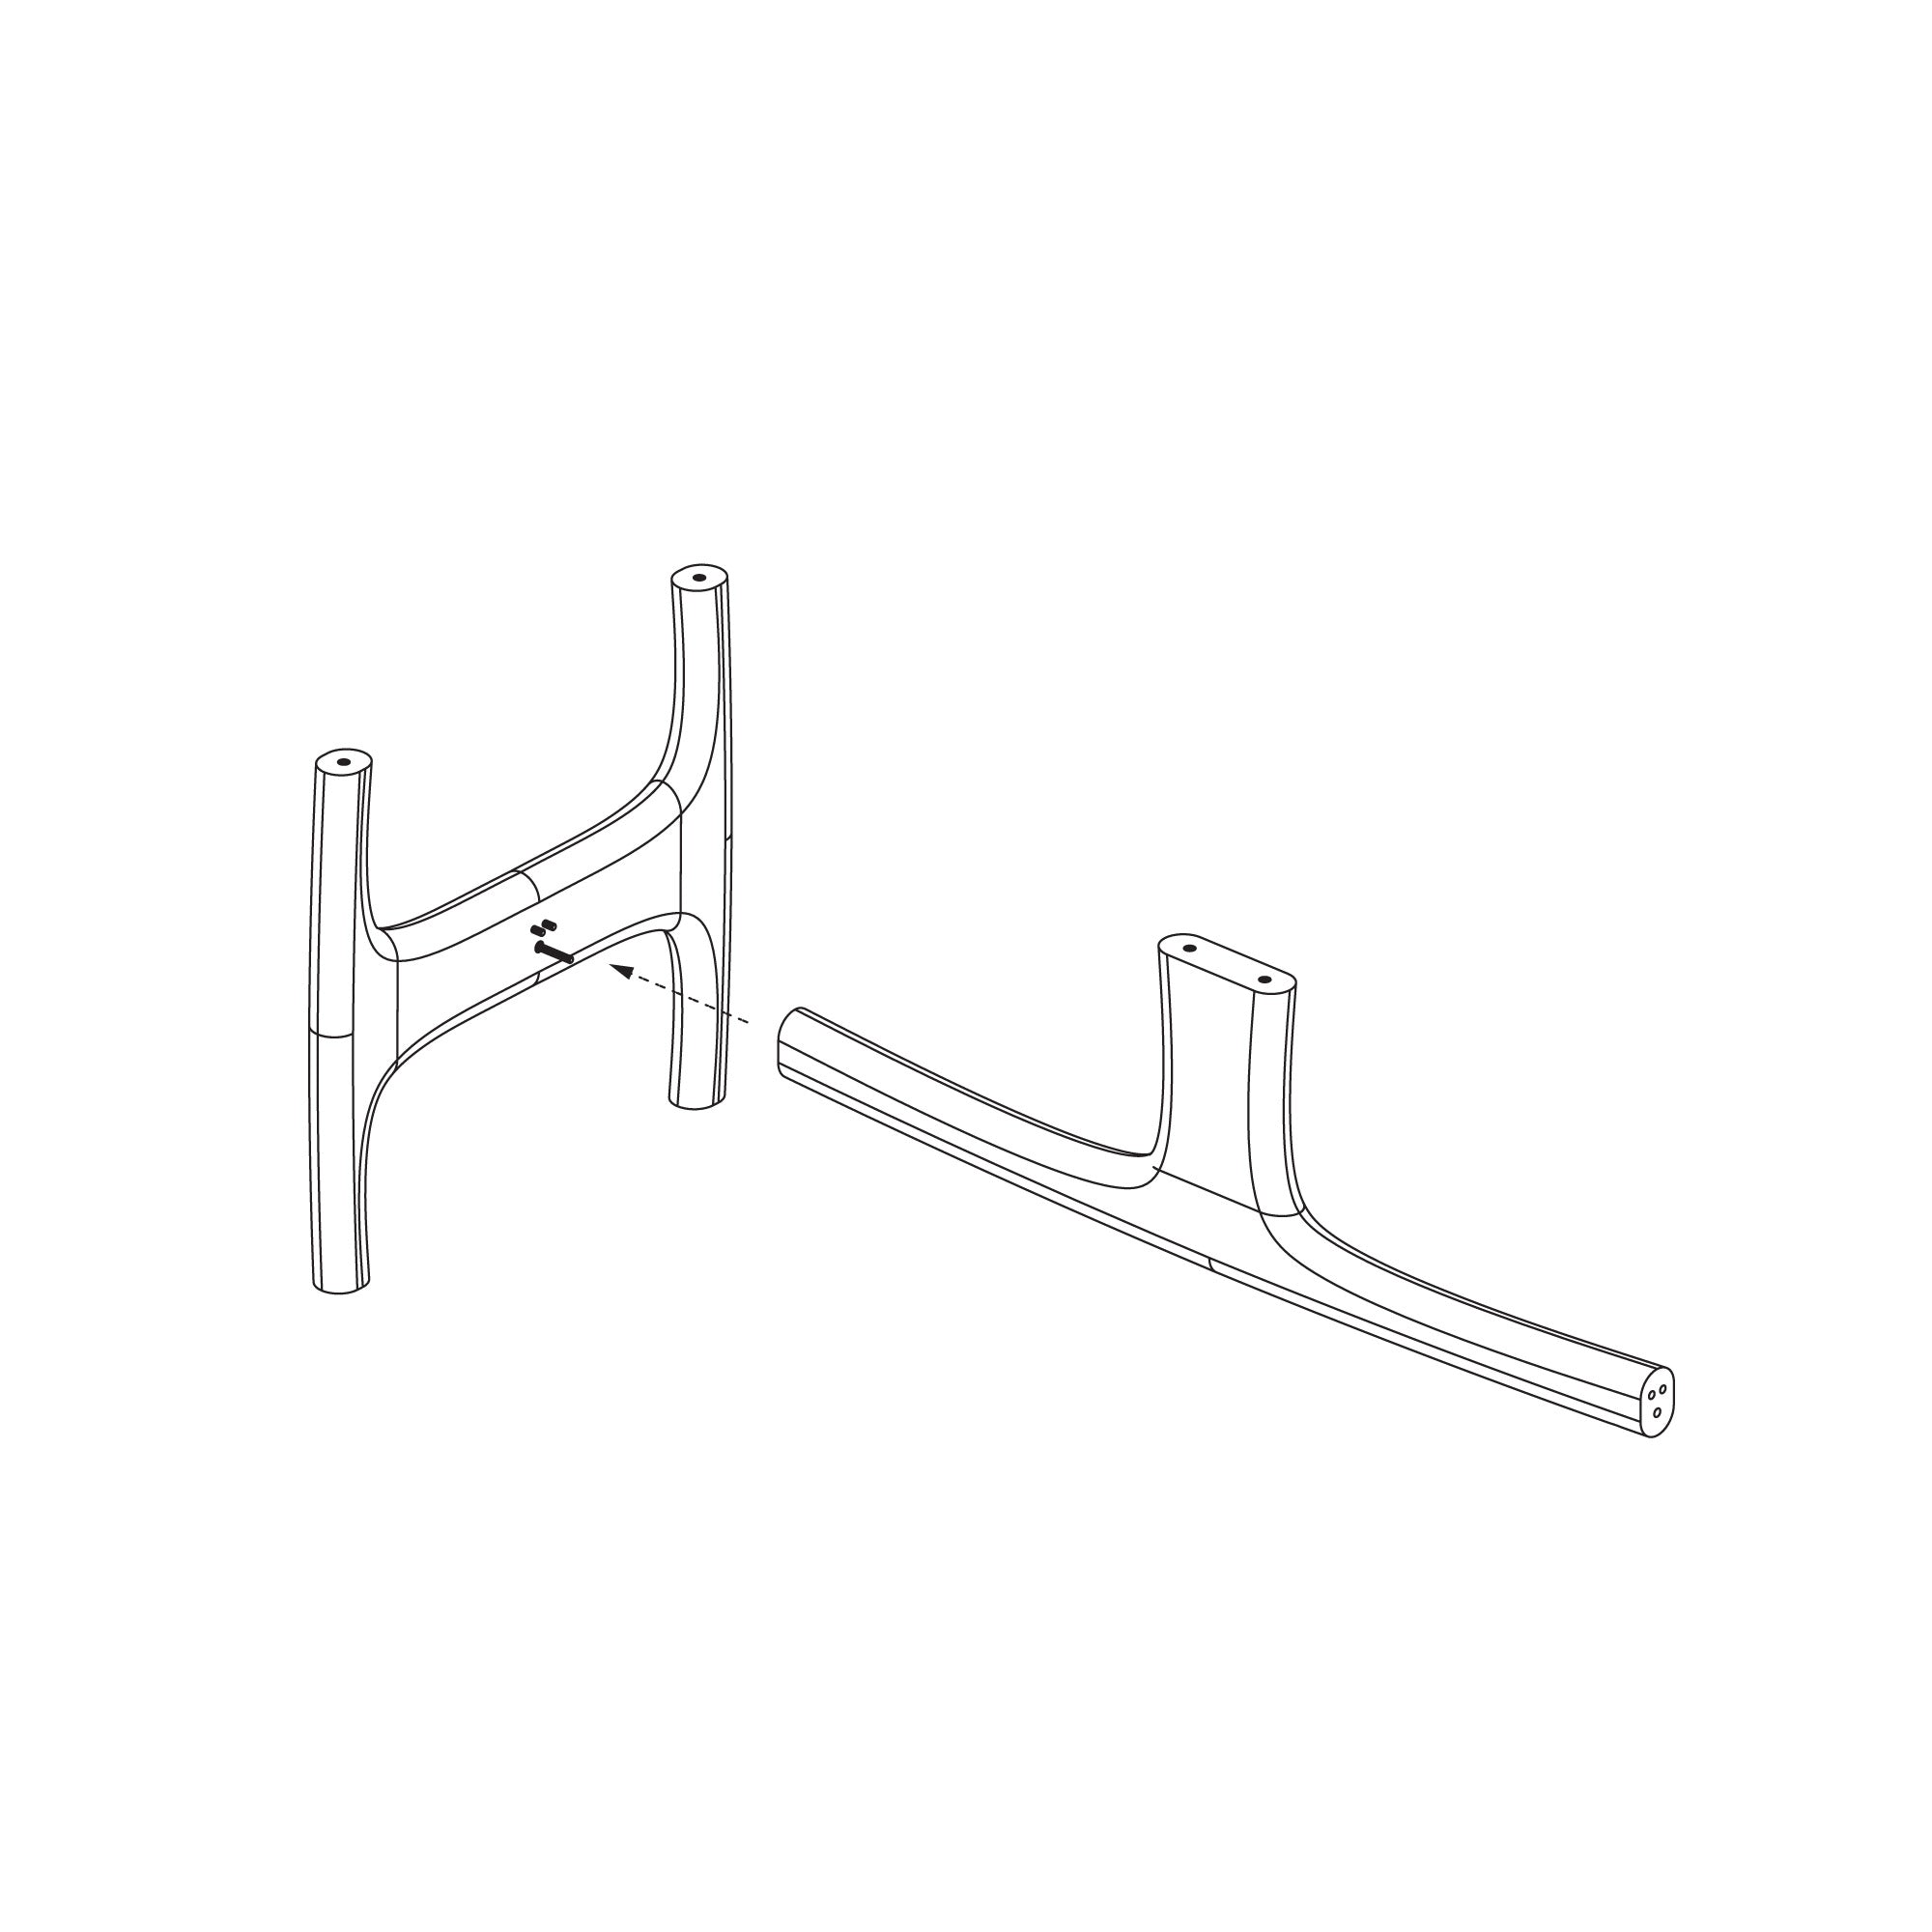
Now the threaded rod and the pins protruding from the leg should be
placed in the holes that are located in the longitudinal connector. The
mounting side is optional.

After connecting the elements, there will be a thread in the hole of the
connector on which you need to apply successively moonline and then a
nut with M8 thread. Using the wrench included in the shipment, tighten
the nut. In this way, the two elements should be well pressed together.
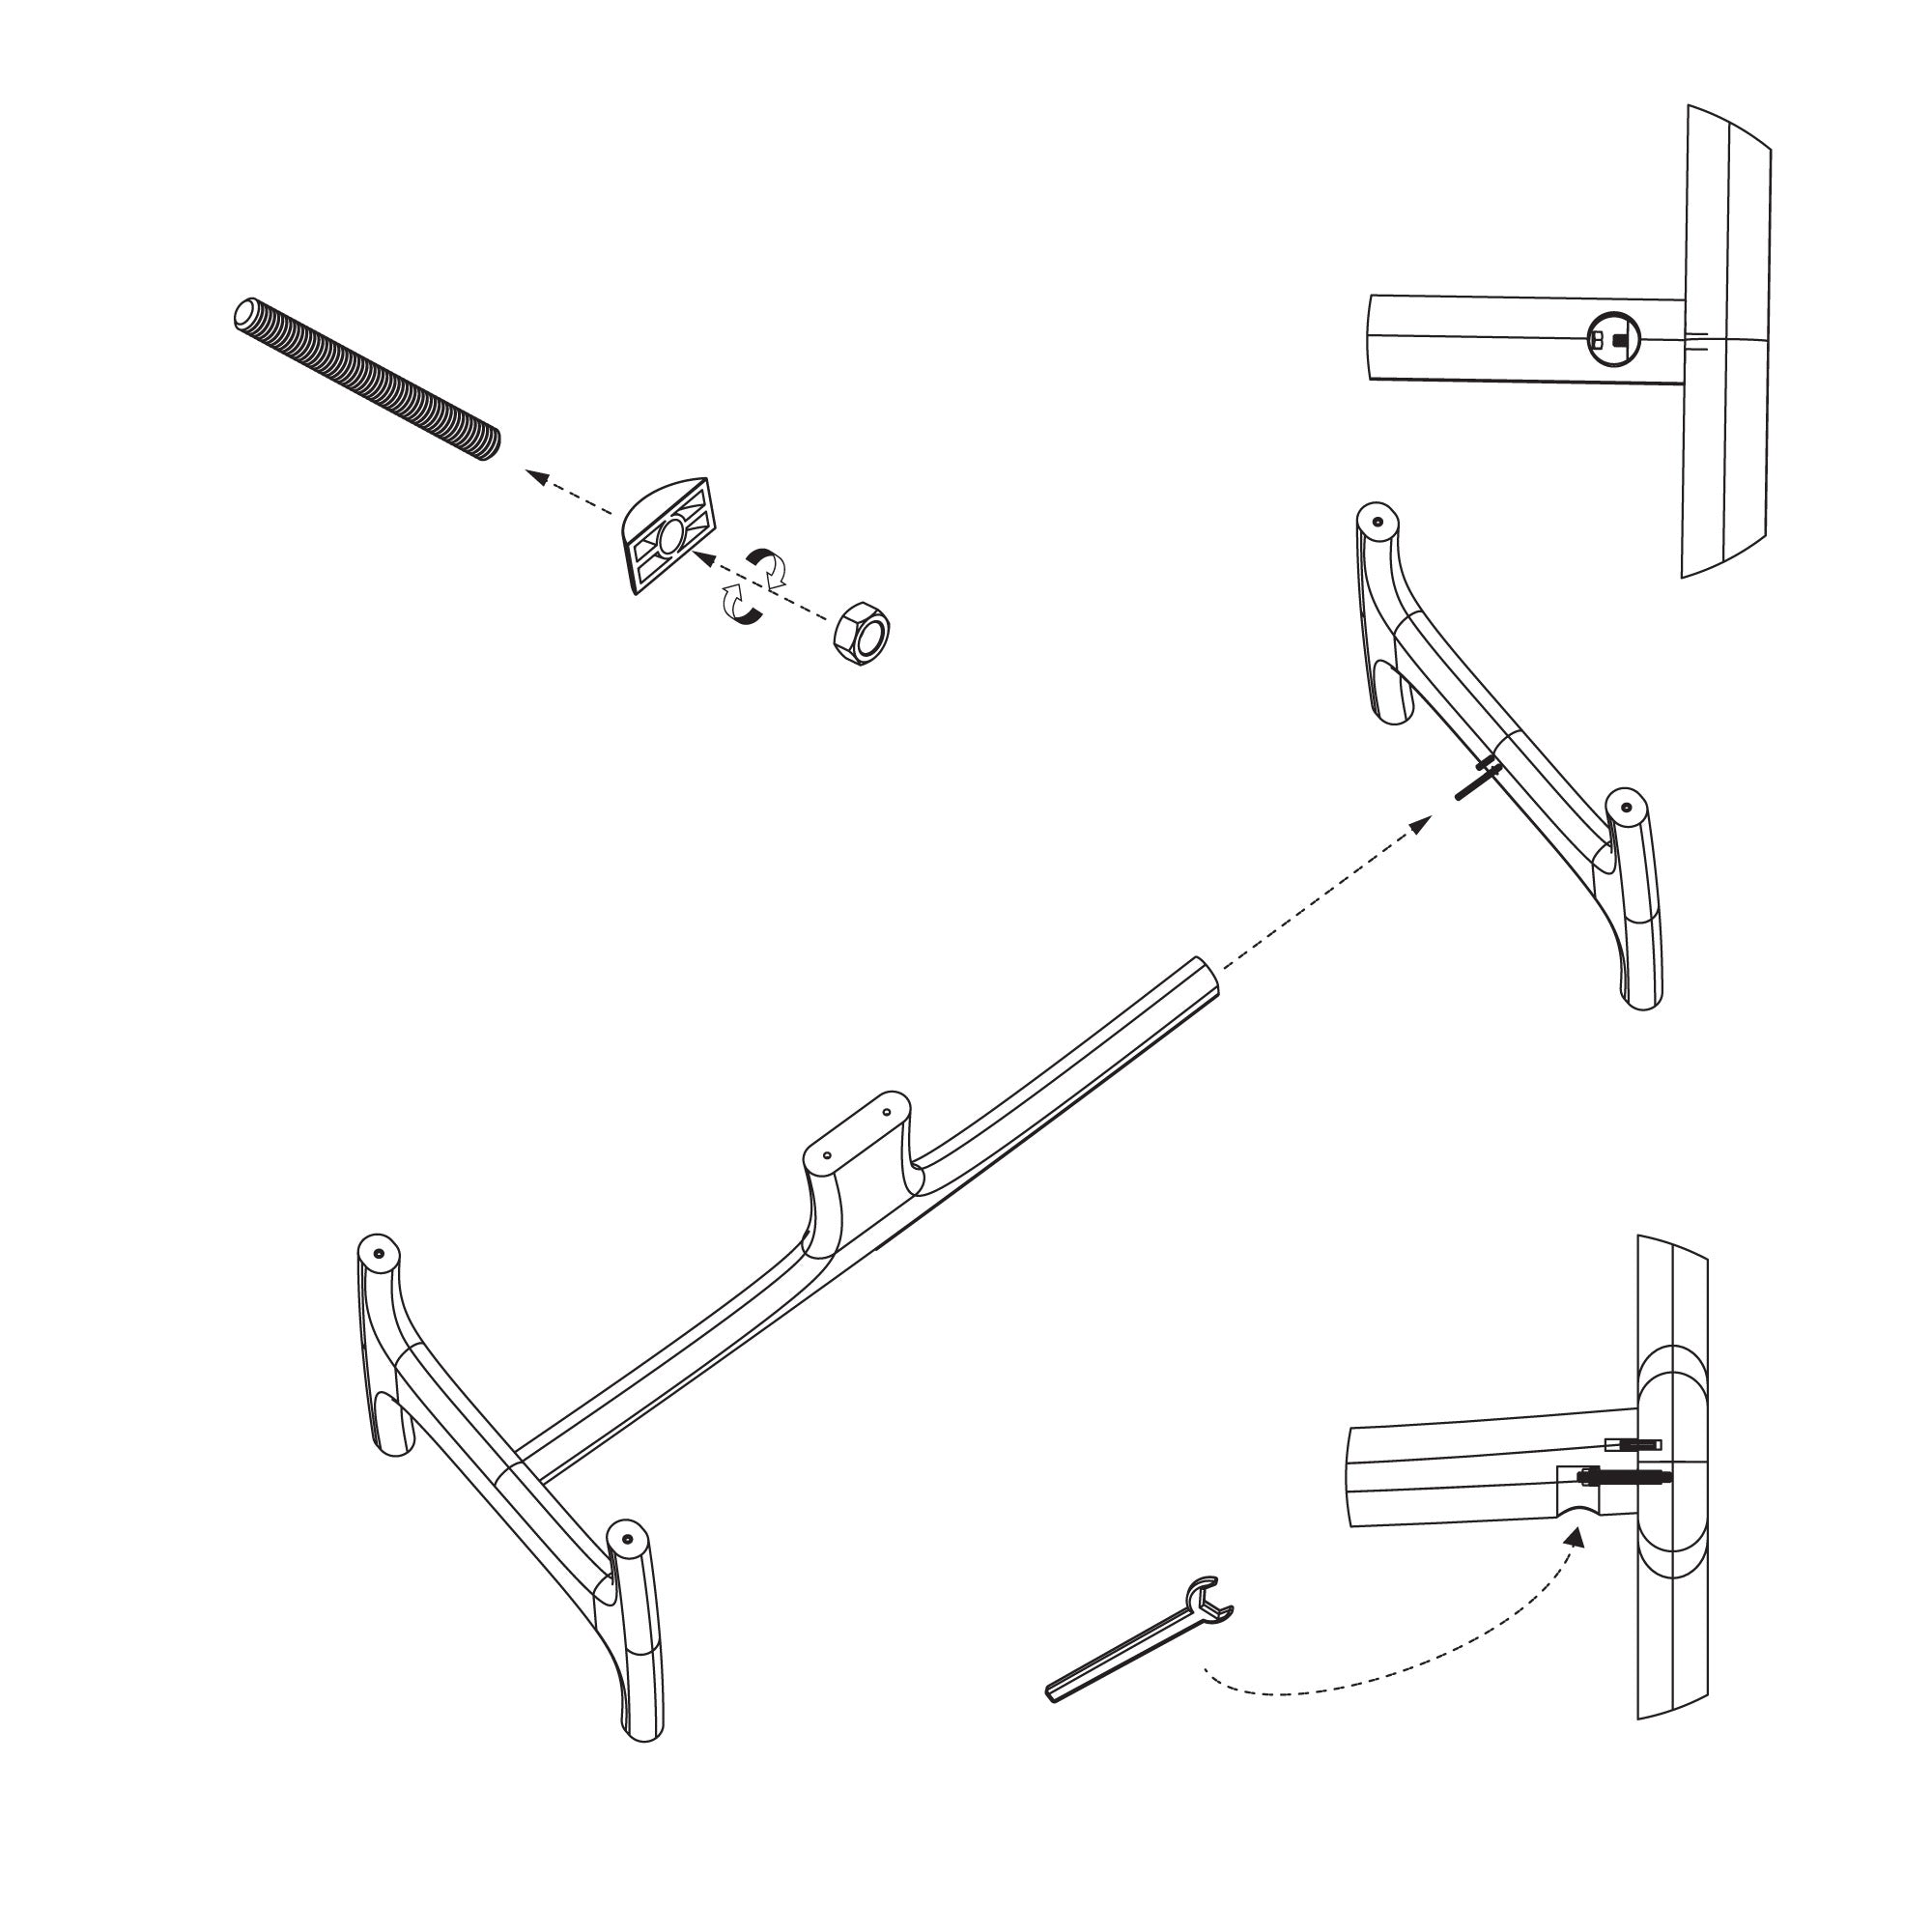
Perform the same operation for the right leg. Put the longitudinal
connector on the protruding threads and studs and then screw everything
together using the moonline connector and nut.
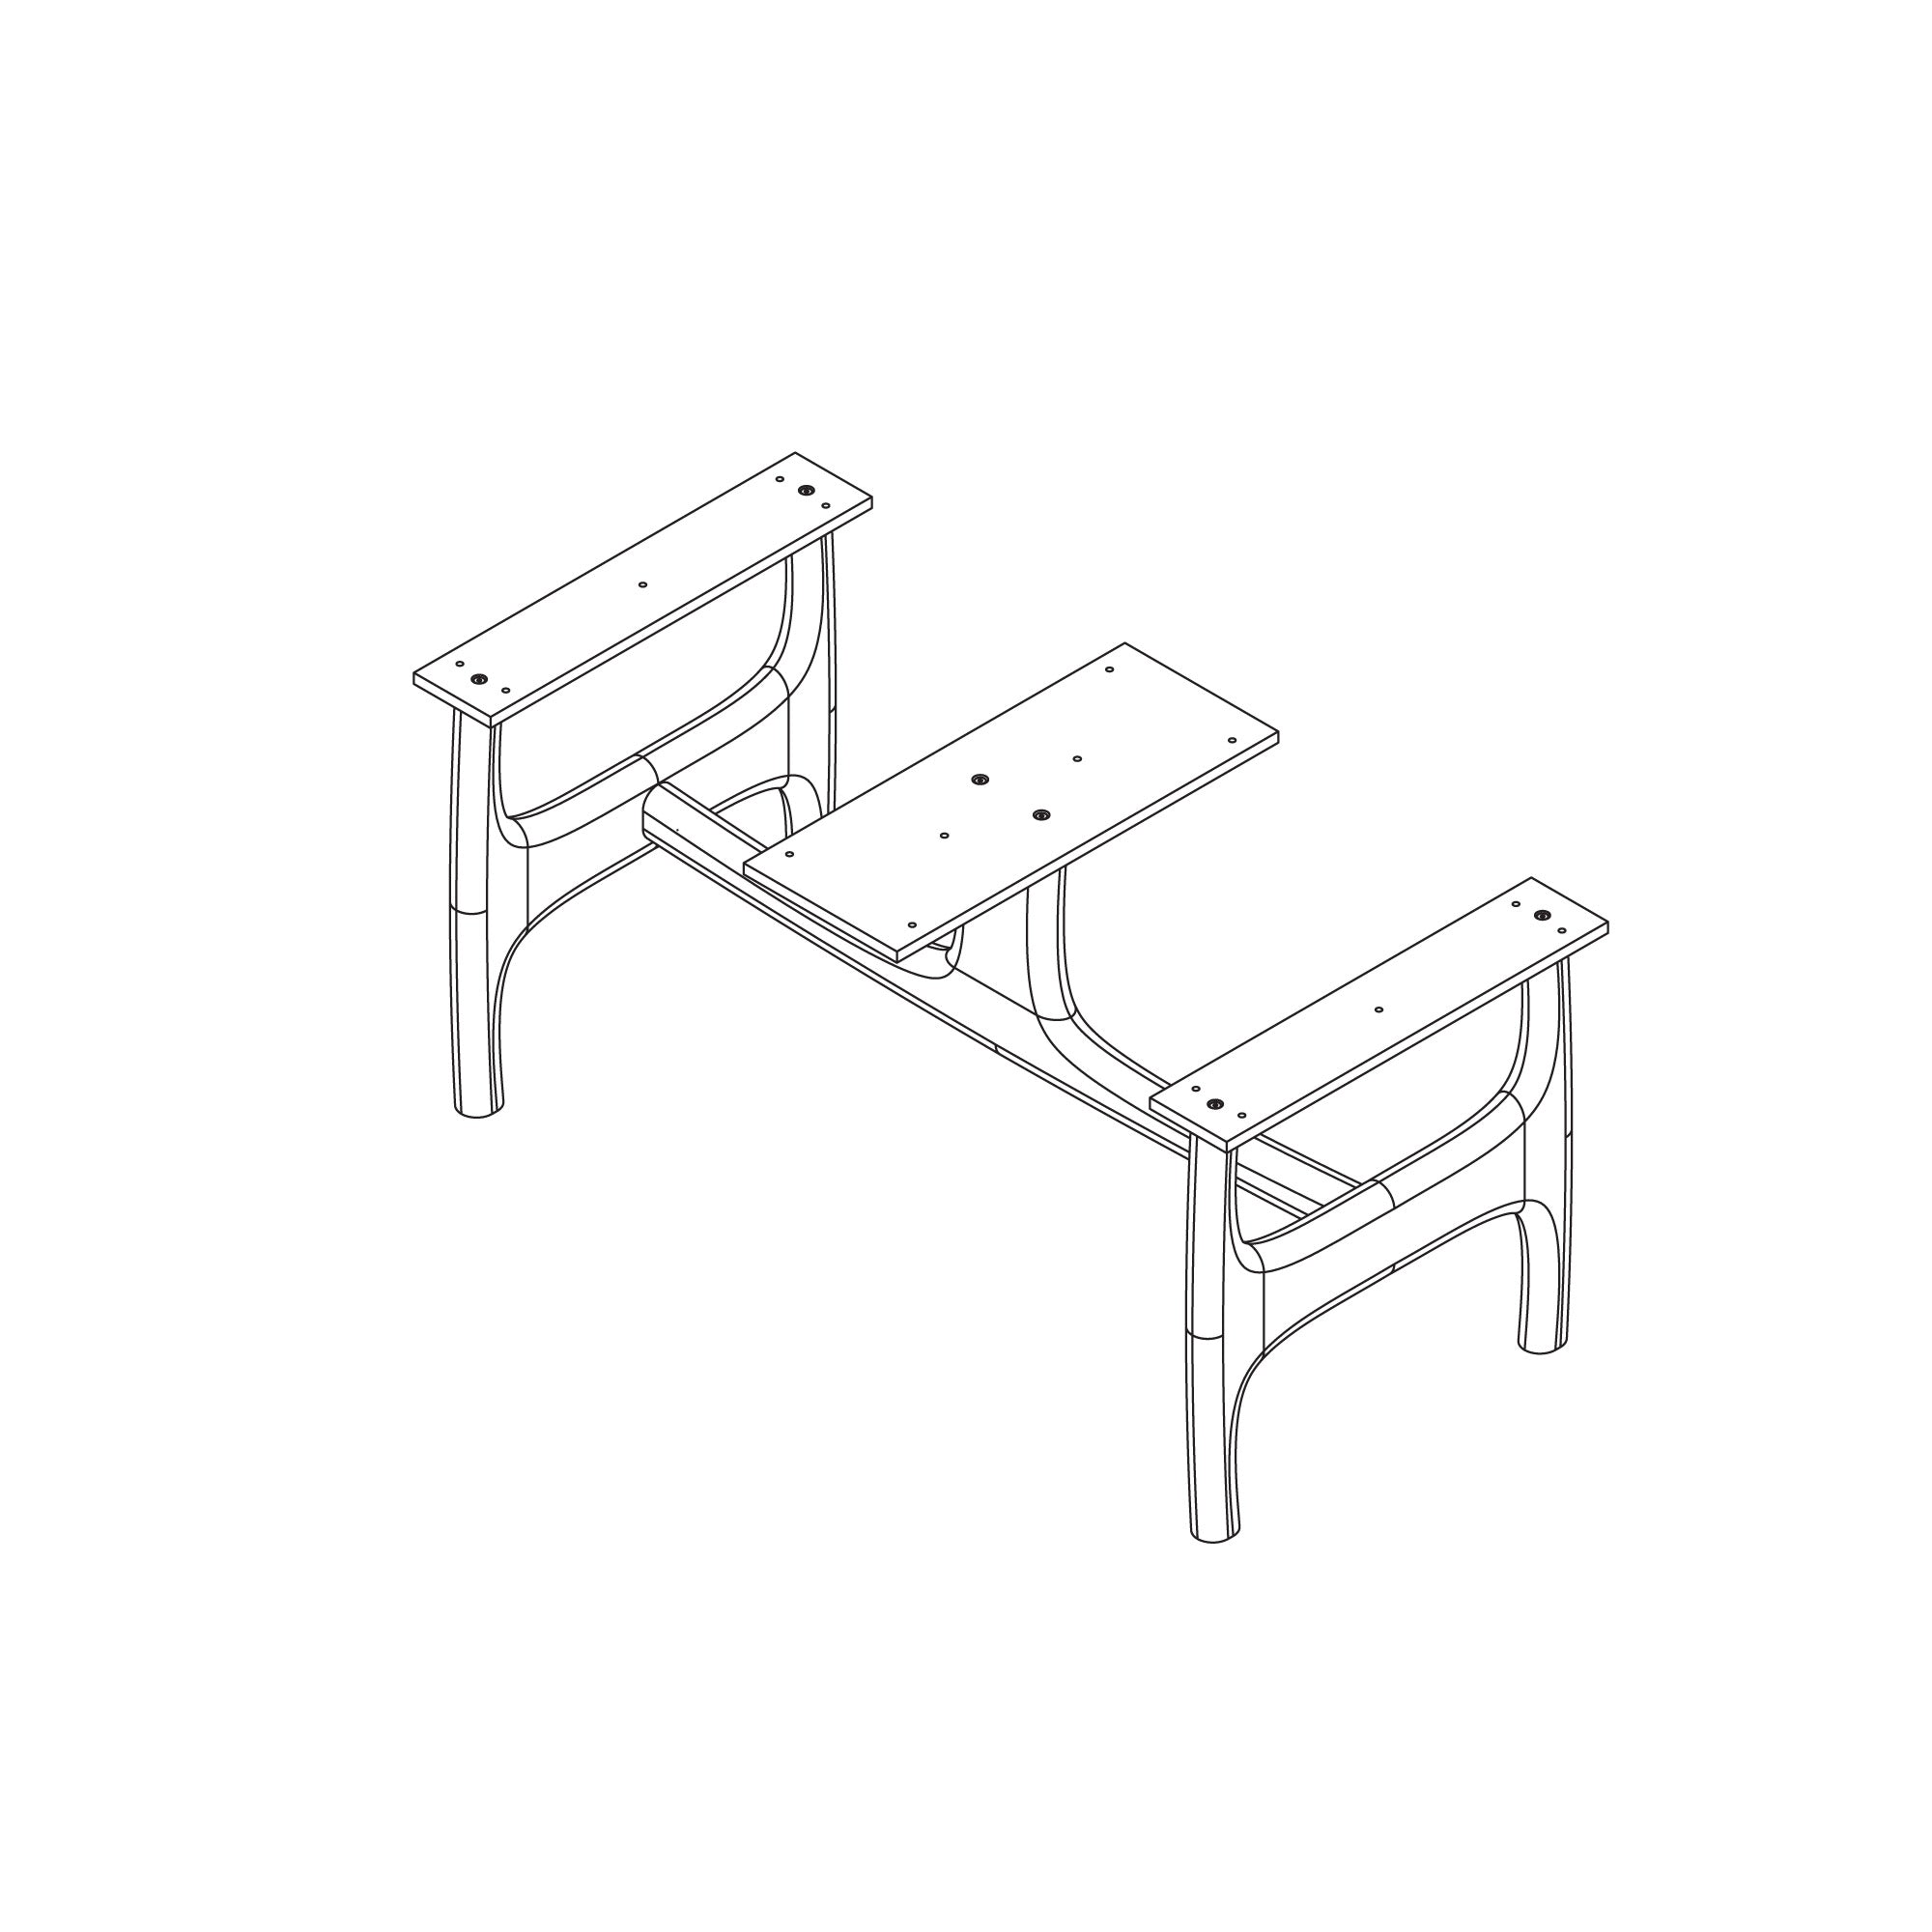
After assembling the left and right legs, we can start screwing the tabletop.
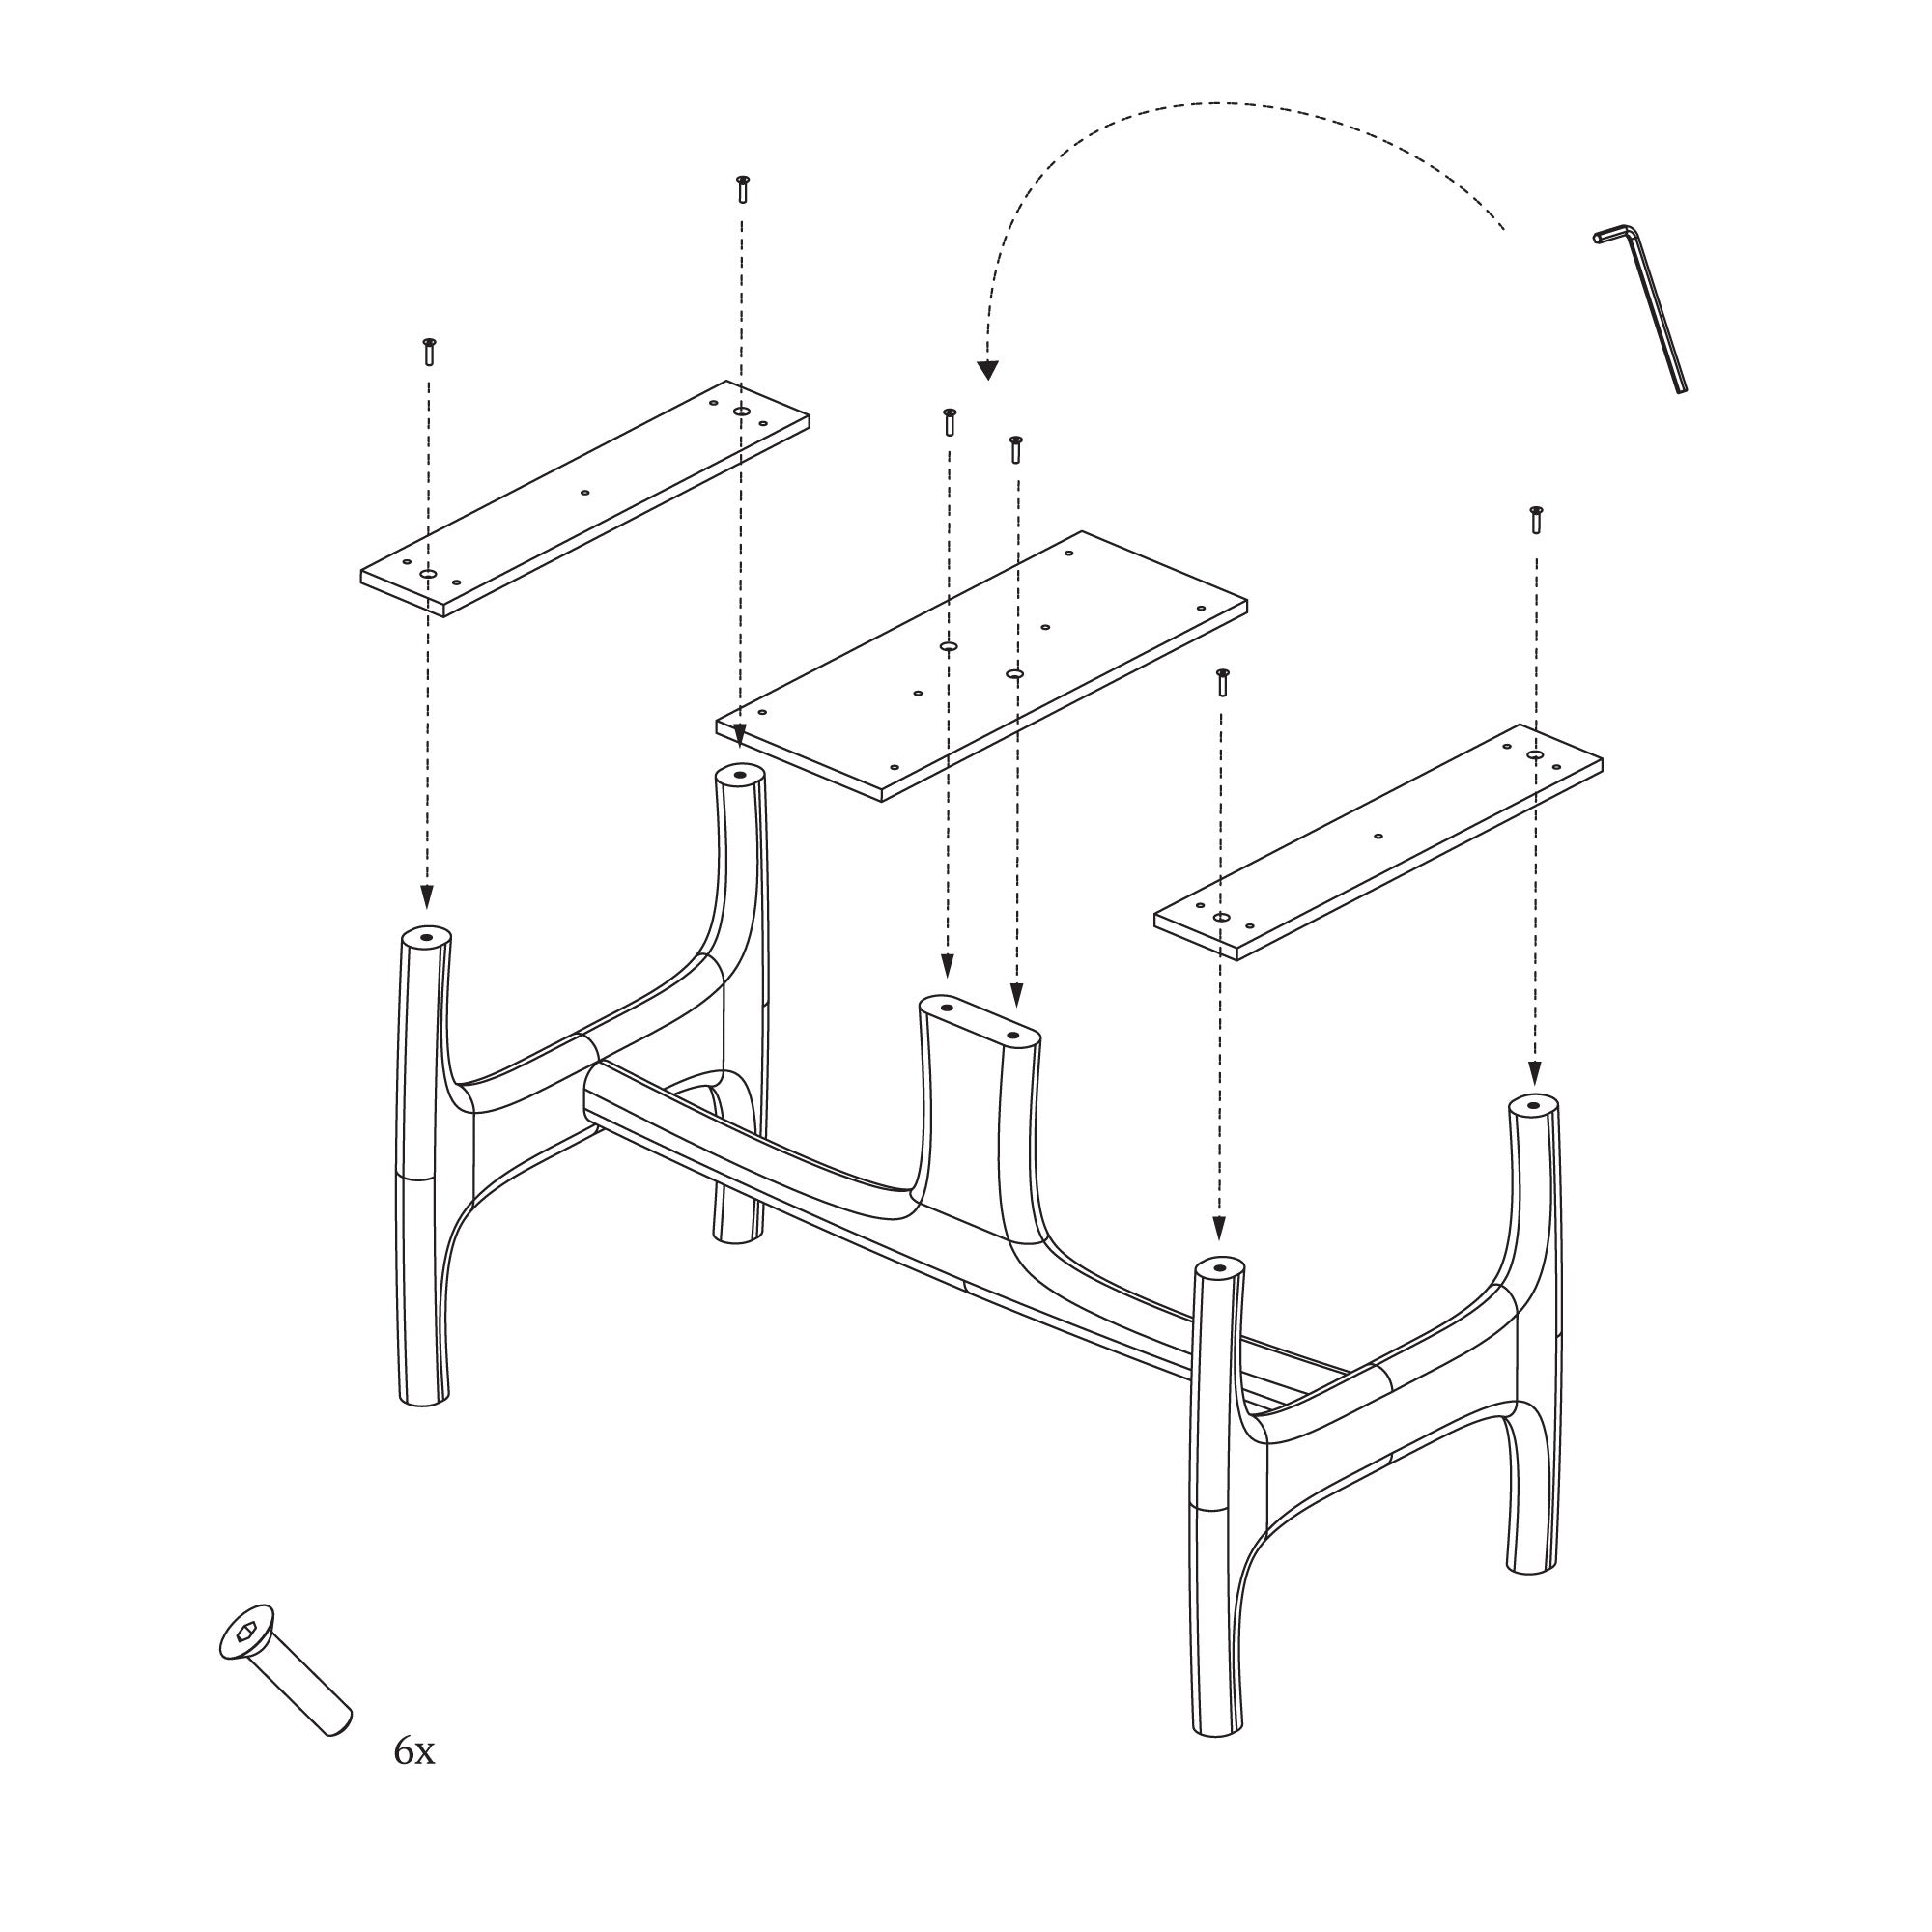
To do this, let's start by screwing the mounting plates of the top /
support. Place the wider support in the middle part. To screw it on, use
the countersunk screws and the allen wrench you find in the kit.
Make sure all screws are securely tightened.
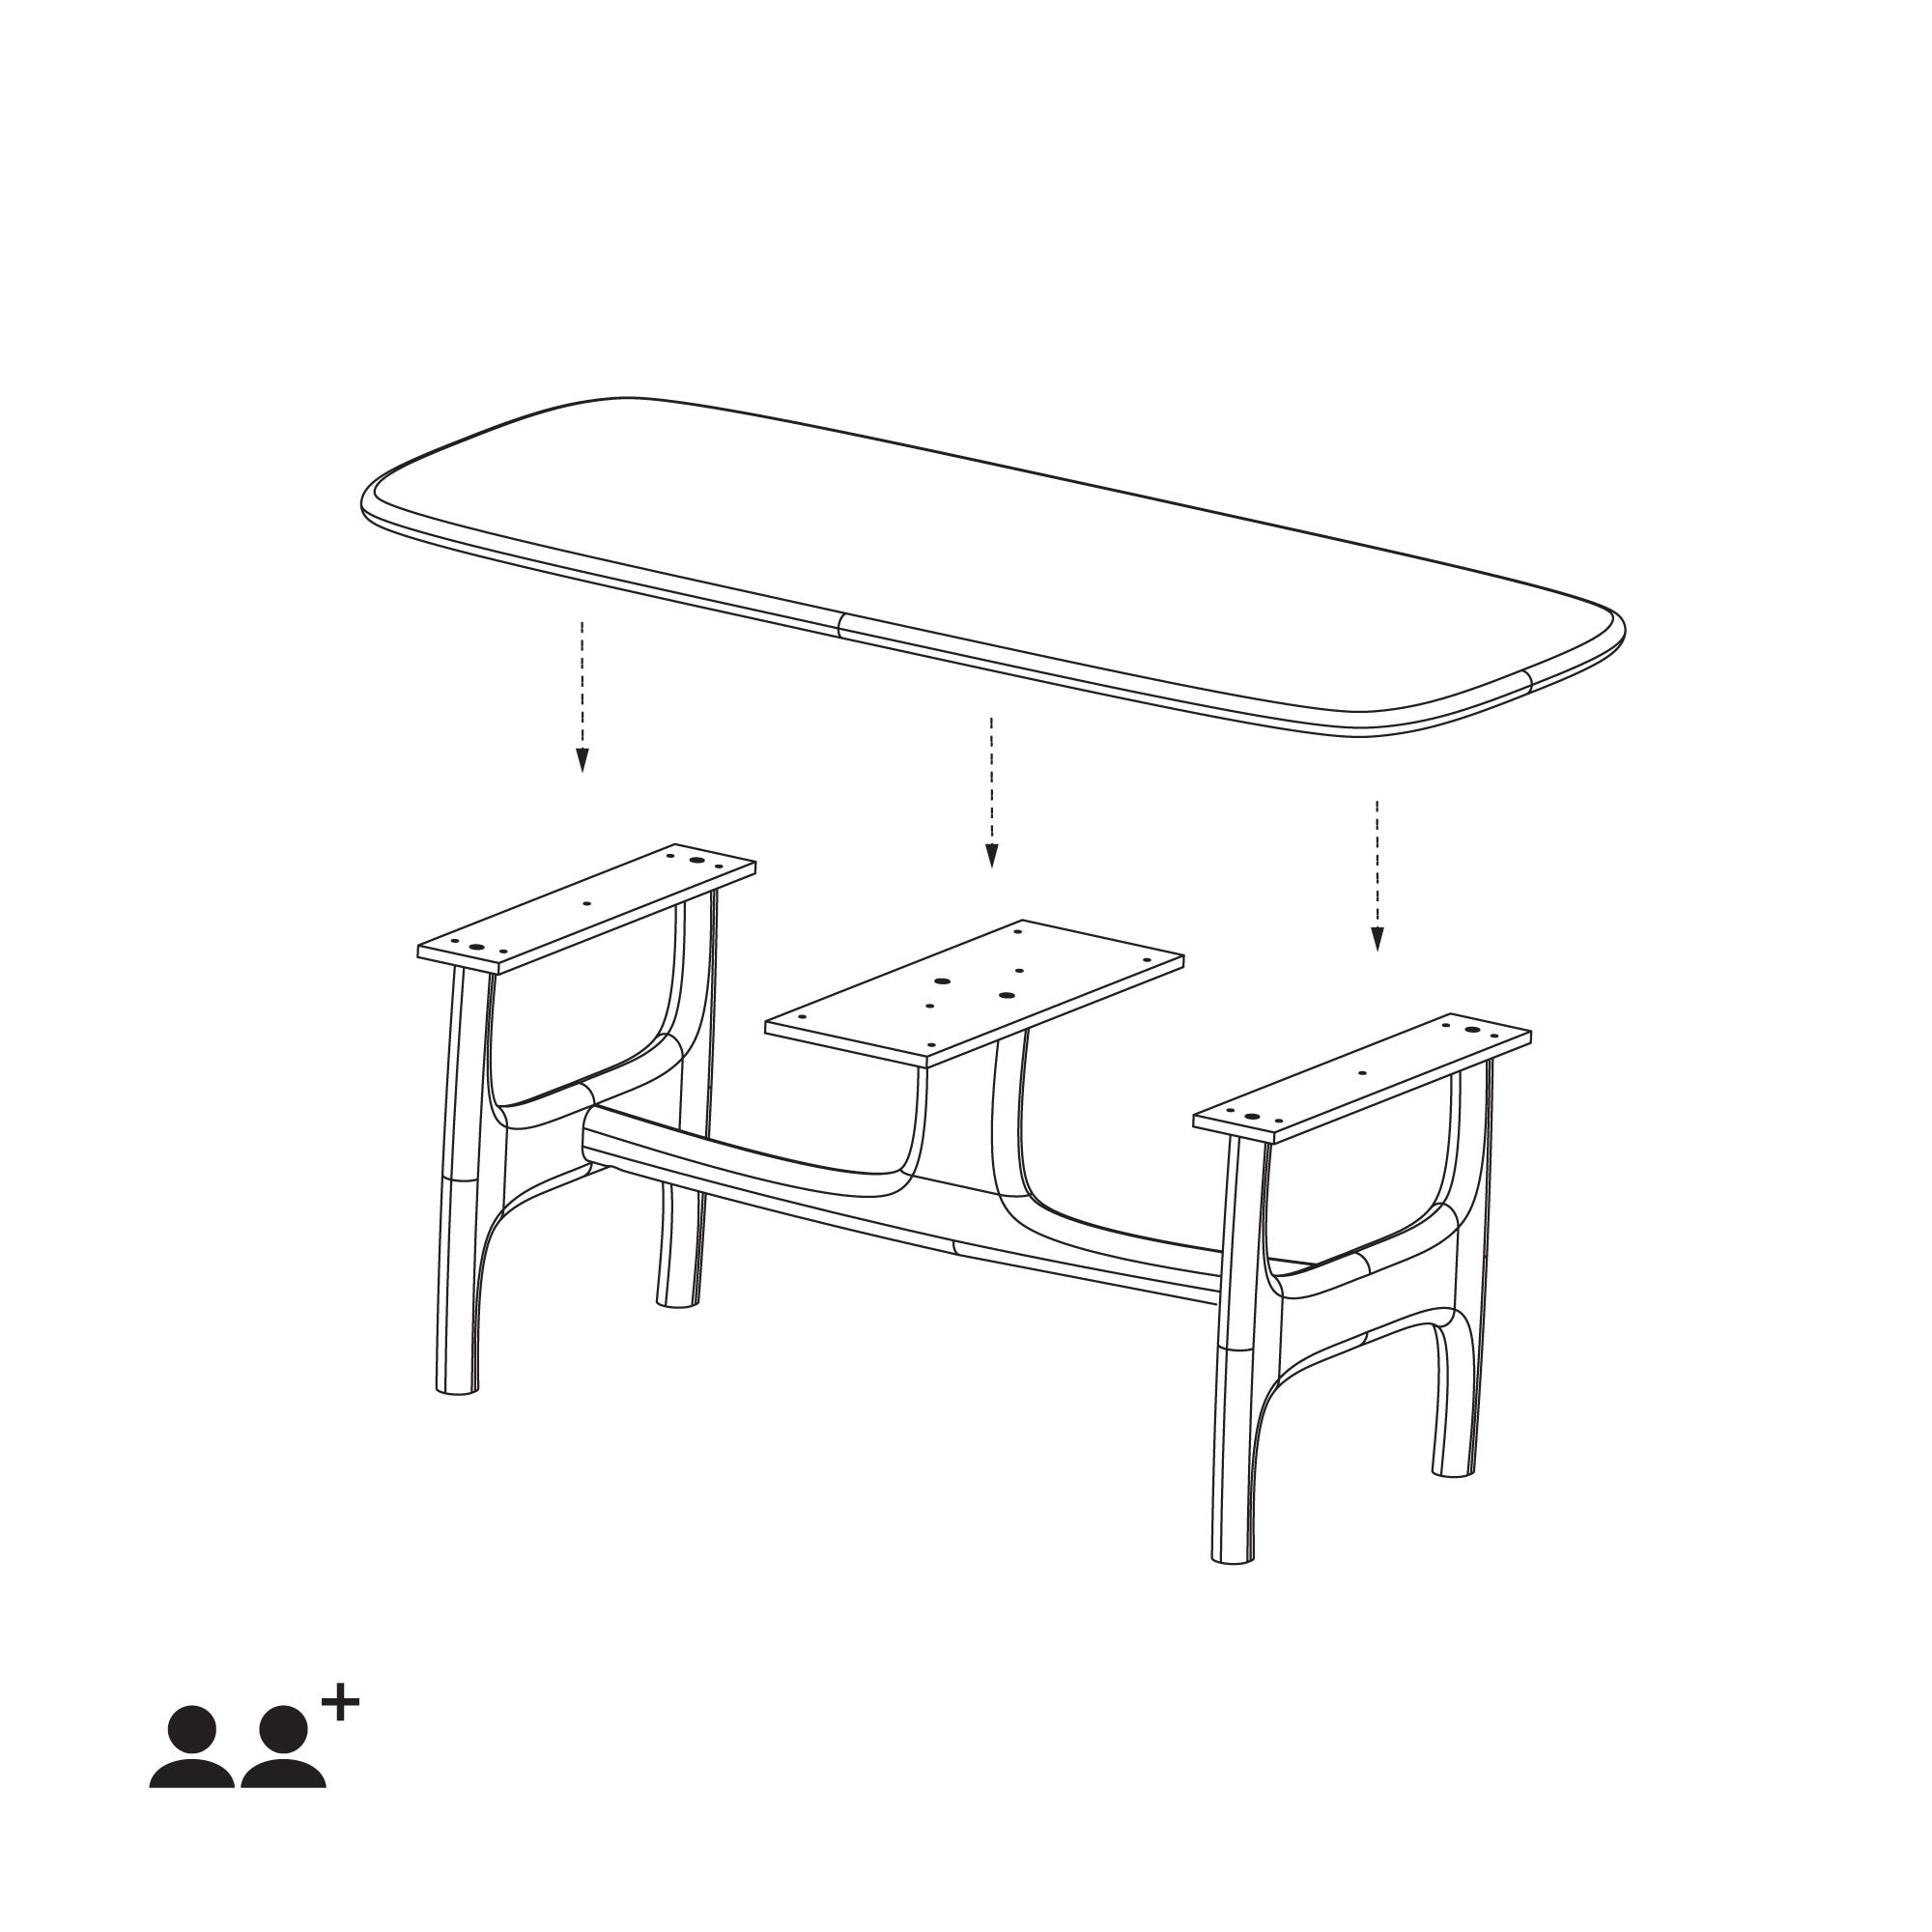
Ask someone to help you place the tabletop on the screwed supports. The
tabletop has a rectangular recess in which mounting plates should be
hidden.
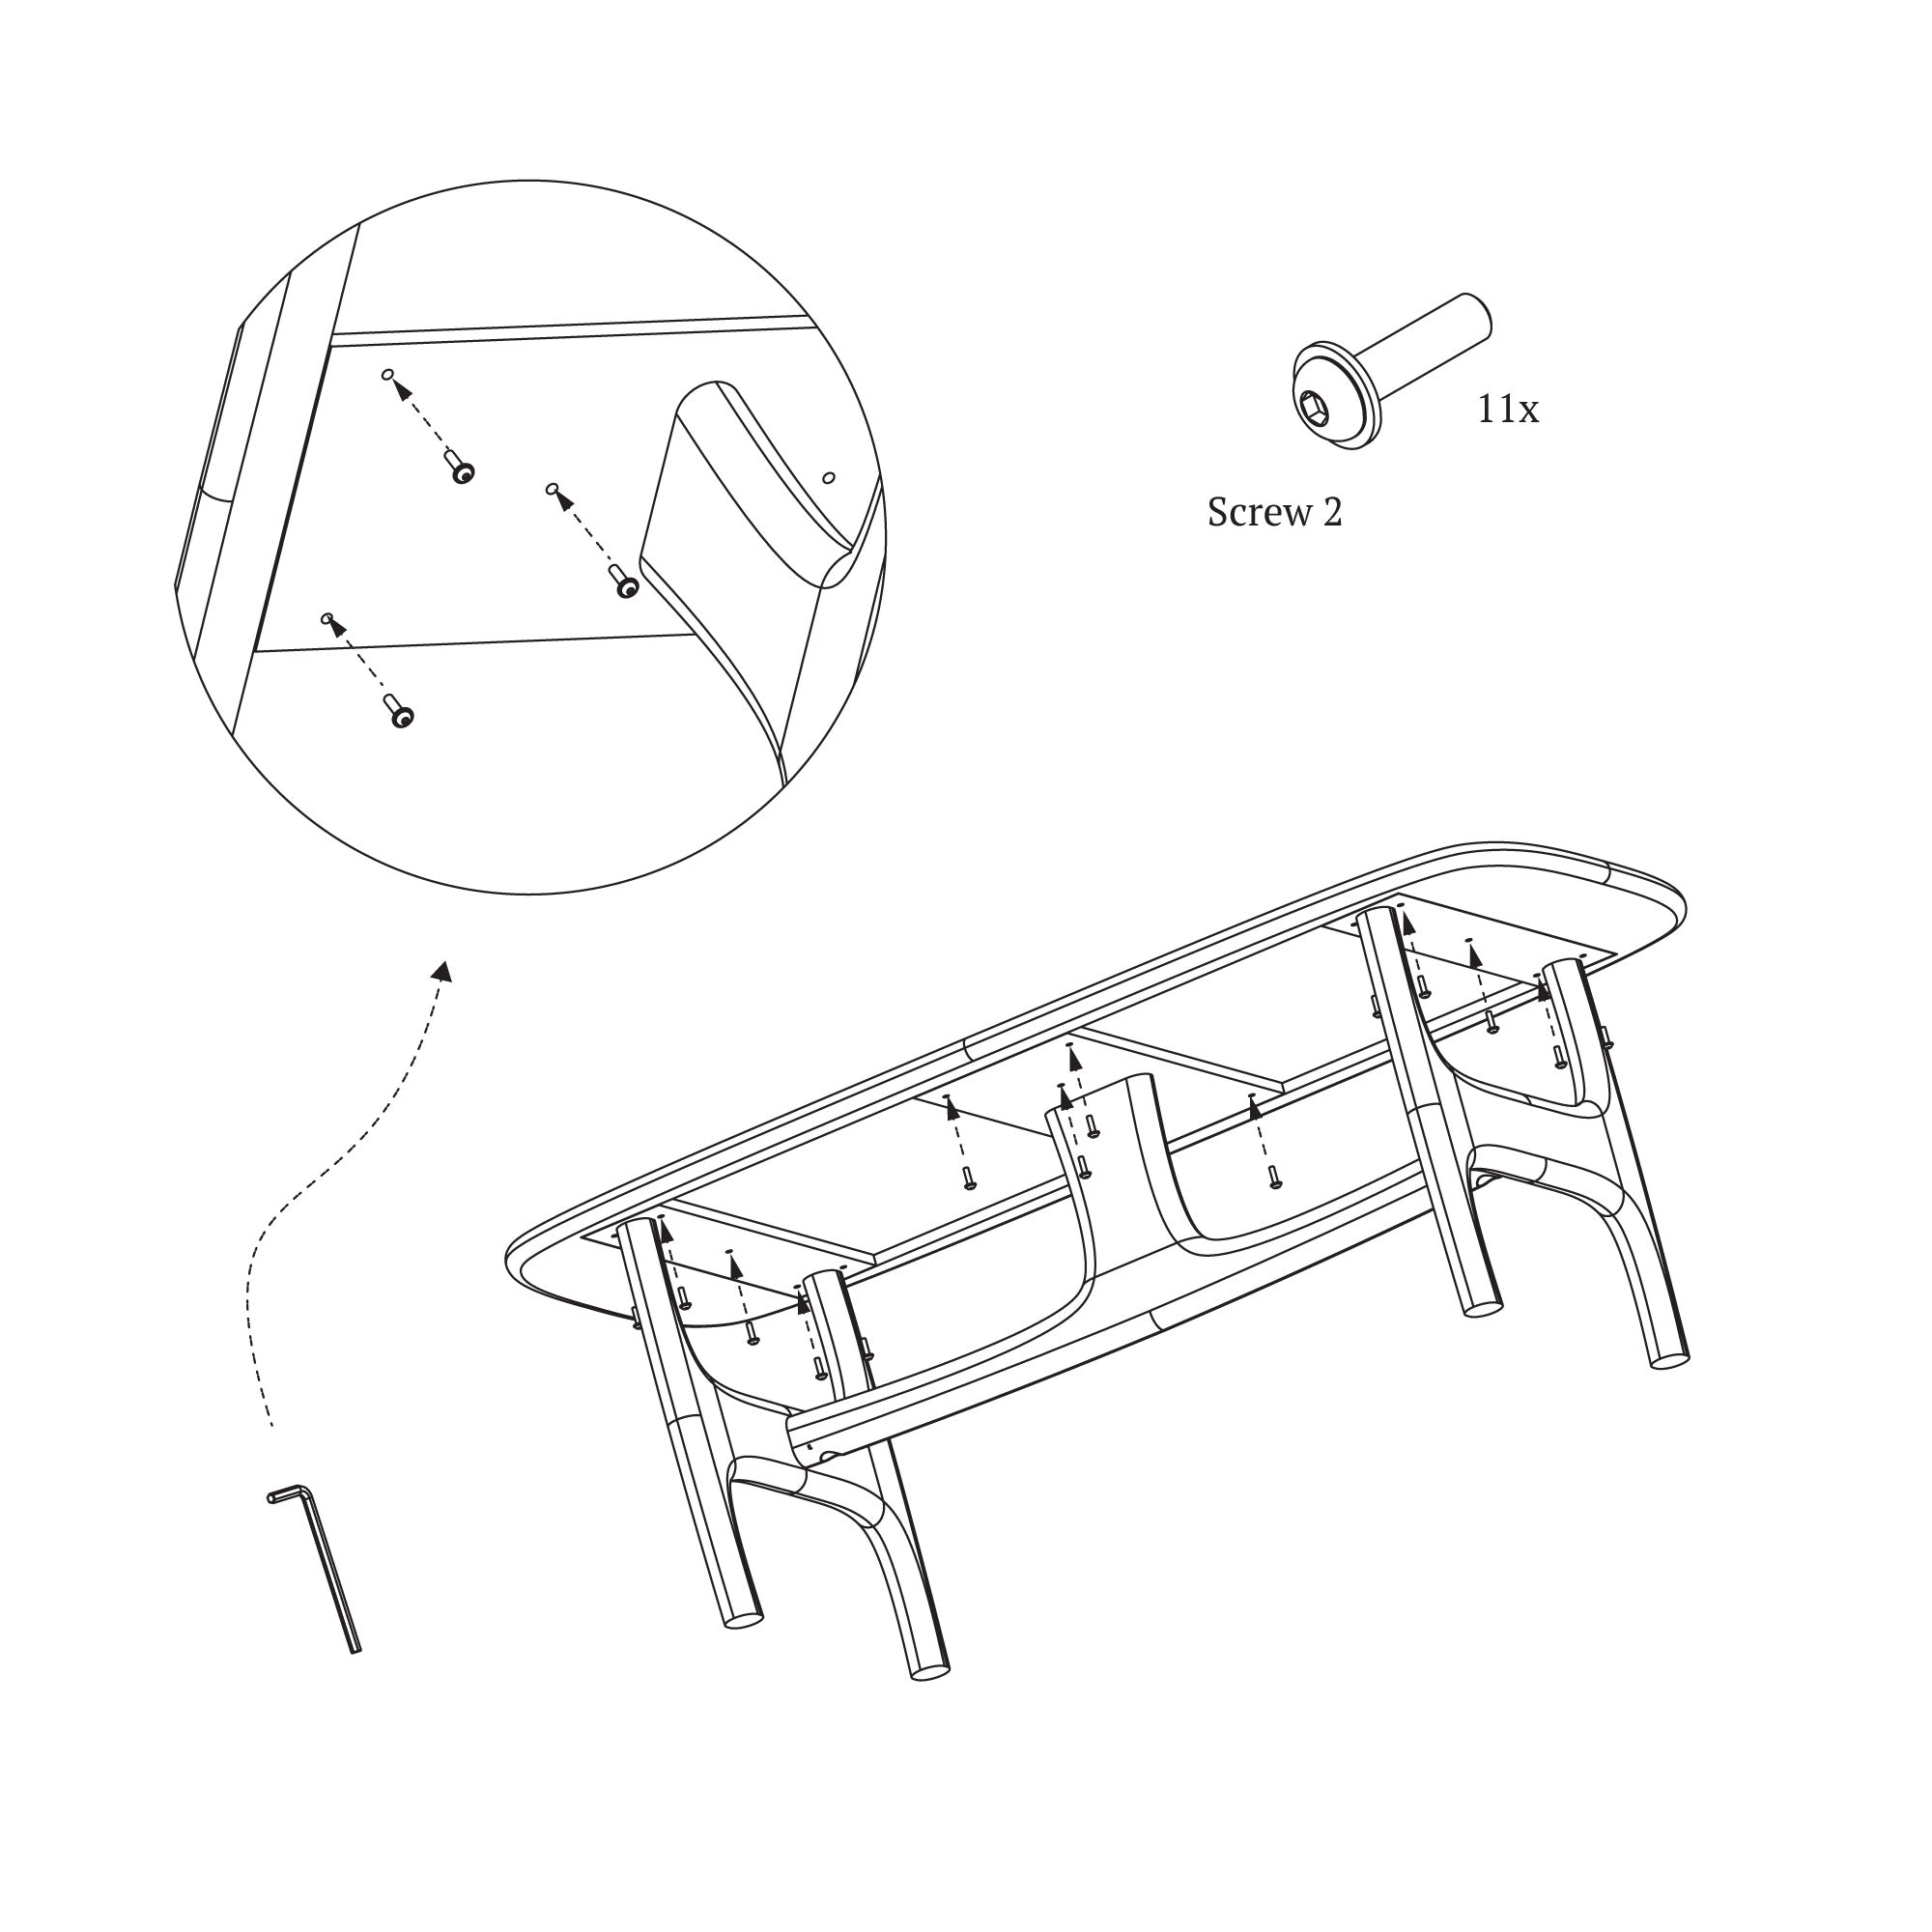
Using the remaining screws in the kit, screw the top to the structure.
It is best to screw the screws diagonally. First one on the left, then
the one furthest to the right, and so on. This should make it easier for
you to fit the holes and easier to spin.
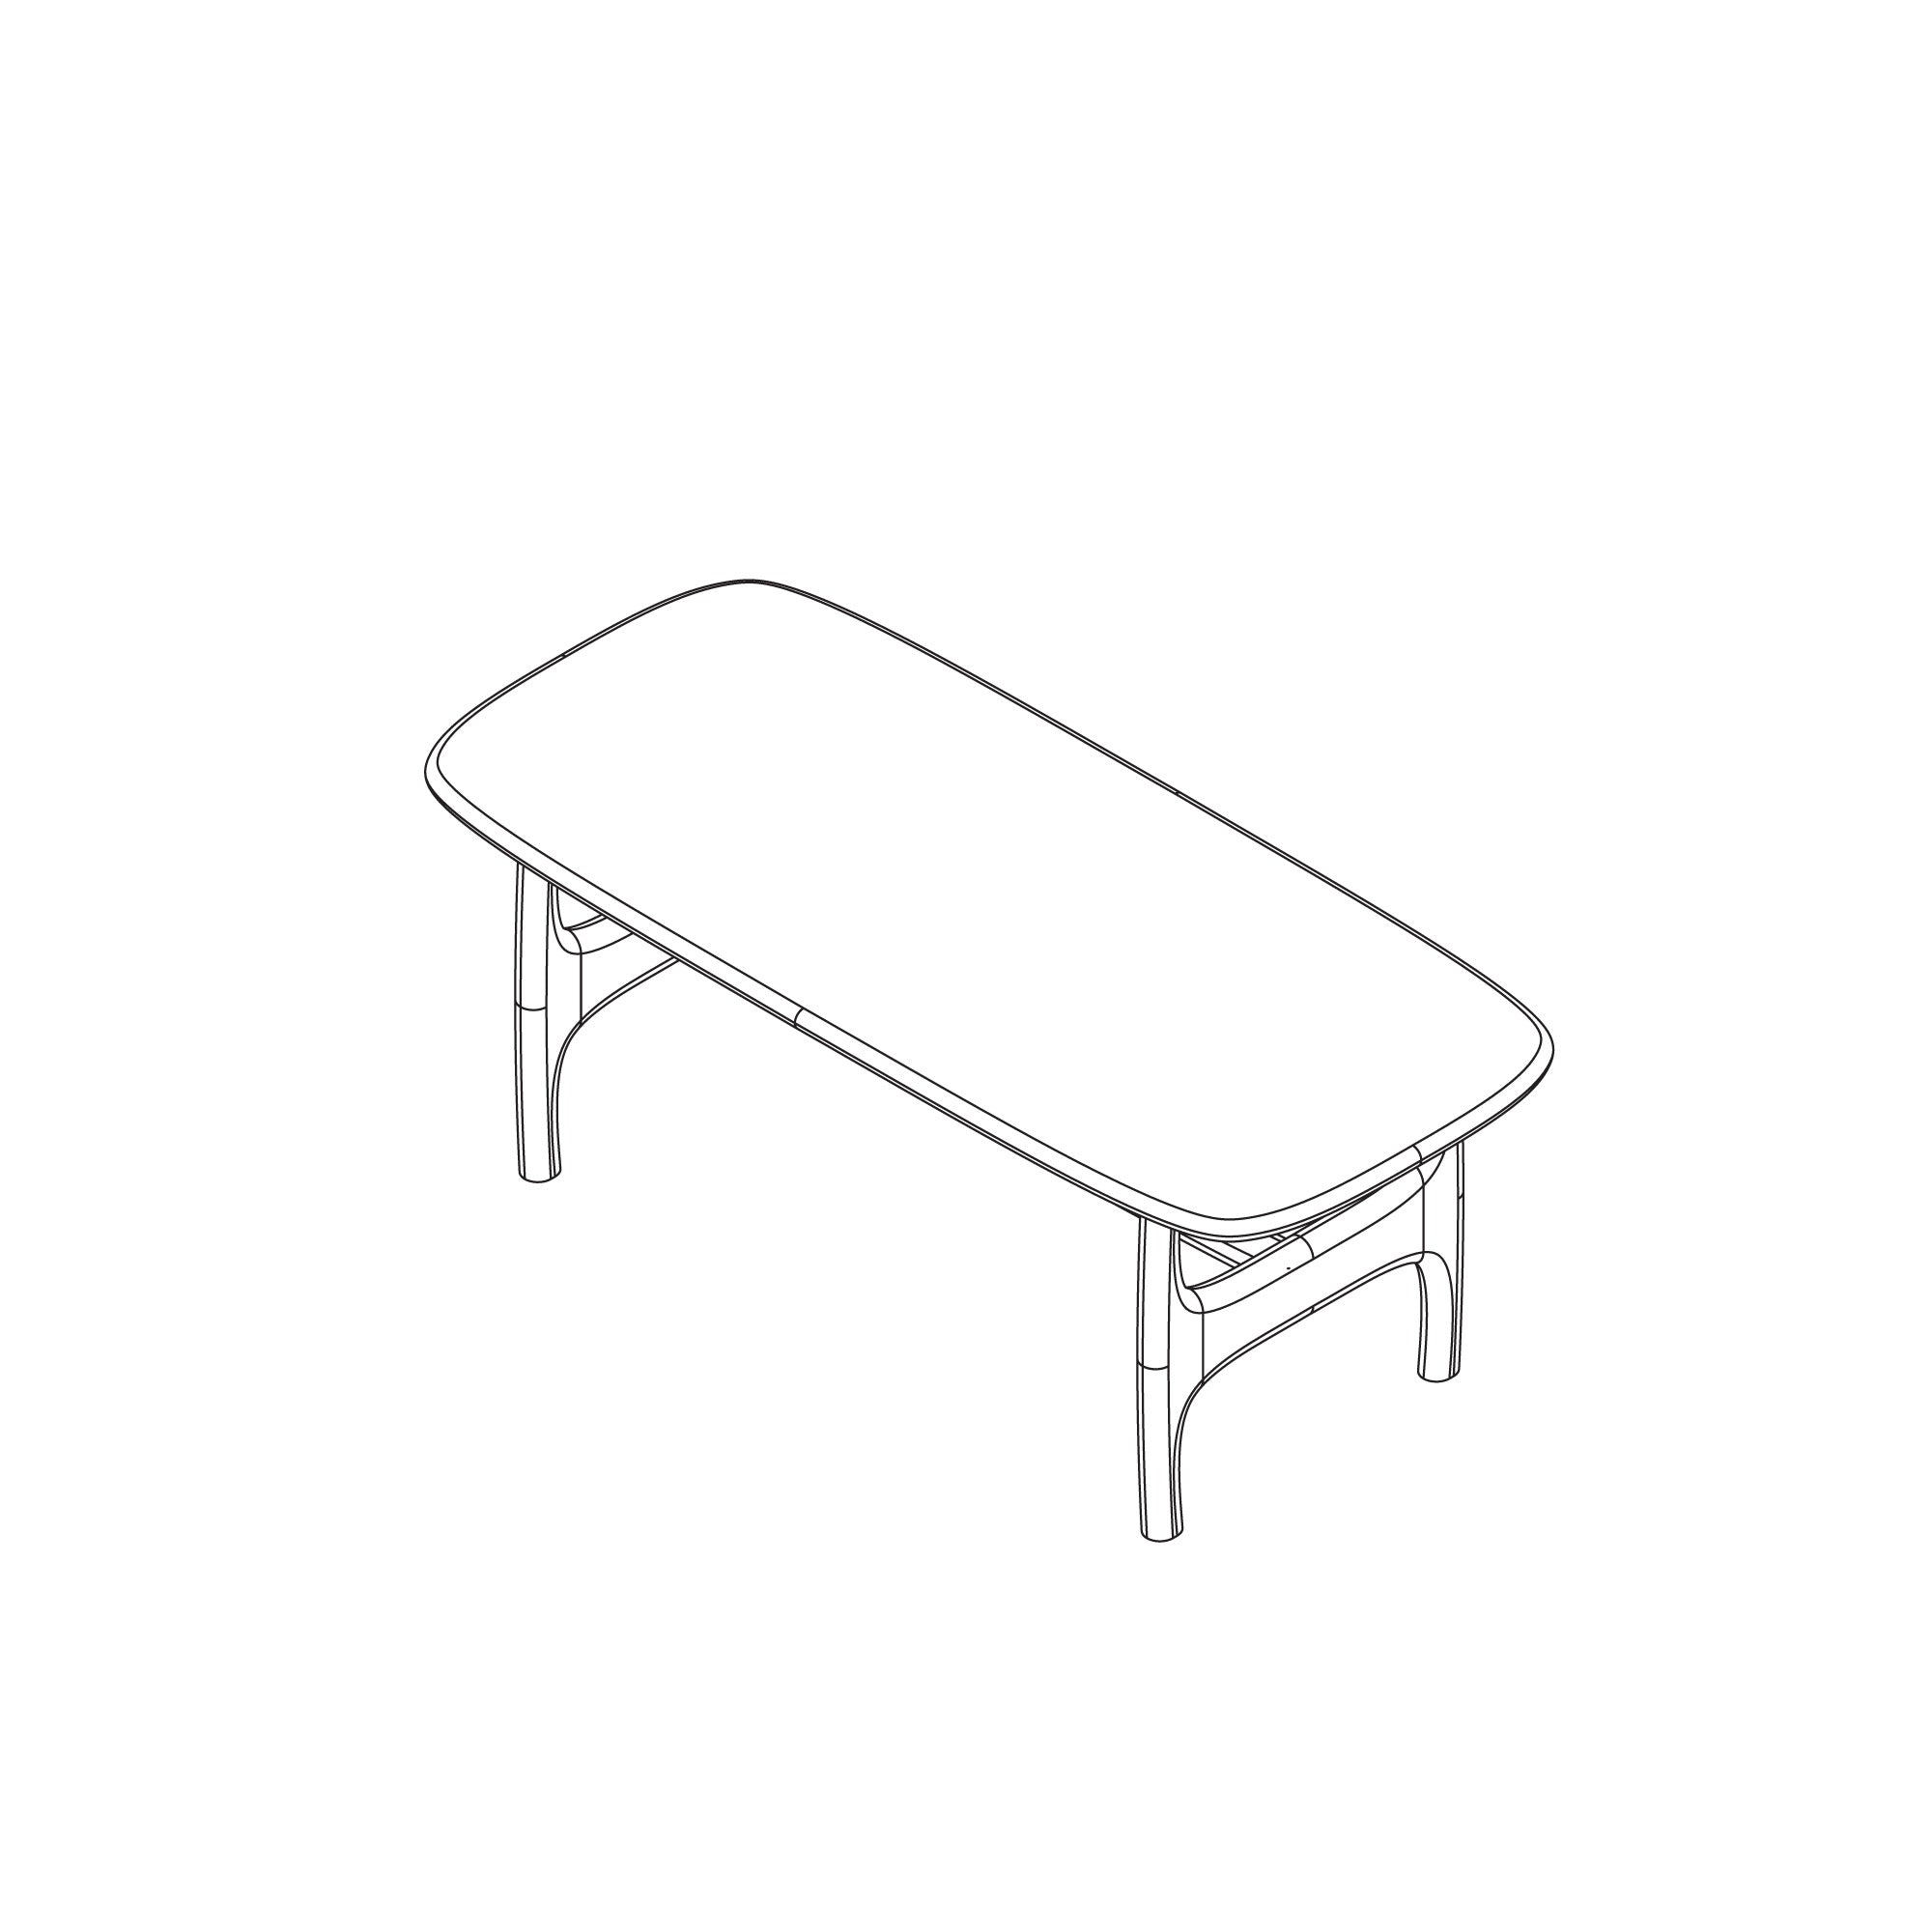
Congratulations! Your new OLFO table is ready for use. You can use additional felt pads to protect the floor from scratches.


