
manual
Crosset
Follow the instructions below. The Crosset shelf you are about to install requires a few simple steps you can easily handle. Ask someone to help you, as the assembly requires two people. It's always better together.
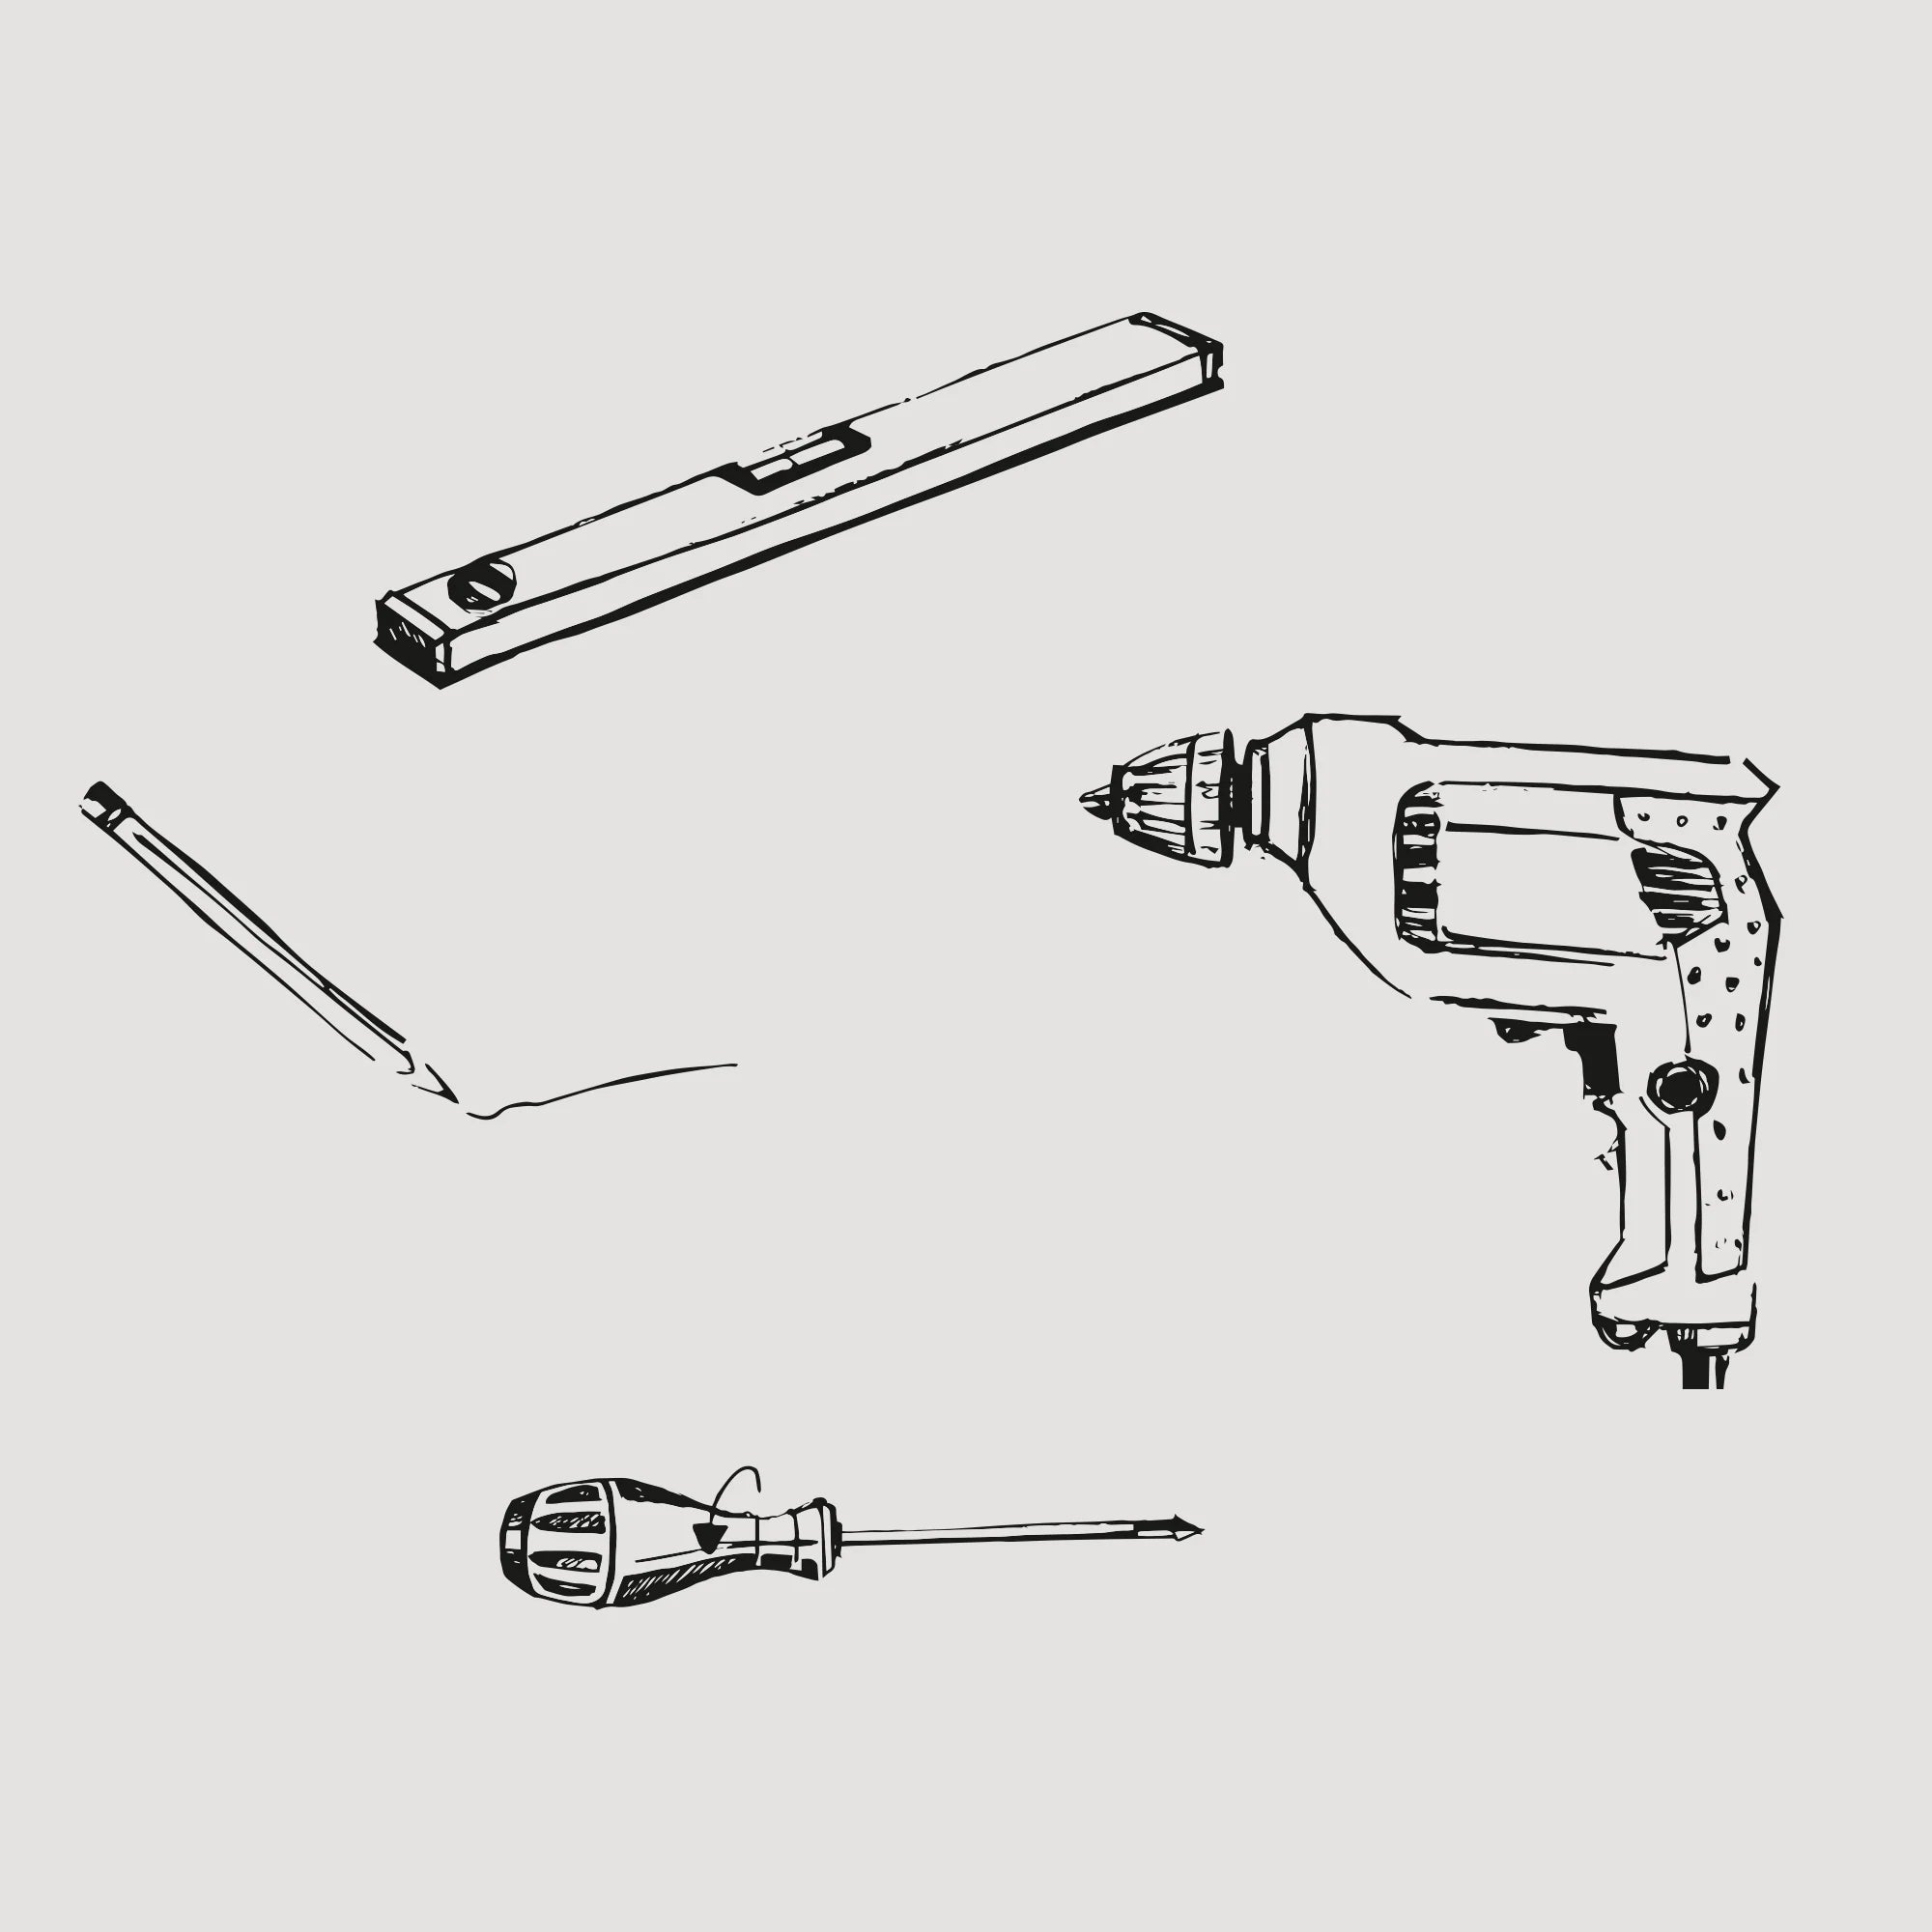
Prepare the tools for assembling the CROSSET shelf. To install the shelf efficiently, you will need: a spirit level (1), a drill with a 6 mm bit or a screwdriver with a drilling function (2), a screwdriver (3), and a pencil (4).
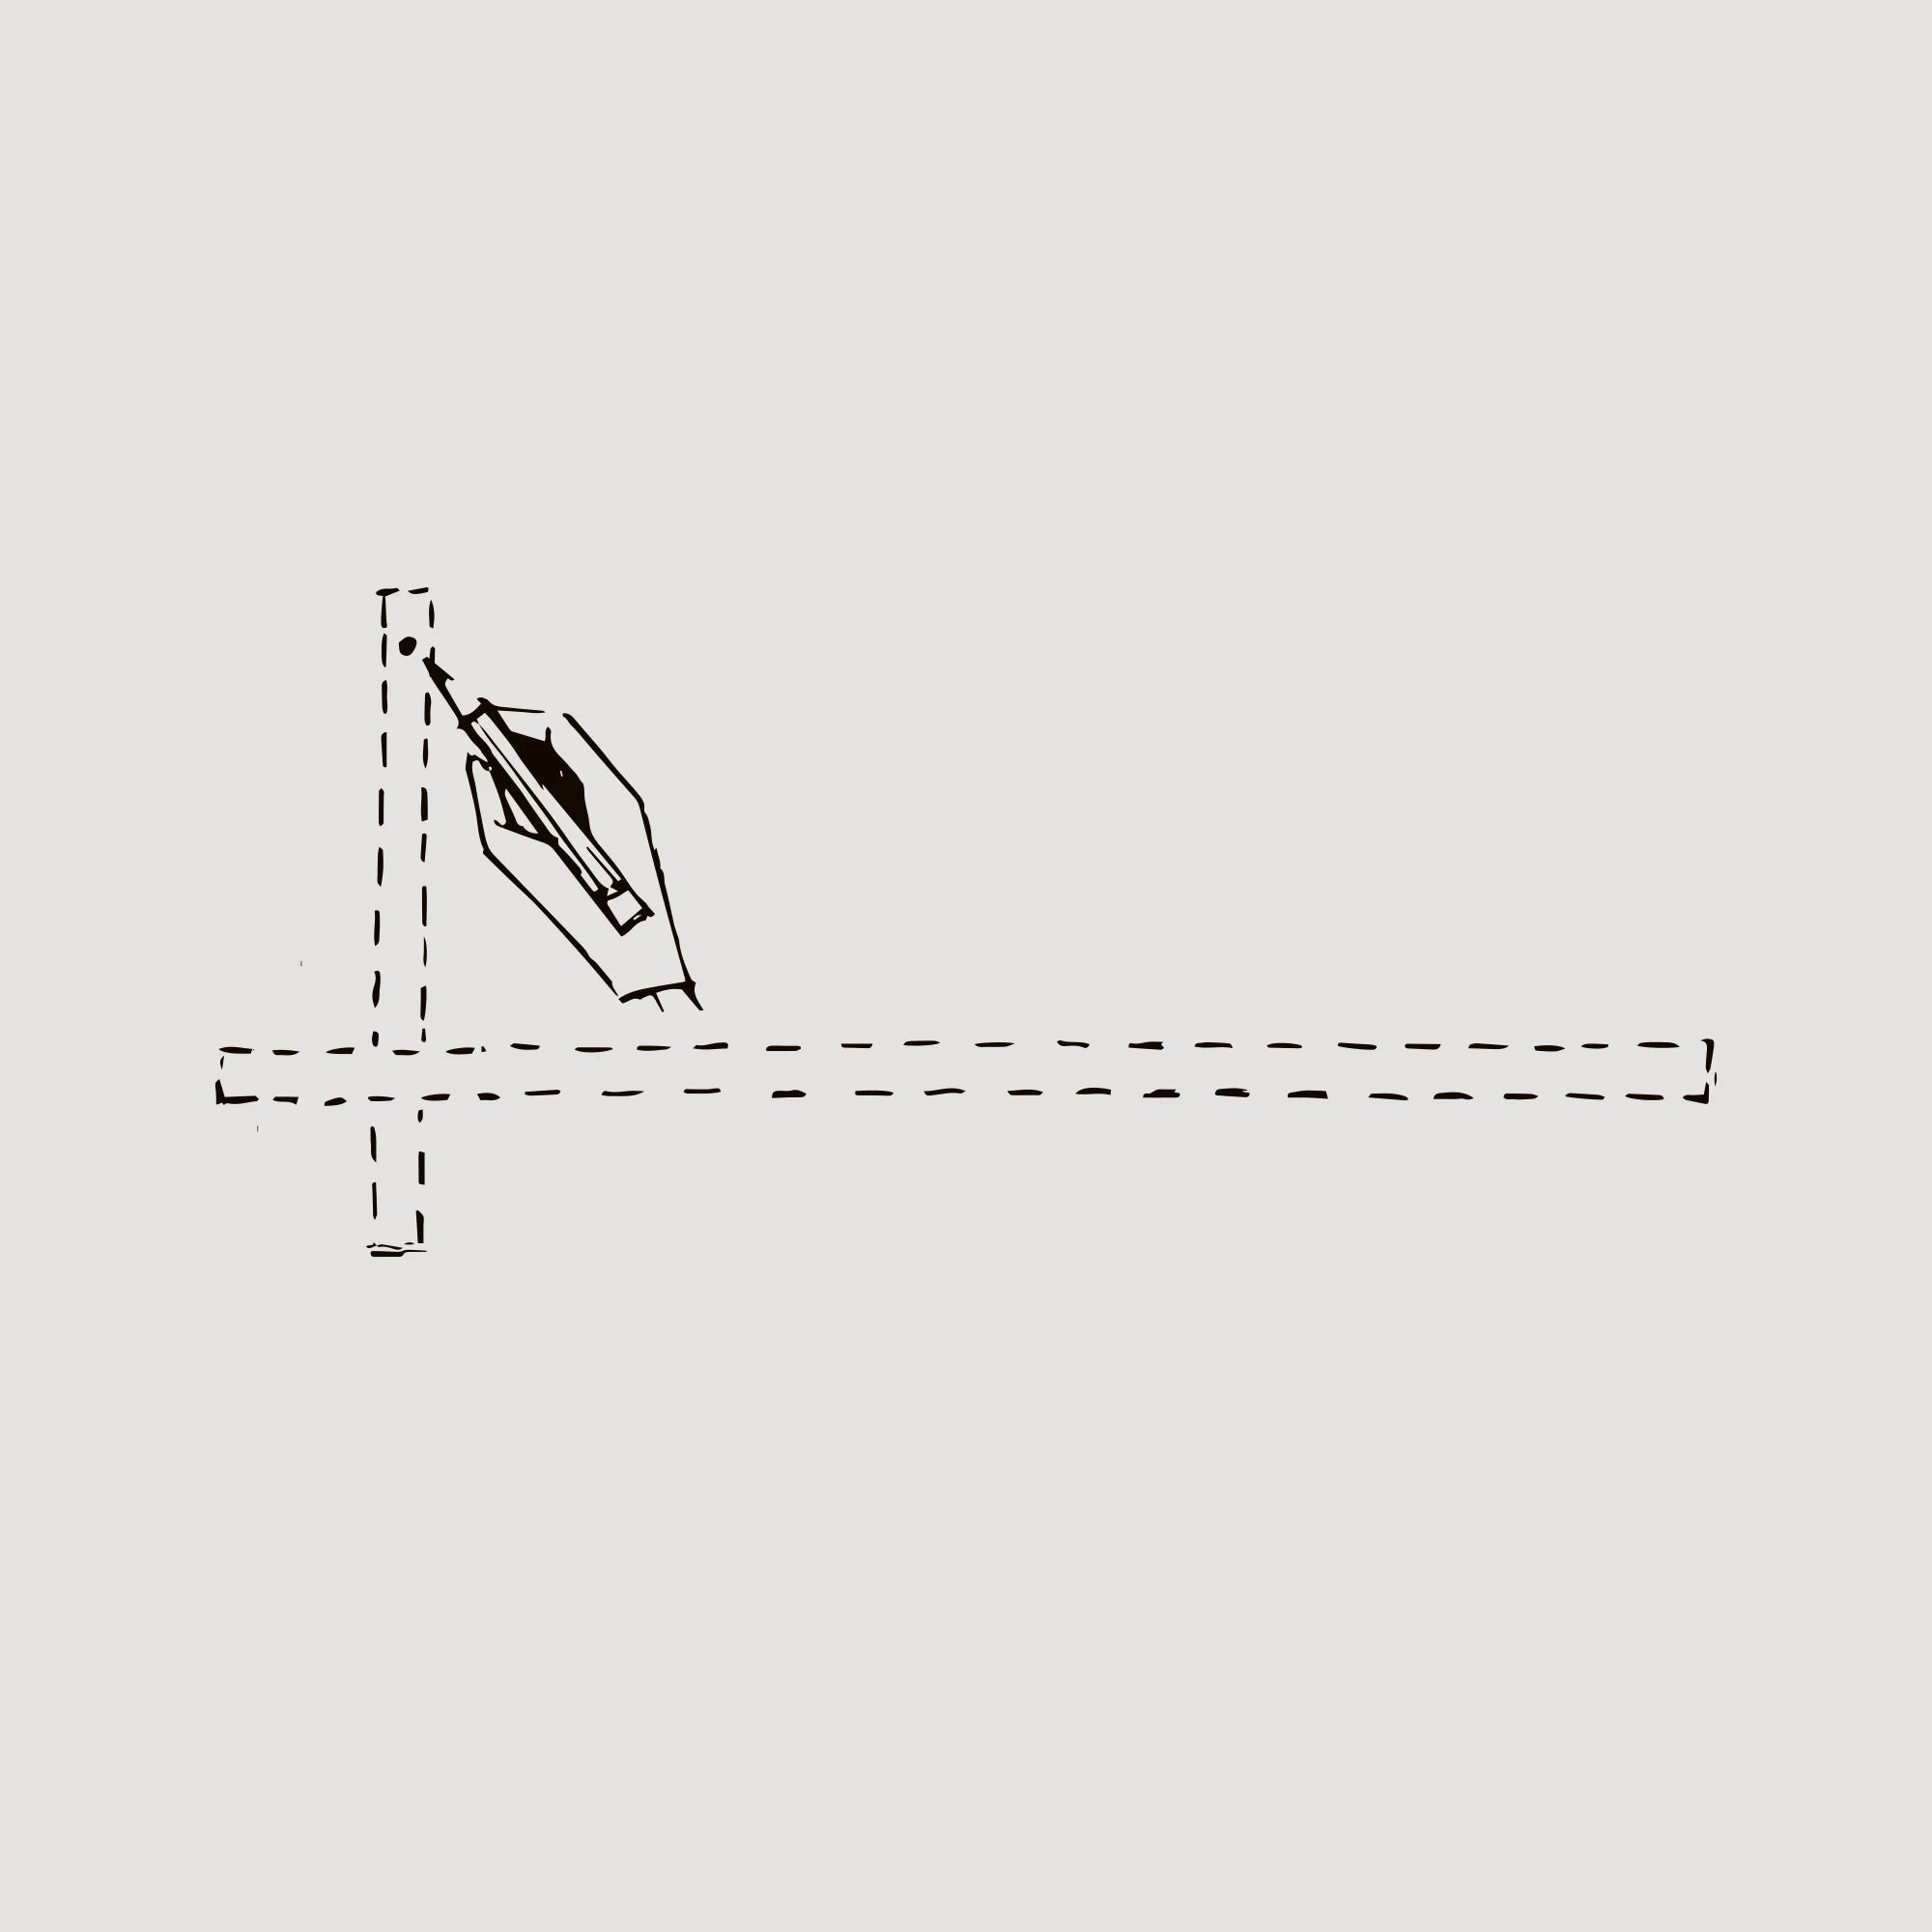
Choose a place to install the shelf. Check if the wall is even. Mark the spot for mounting the vertical, shorter element on the wall with a pencil.
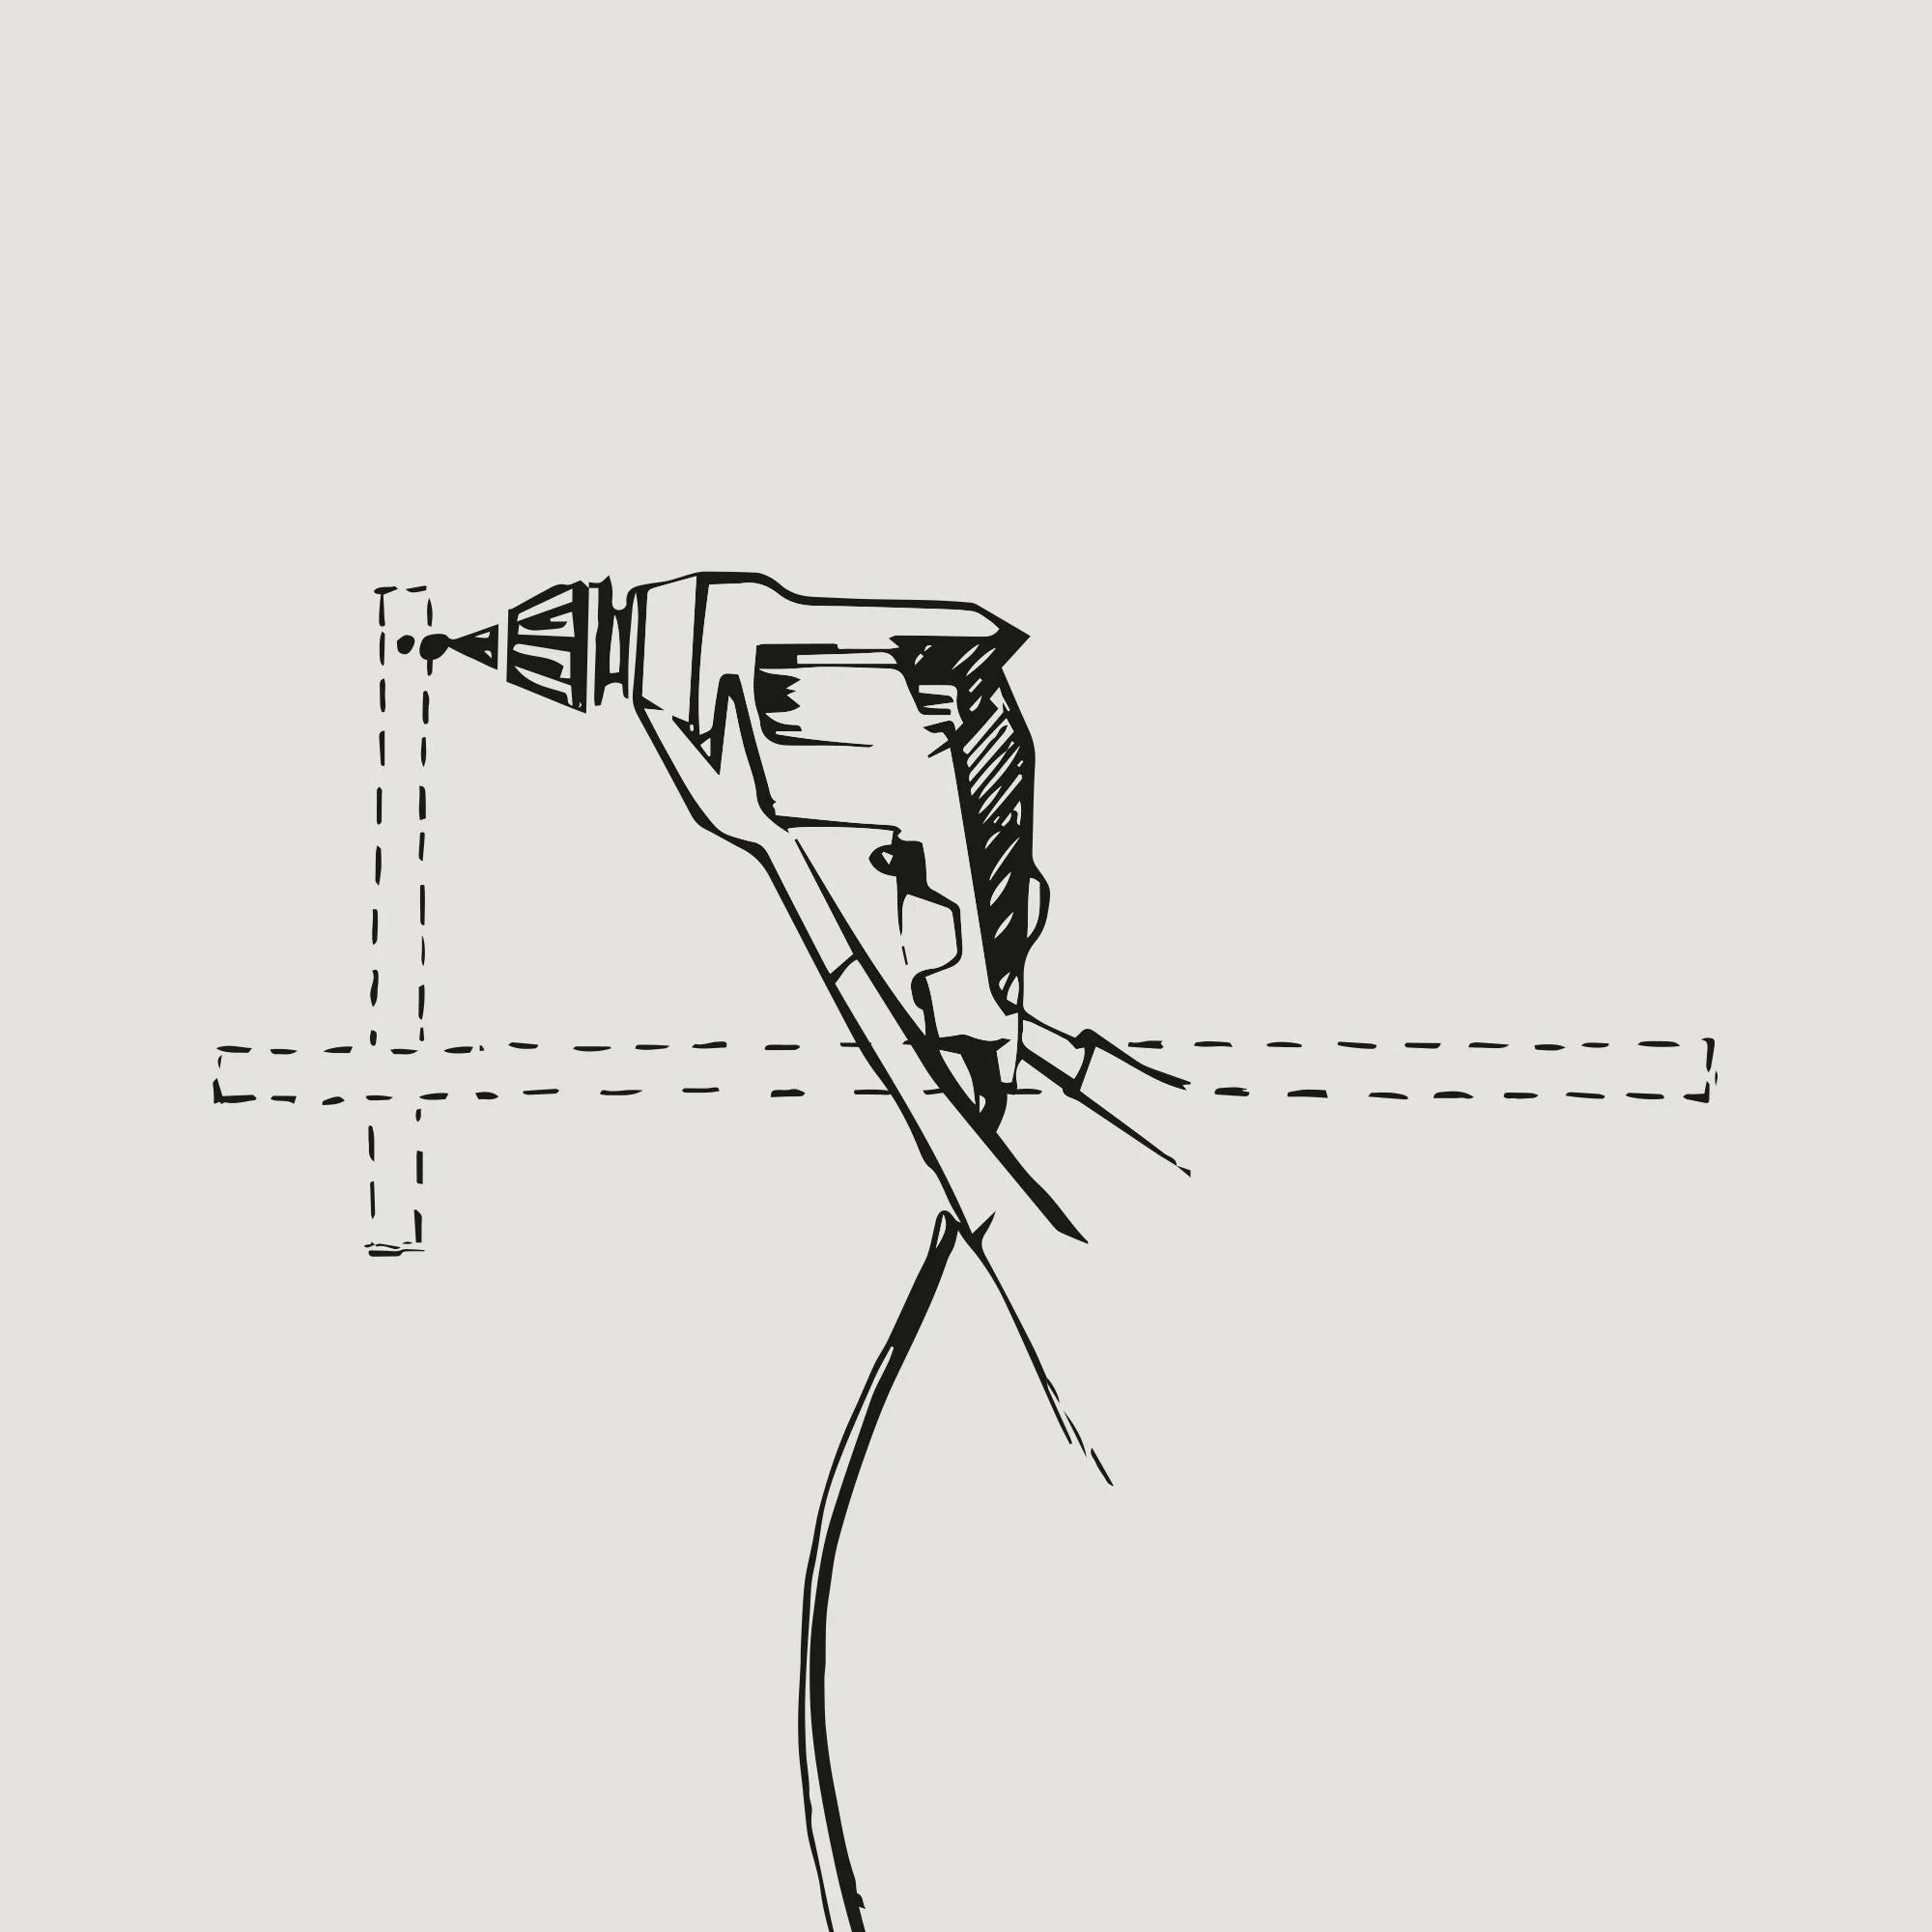
Next, use the drill to mark the spots for the first wall plug. Start with the vertical element.
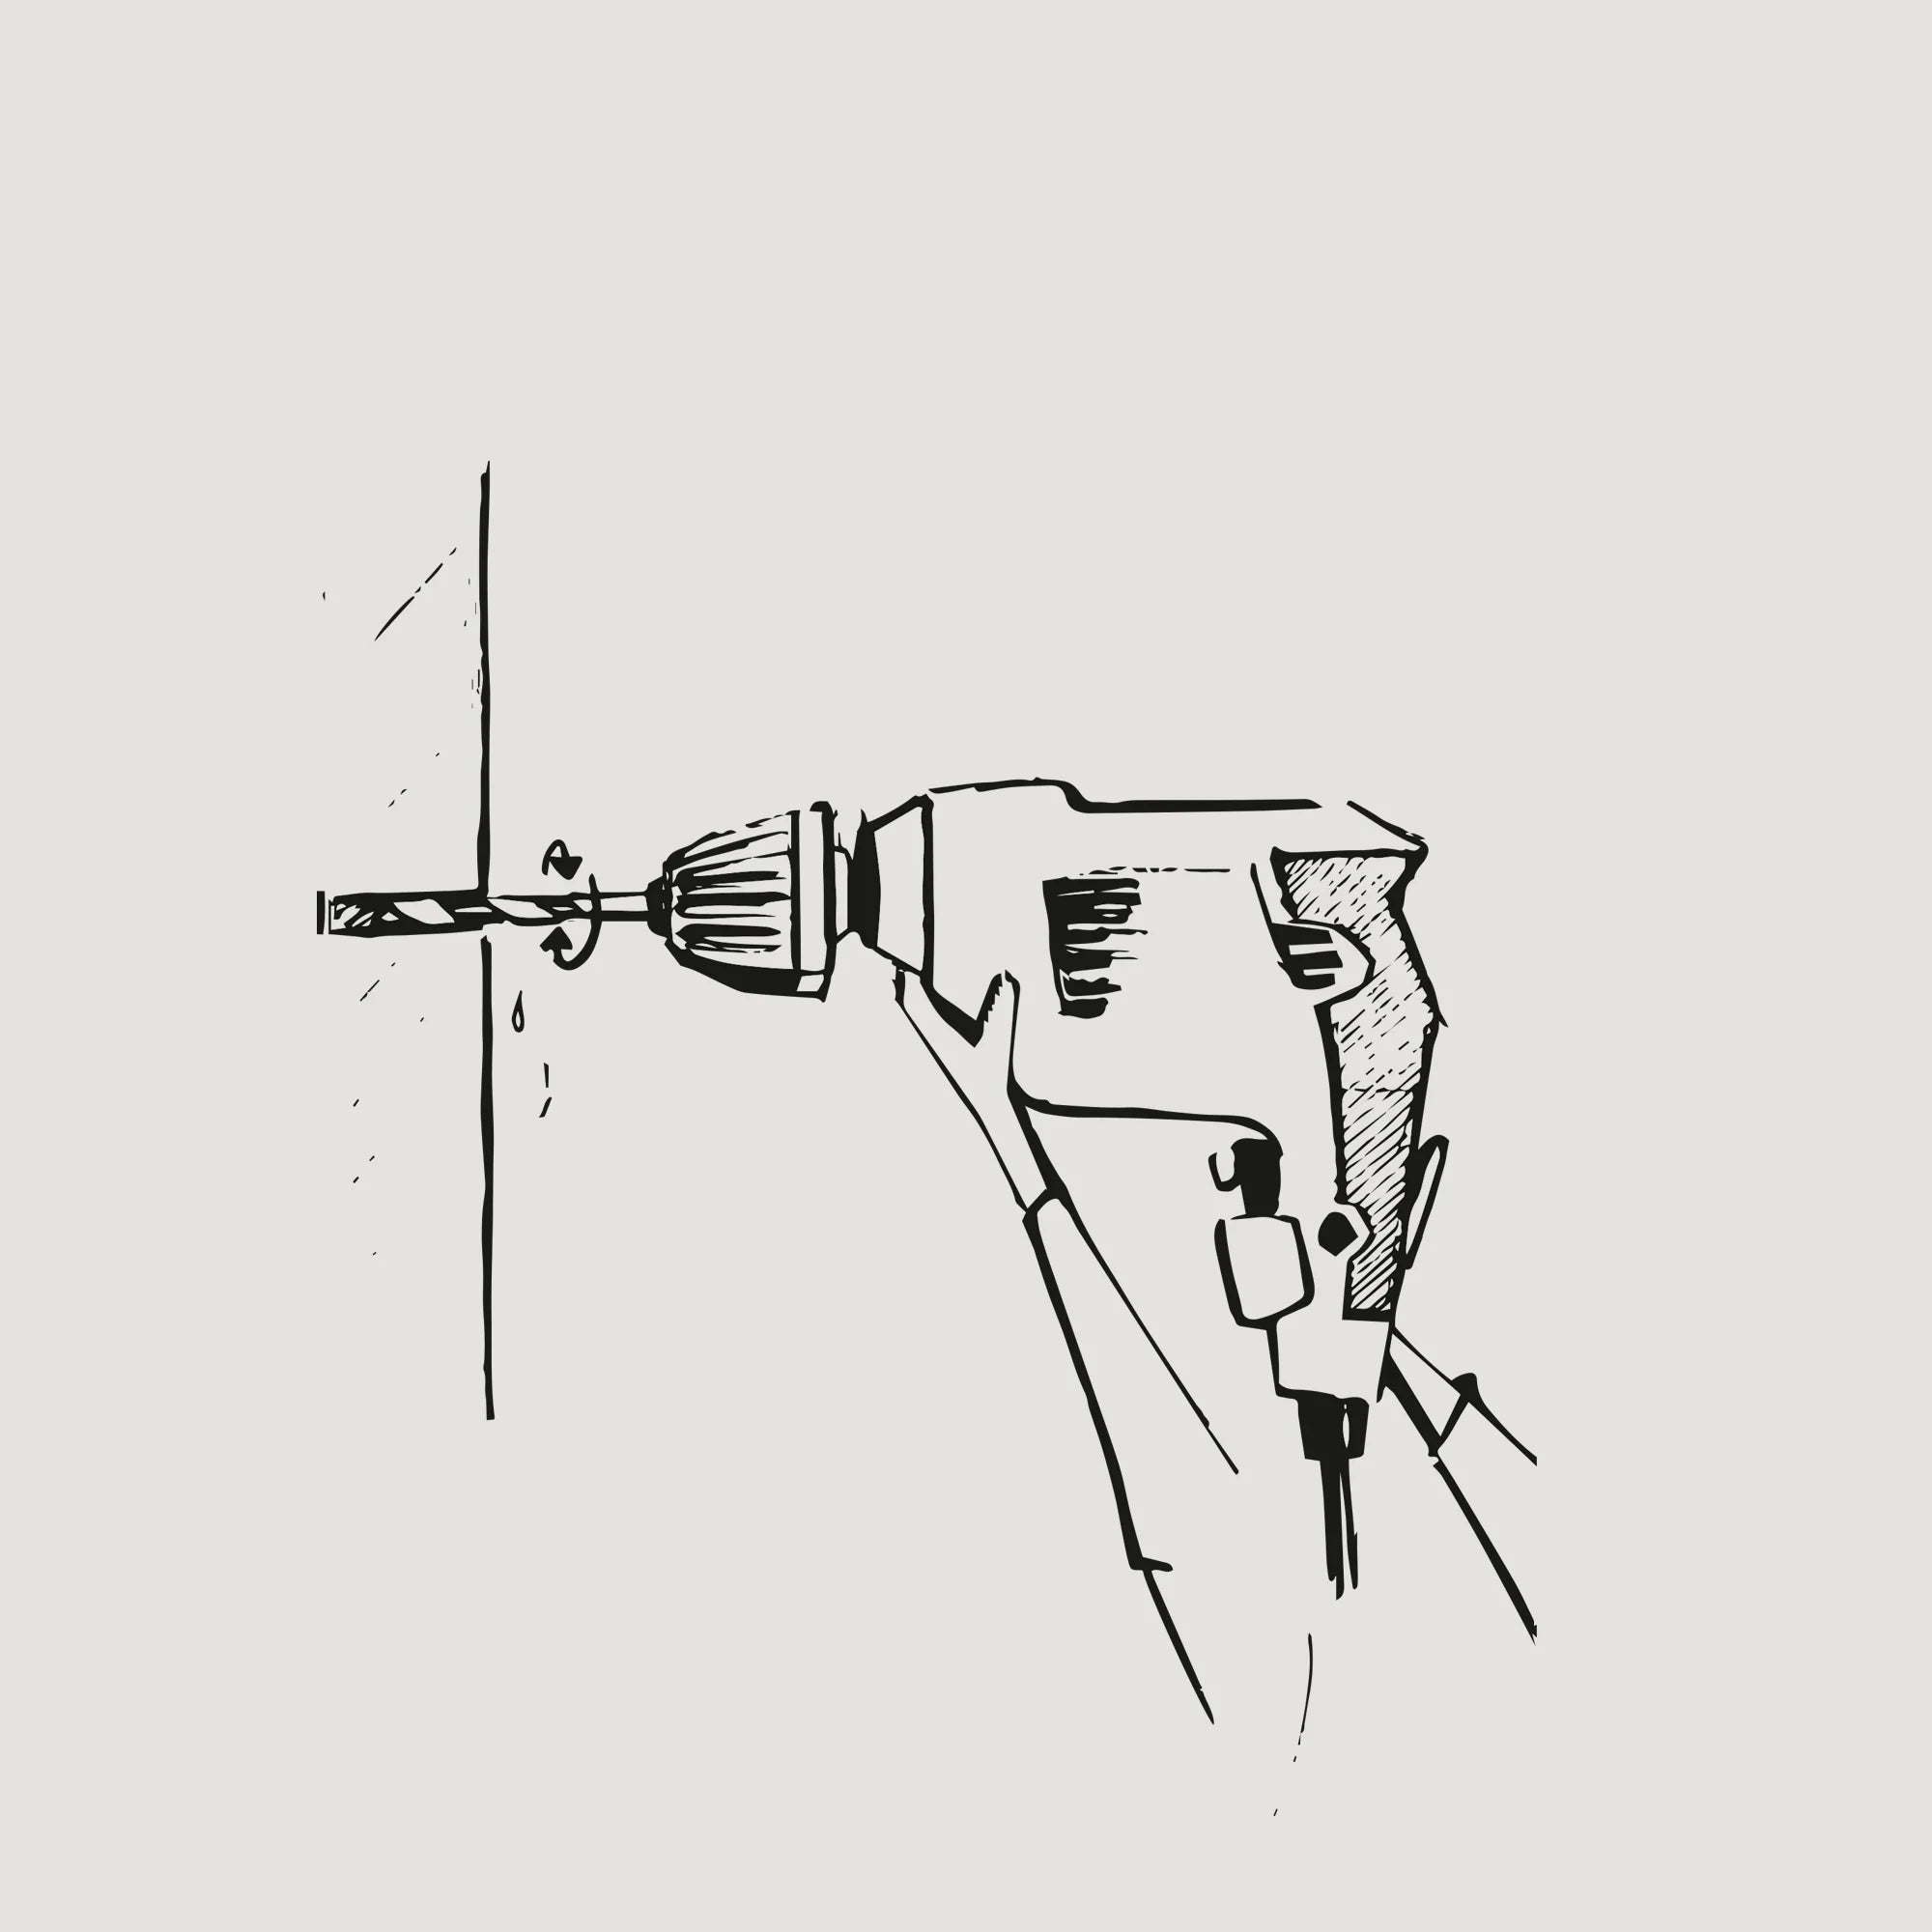
Drill a hole in the wall to the full depth of the wall plug (make sure to drill perpendicular to the wall using a 6 mm bit matching the plug diameter).

After drilling the top hole, insert the wall plug. Set it so that its collar is flush with the wall.
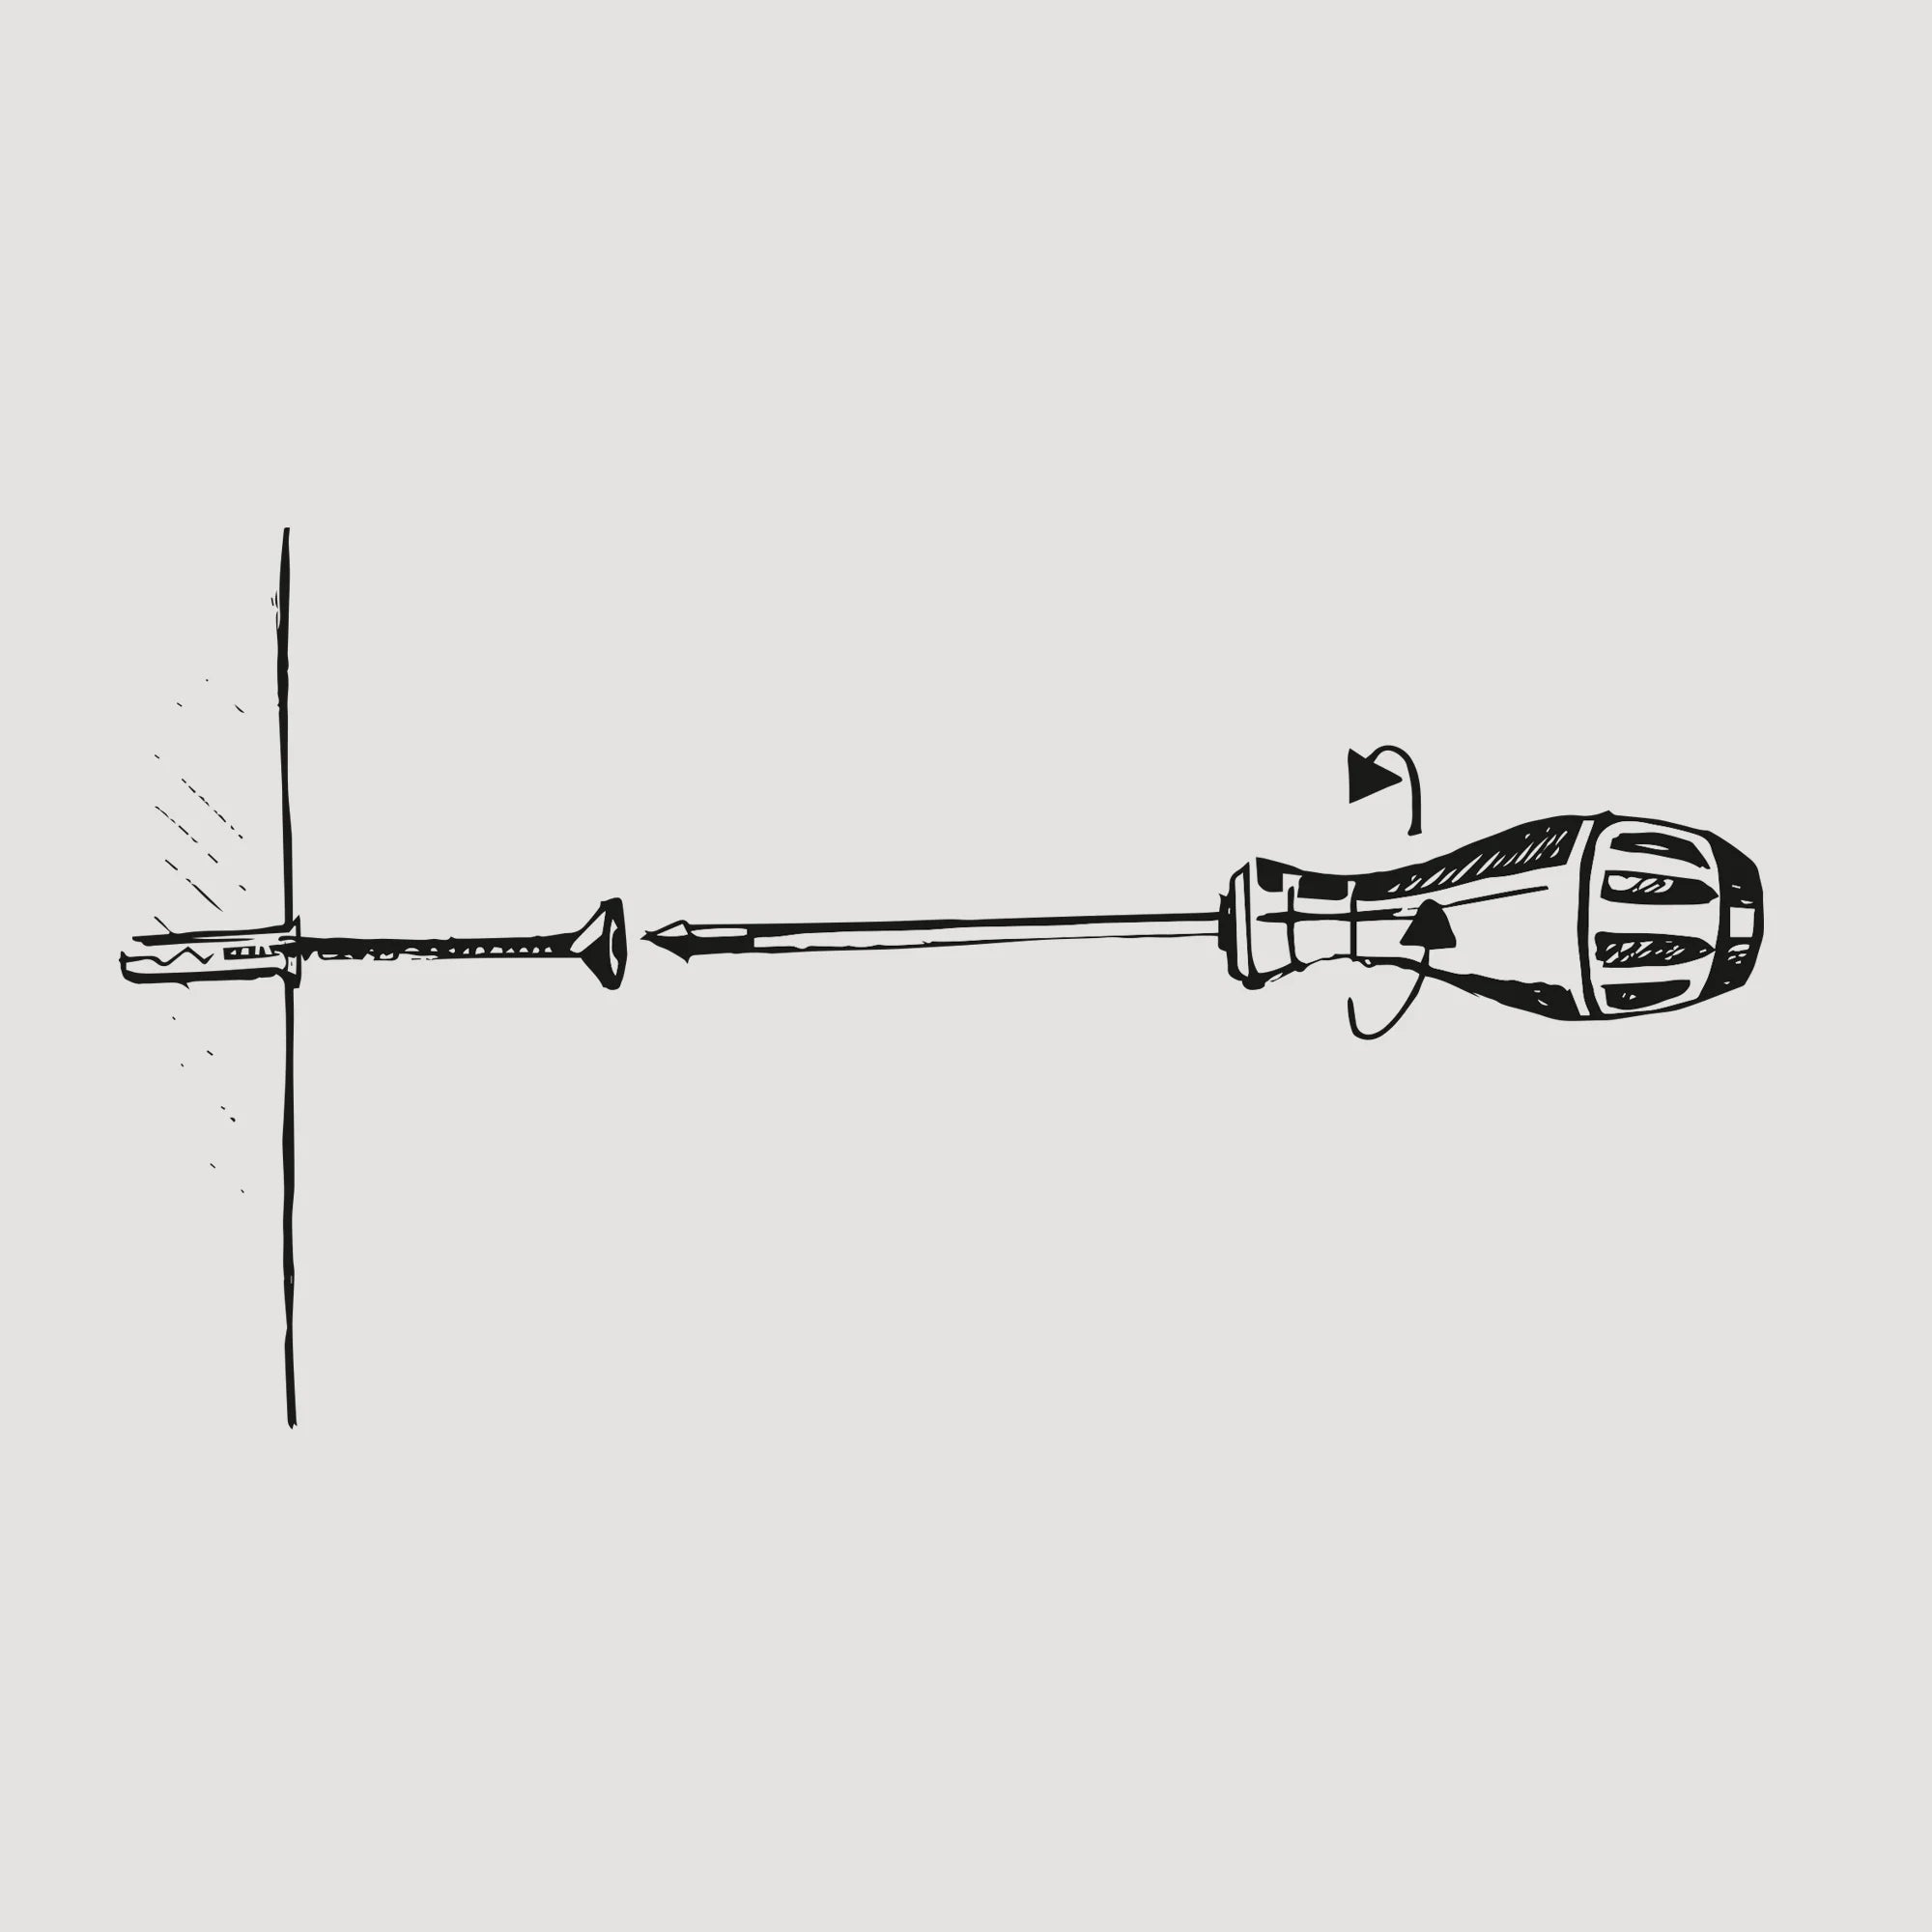
Screw the screw into the wall plug using a screwdriver or a power driver, leaving it slightly protruding. The plug in the wall should be firmly fixed after the screw is inserted.
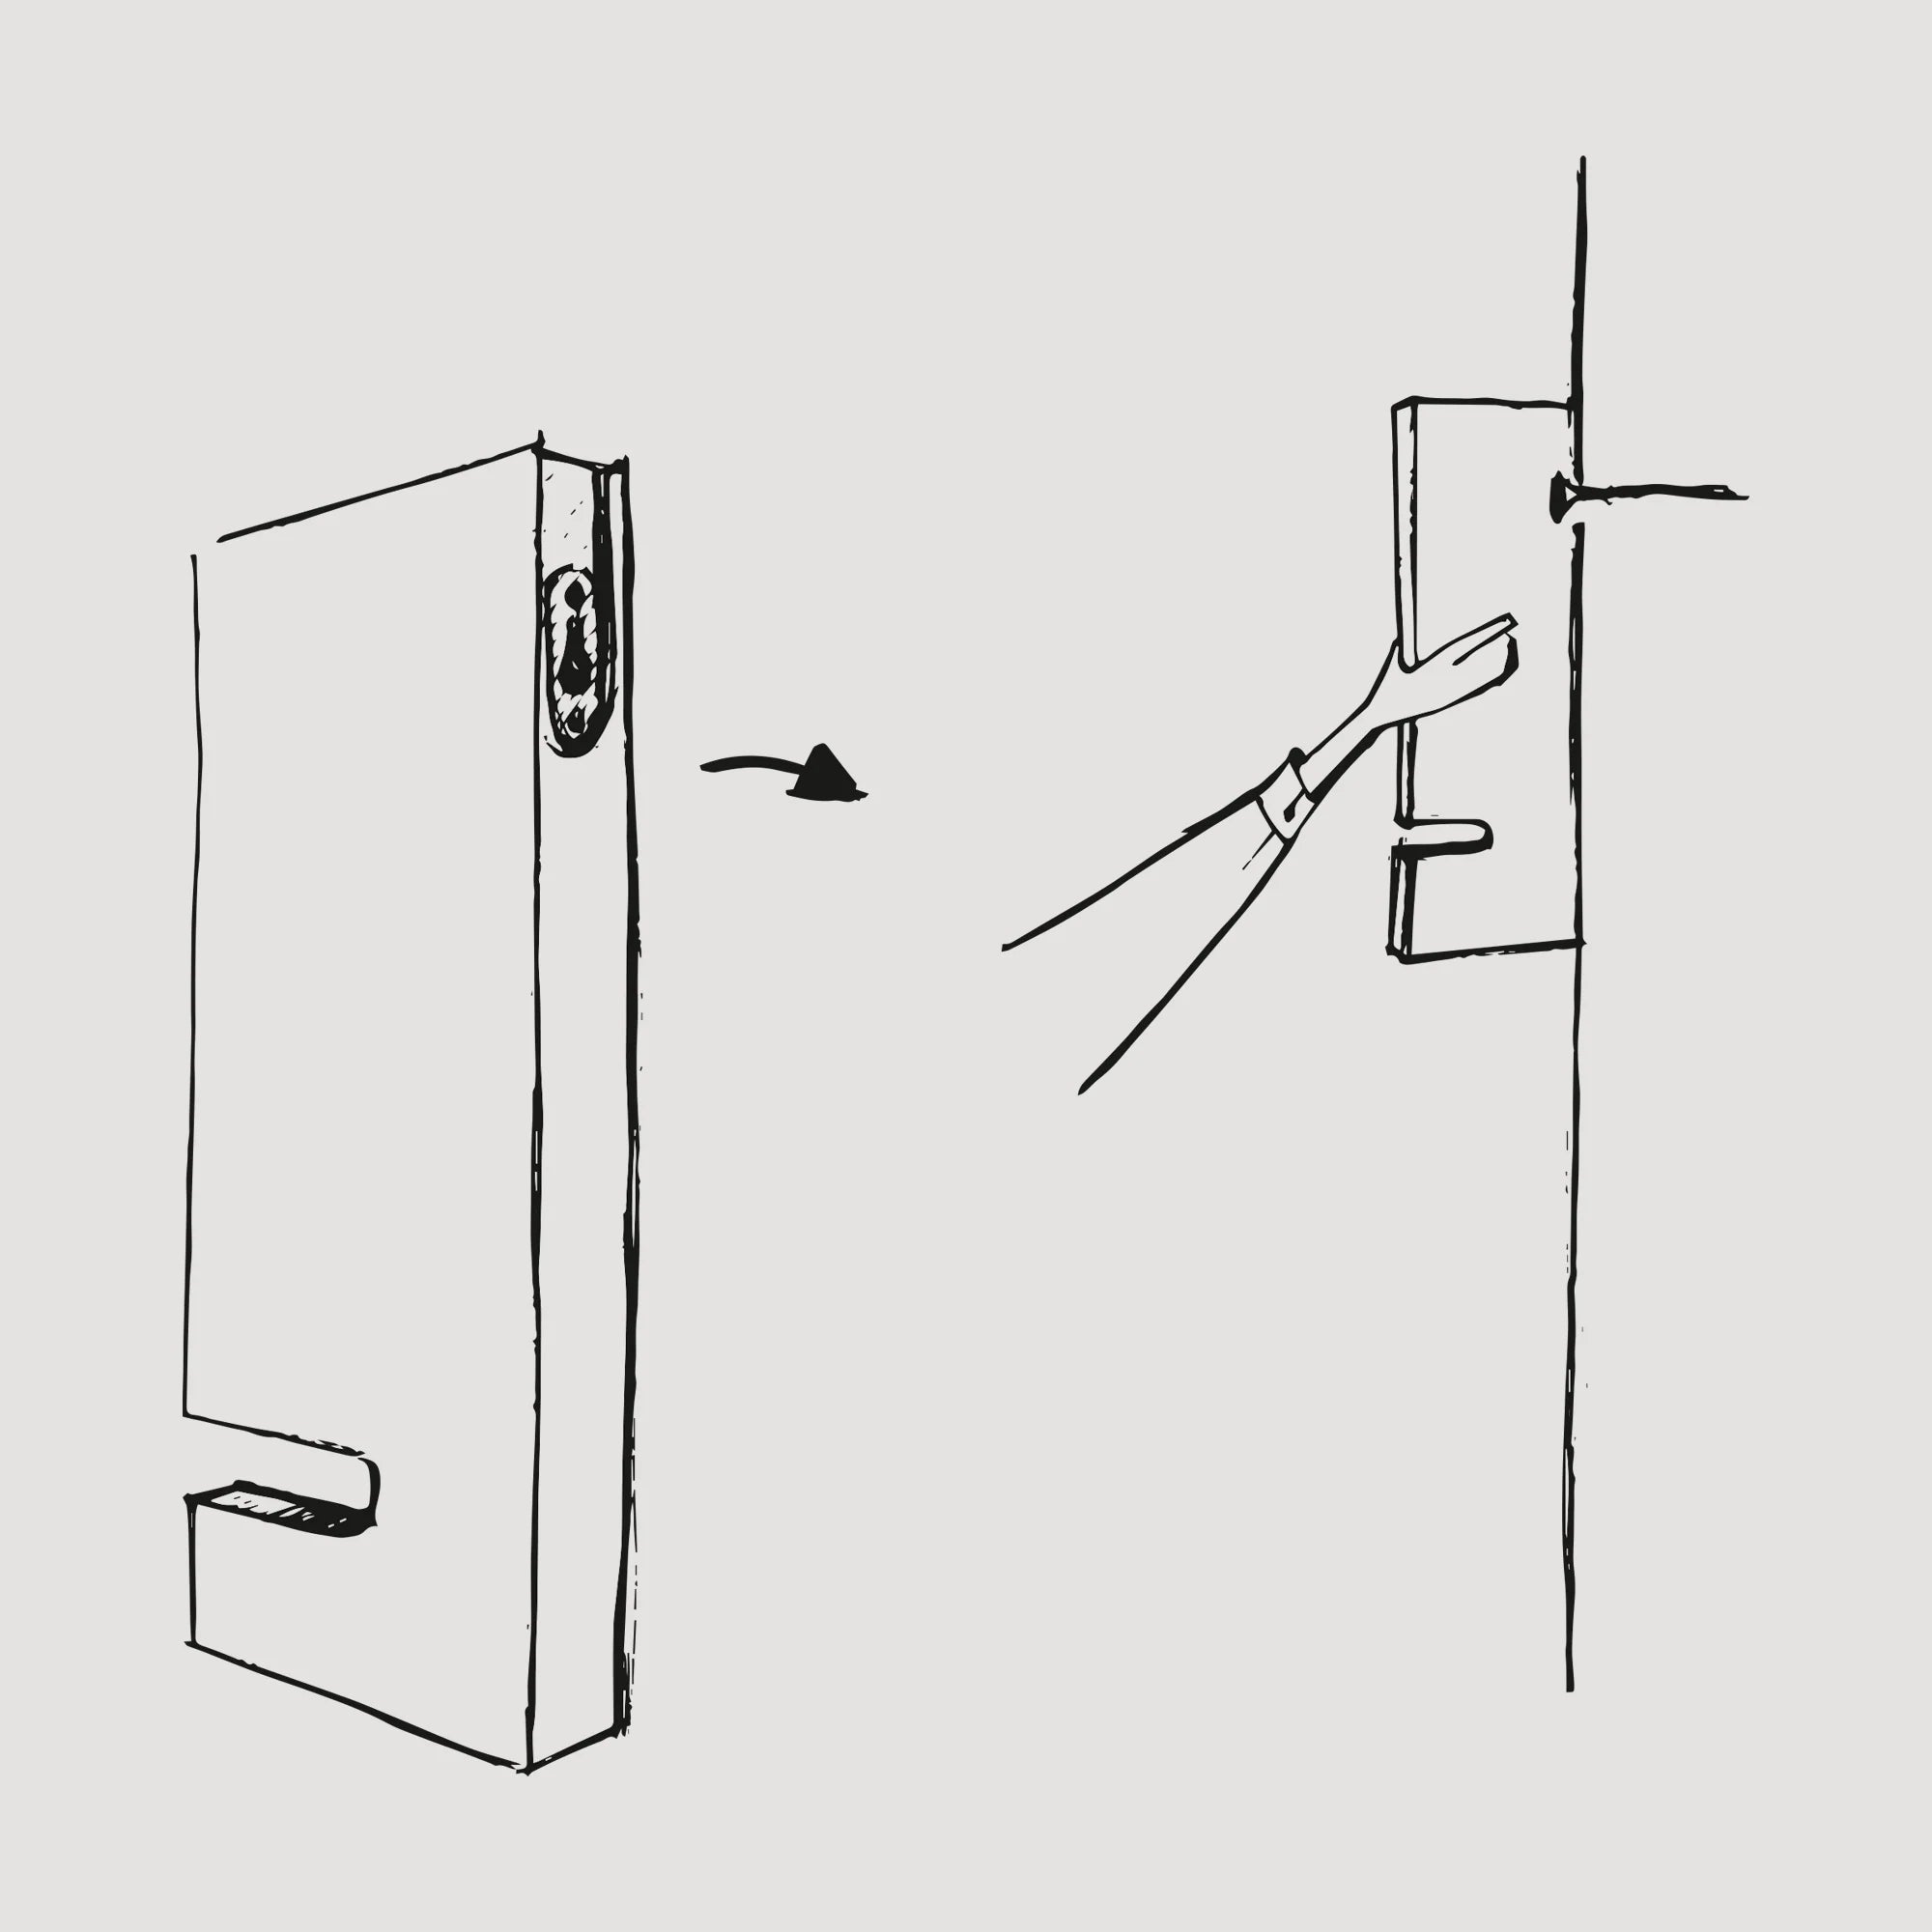
Hang the vertical shelf element on the protruding screw and check its vertical alignment.
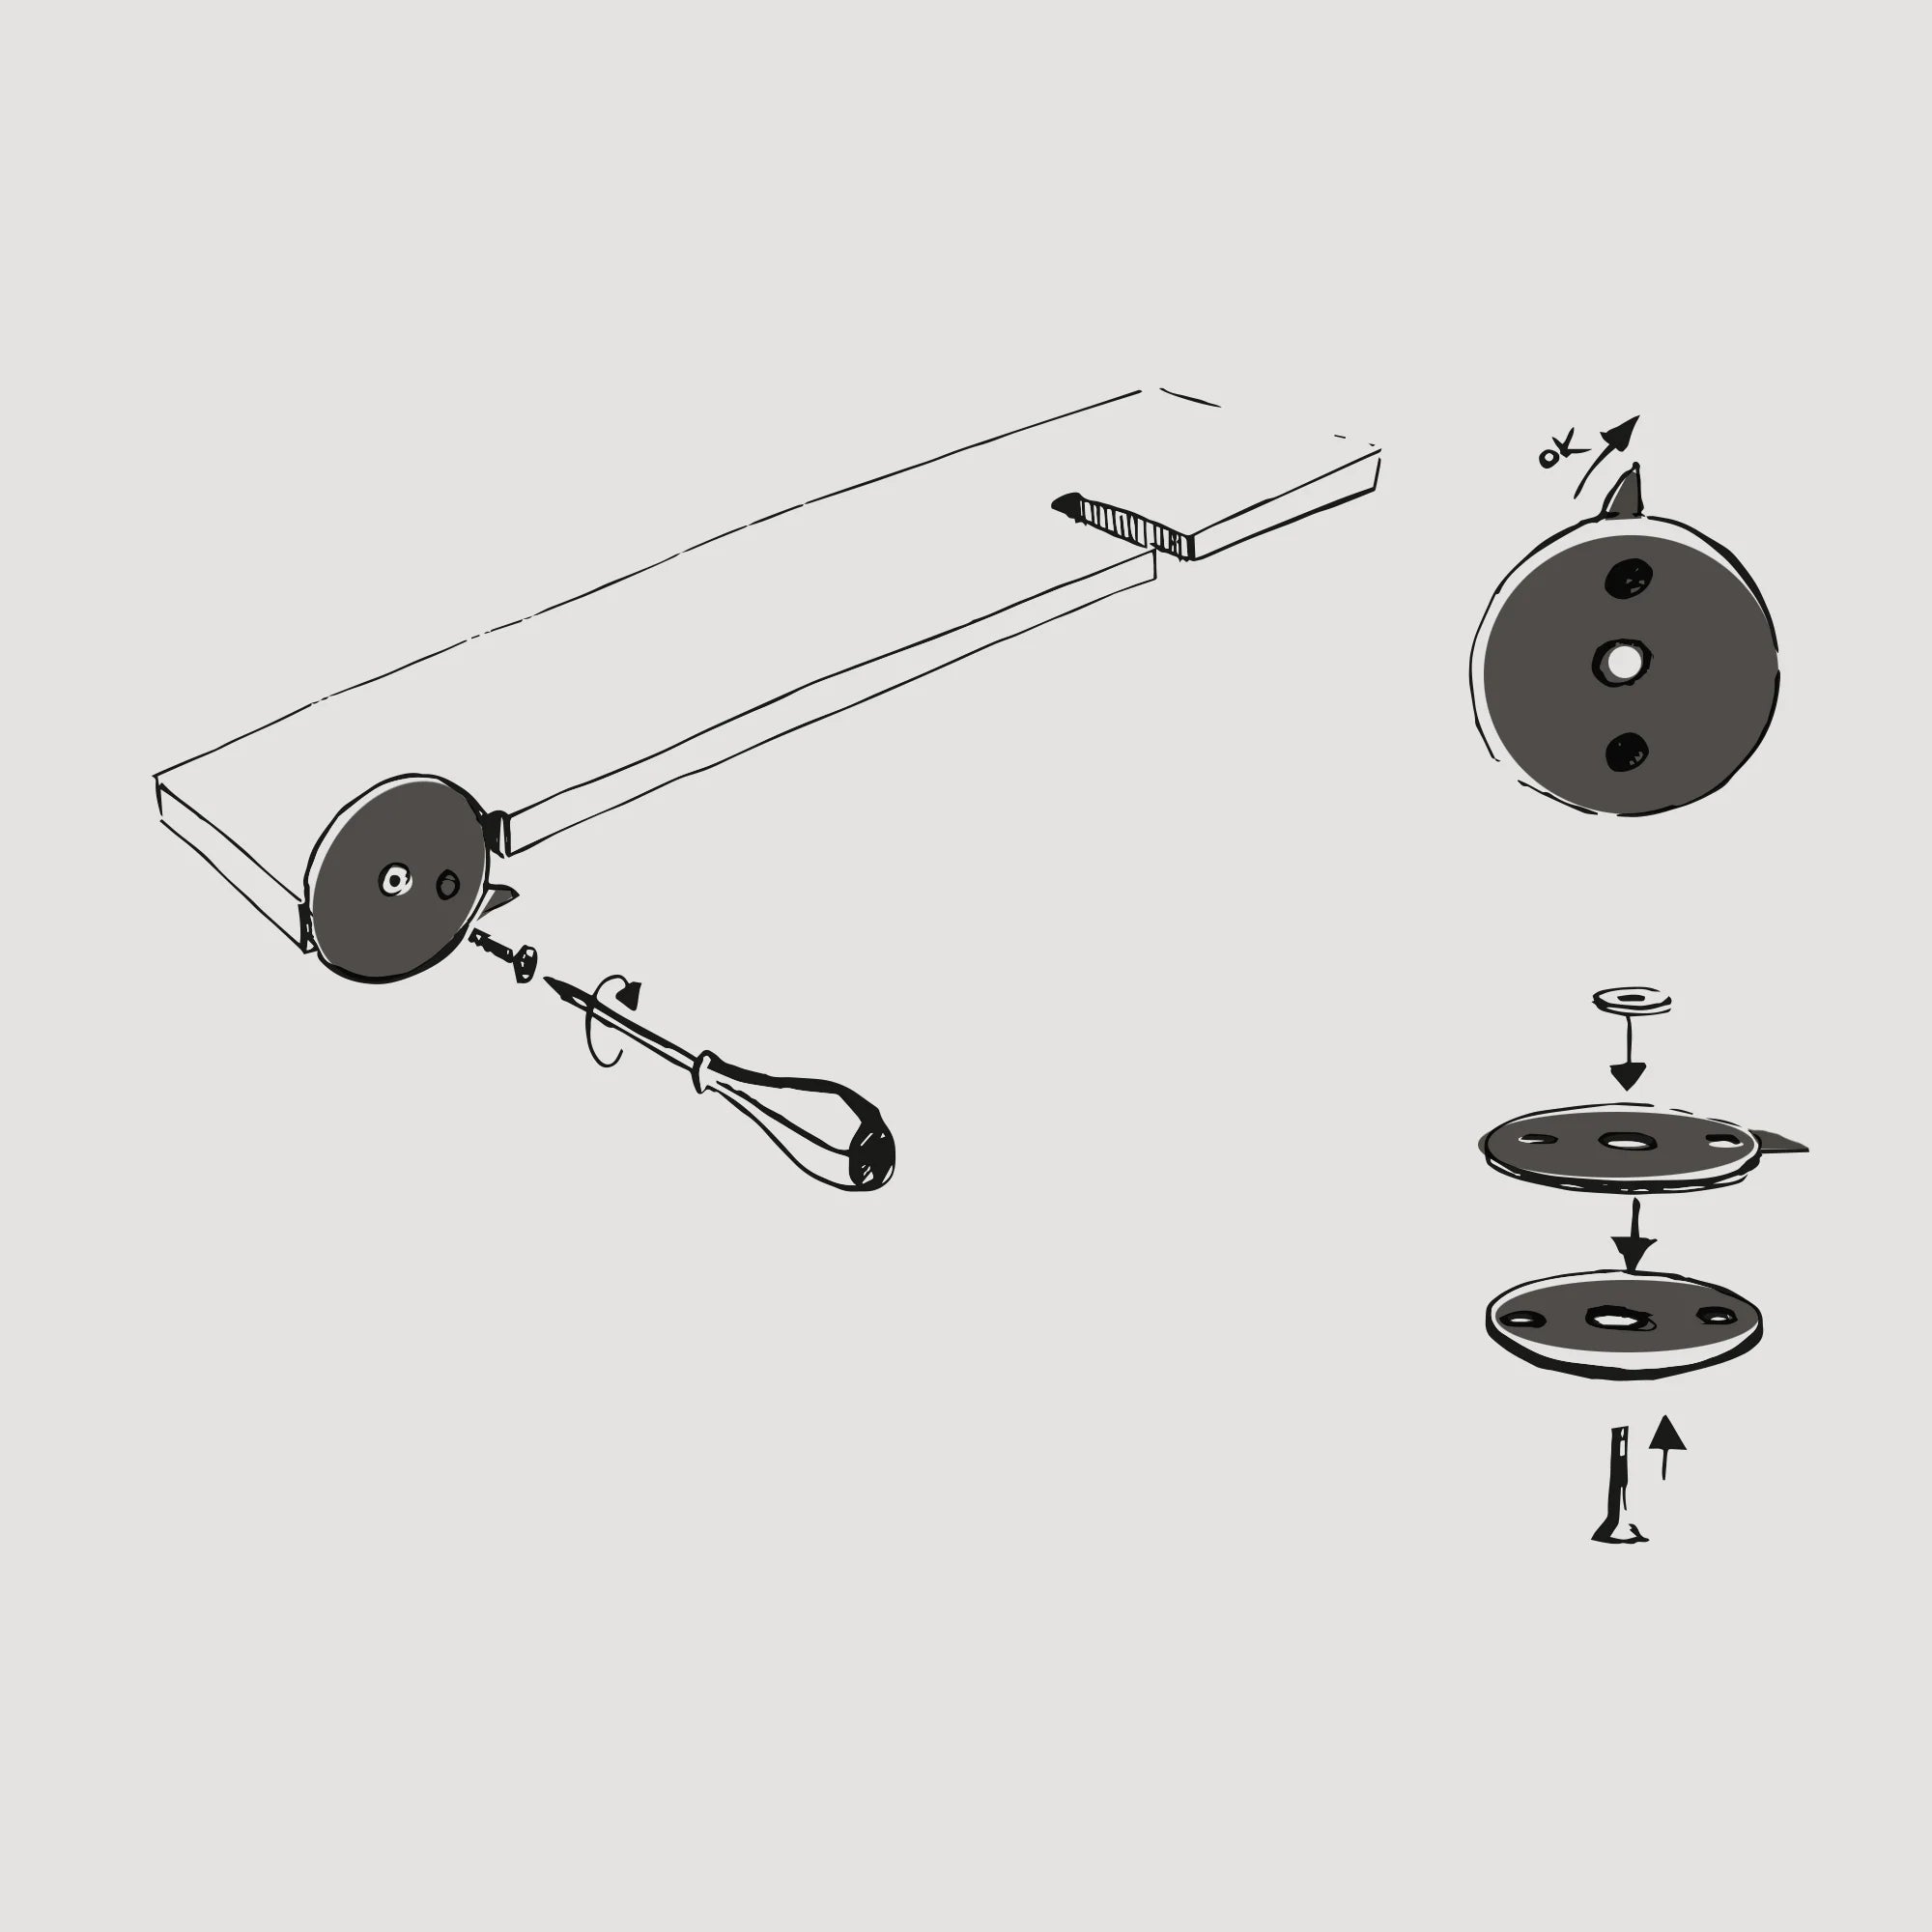
In the assembly kit, you will find two mounting rings along with a screw. Following the diagram, place one on top of the other so that the ring with the notch is on top and points to the right (see diagram). Then attach the elements to the horizontal part of the shelf using a screwdriver. Brass washers must be placed on the screw, as they provide the required spacing.
Next, connect the longer horizontal element with the mounted round components to the vertical element hanging on the wall. Slide the shelf notch into the notch on the vertical element.
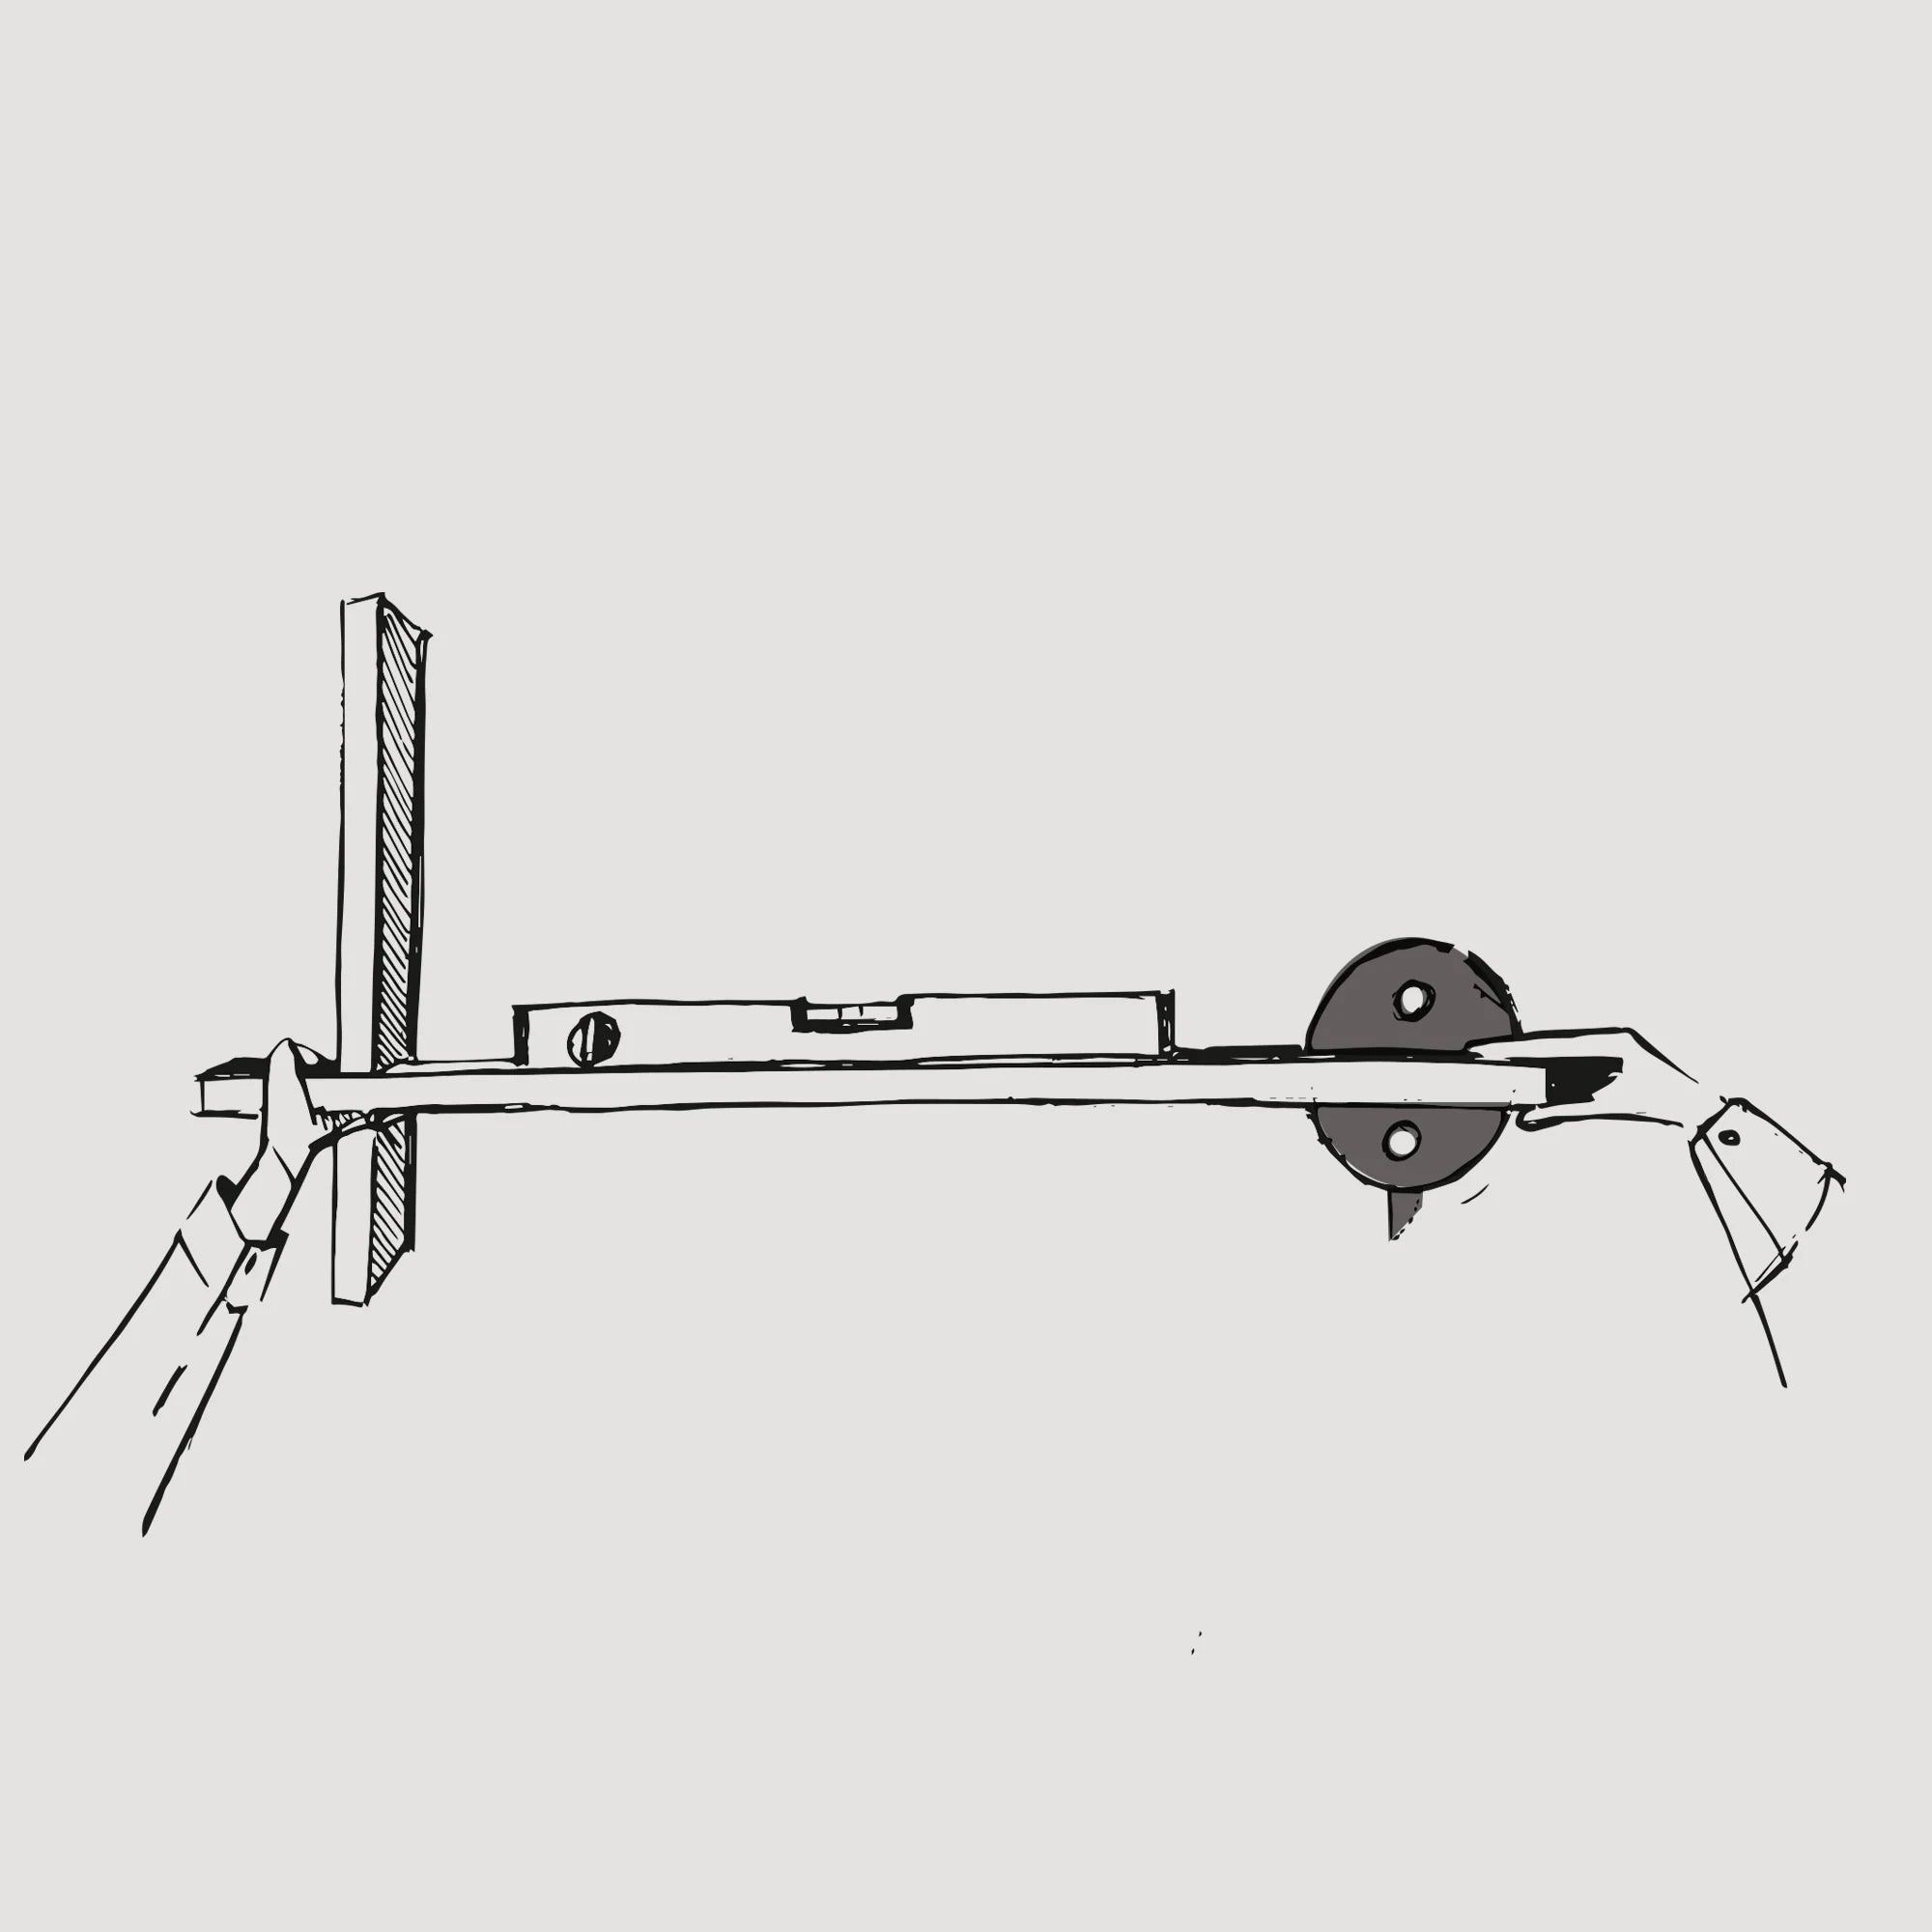
Use a spirit level to align the shelf so that it is properly and evenly mounted to the wall.
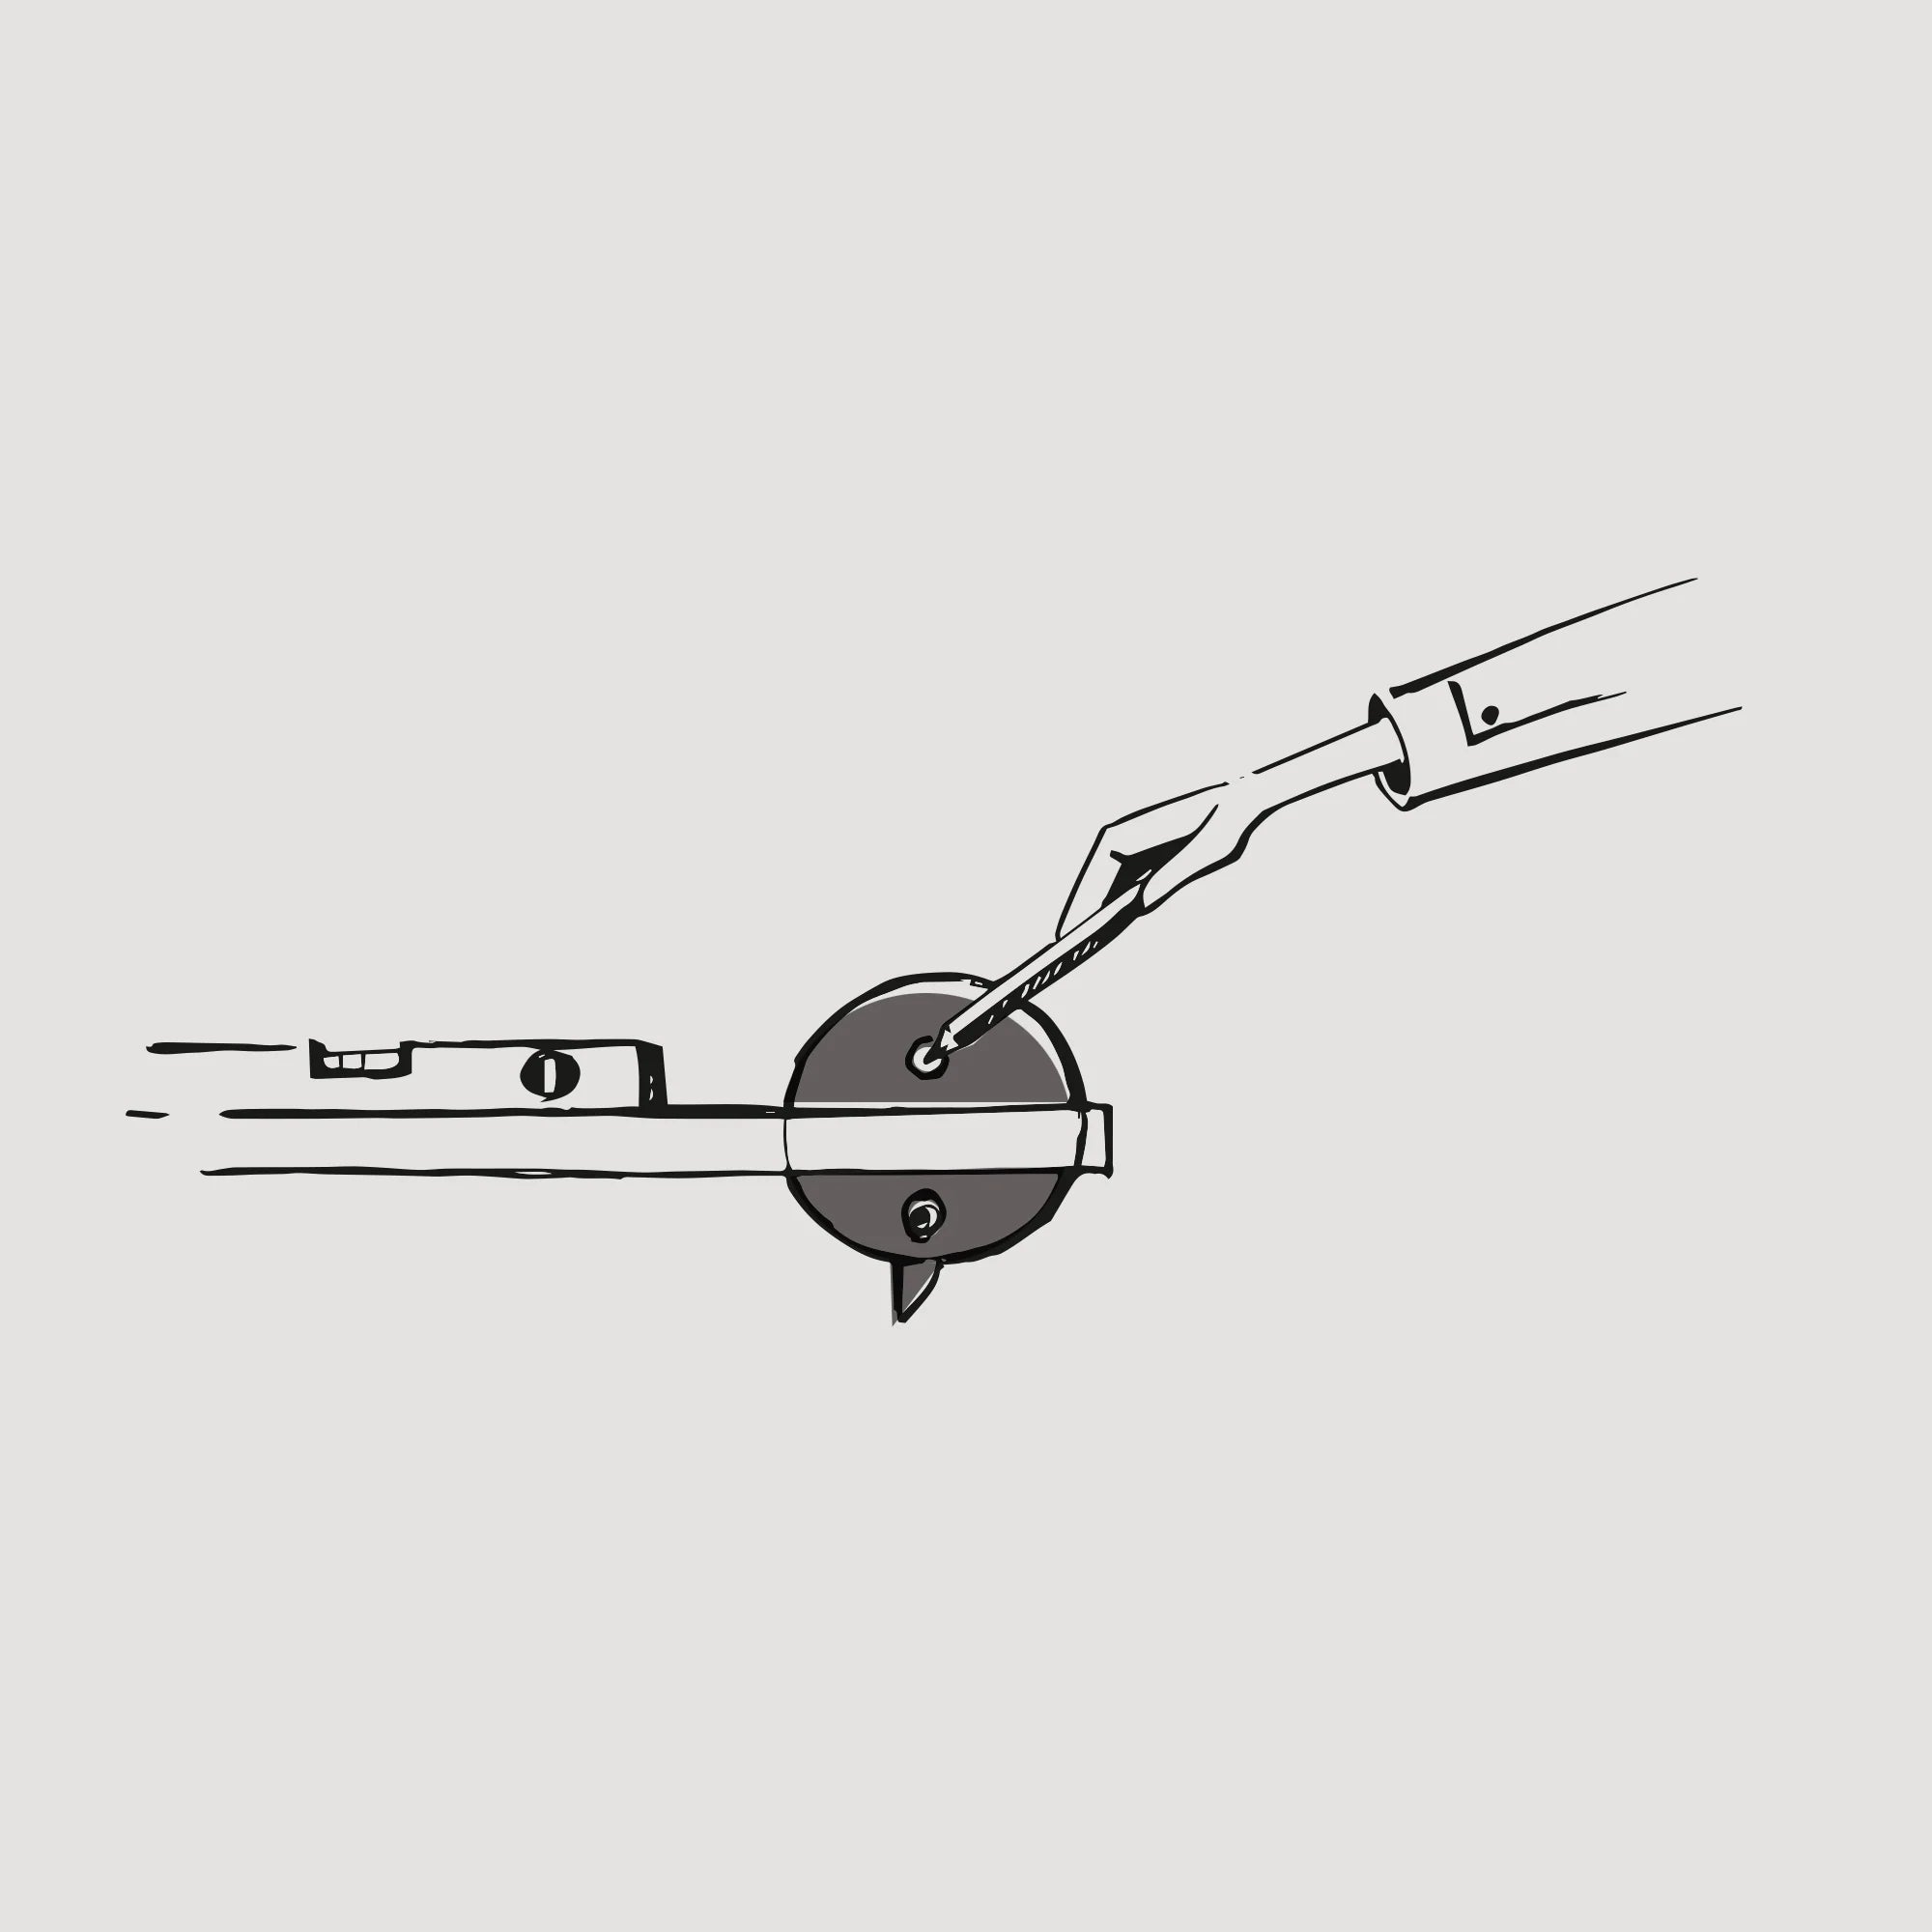
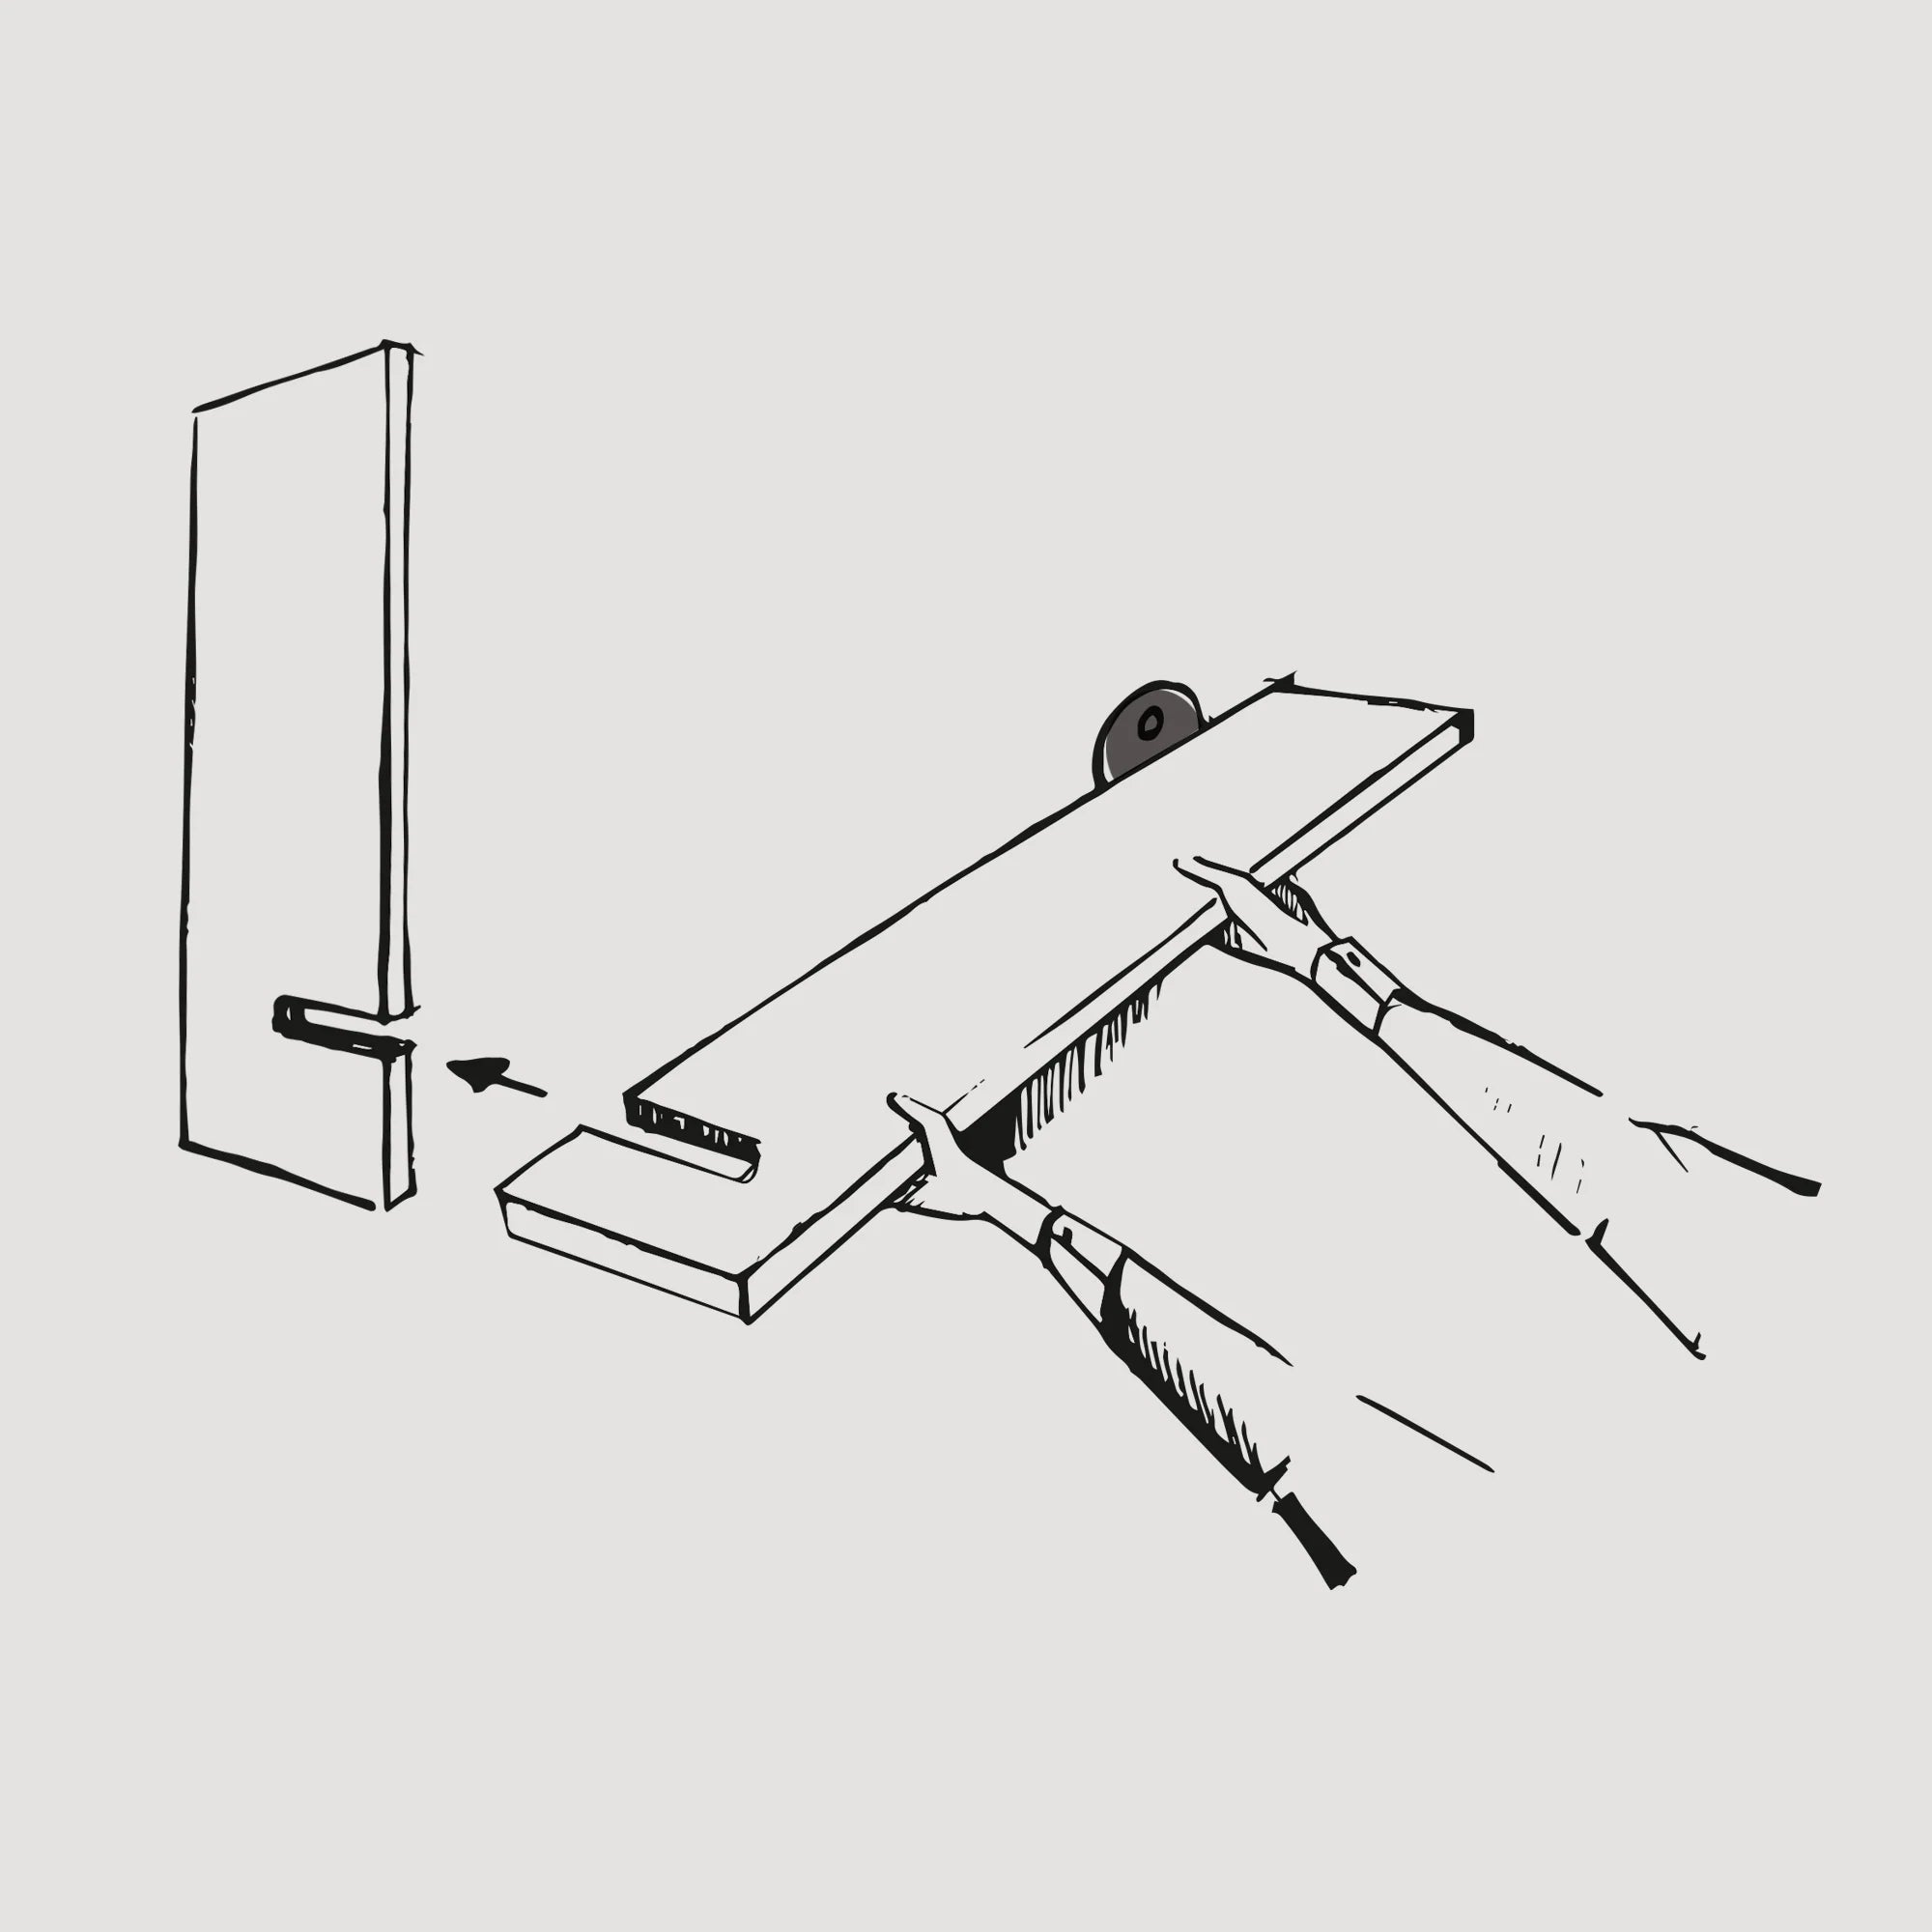
Mark the mounting points of the round shelf elements on the wall using a pencil. Then remove the shelf from the wall.
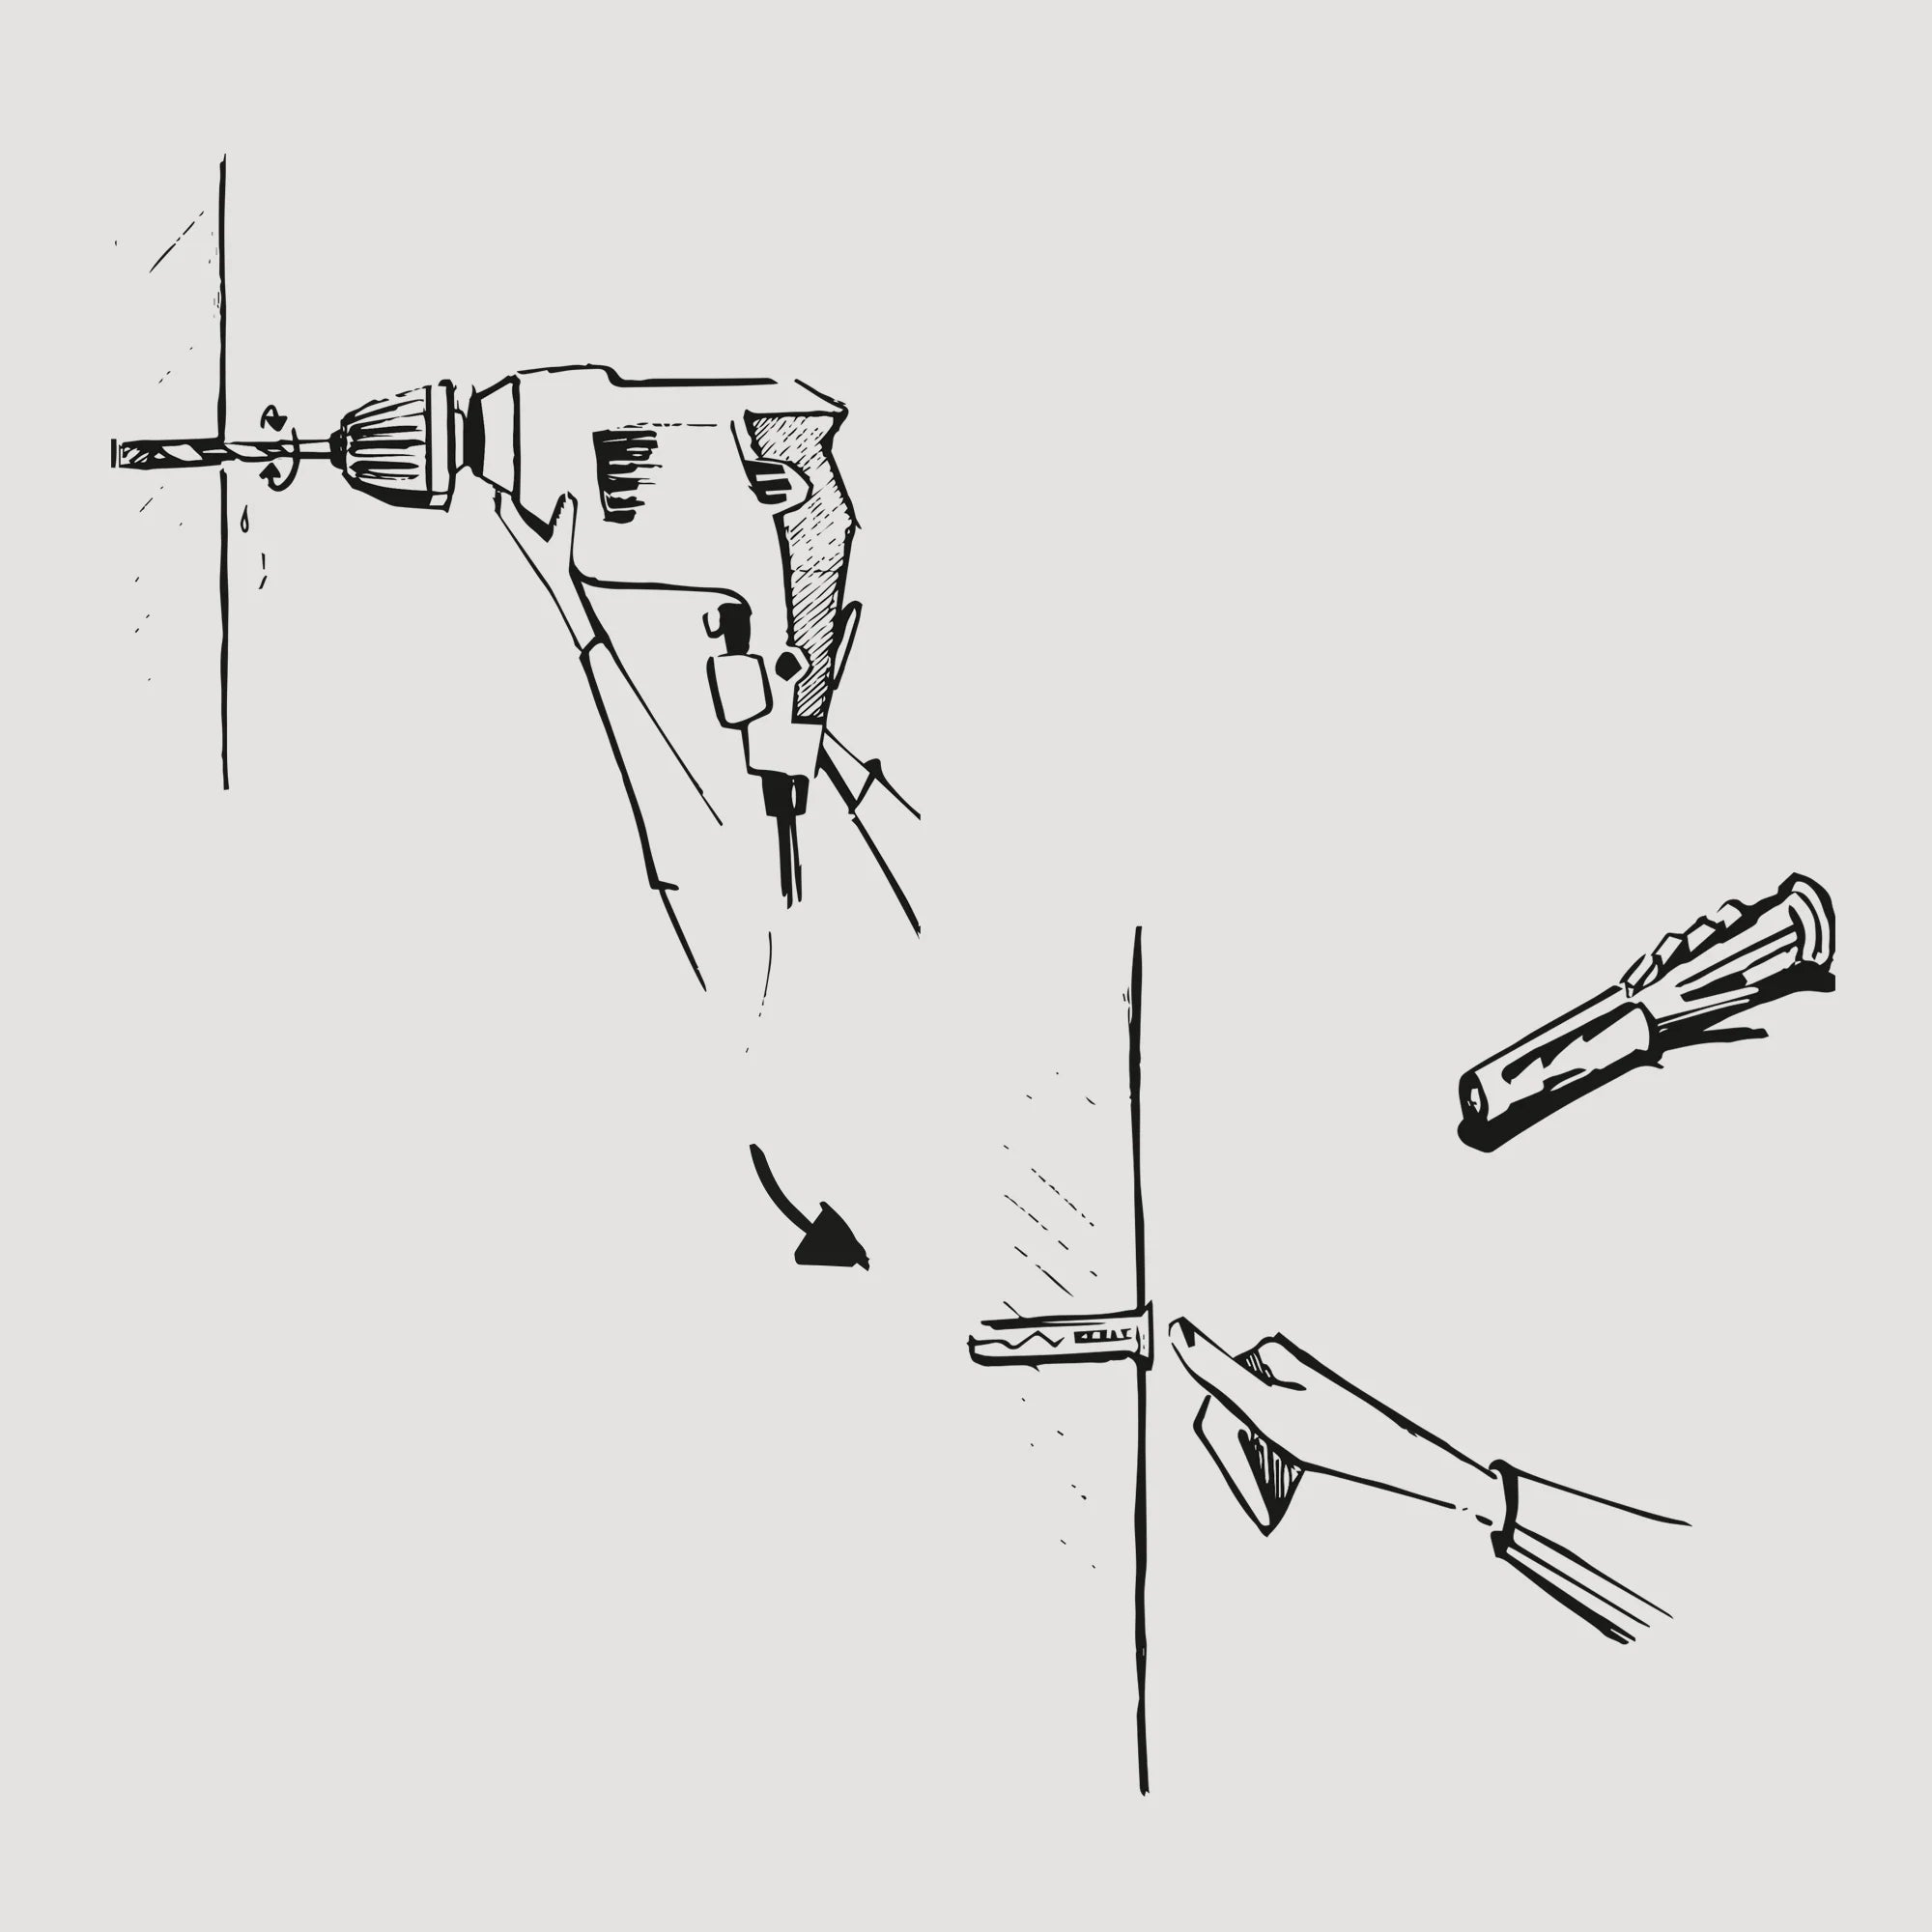
At the marked points, drill holes in the wall to the full depth of the wall plugs (make sure to drill perpendicular to the wall using a 6 mm bit matching the plug diameter). After drilling the holes, insert the wall plugs. Set them so that their collars are flush with the wall.
At the marked points, drill holes in the wall to the full depth of the wall plugs (drill perpendicular to the wall using a 6 mm bit, matching the plug diameter). After drilling the holes, insert the wall plugs. Set them so that their collars are flush with the wall.
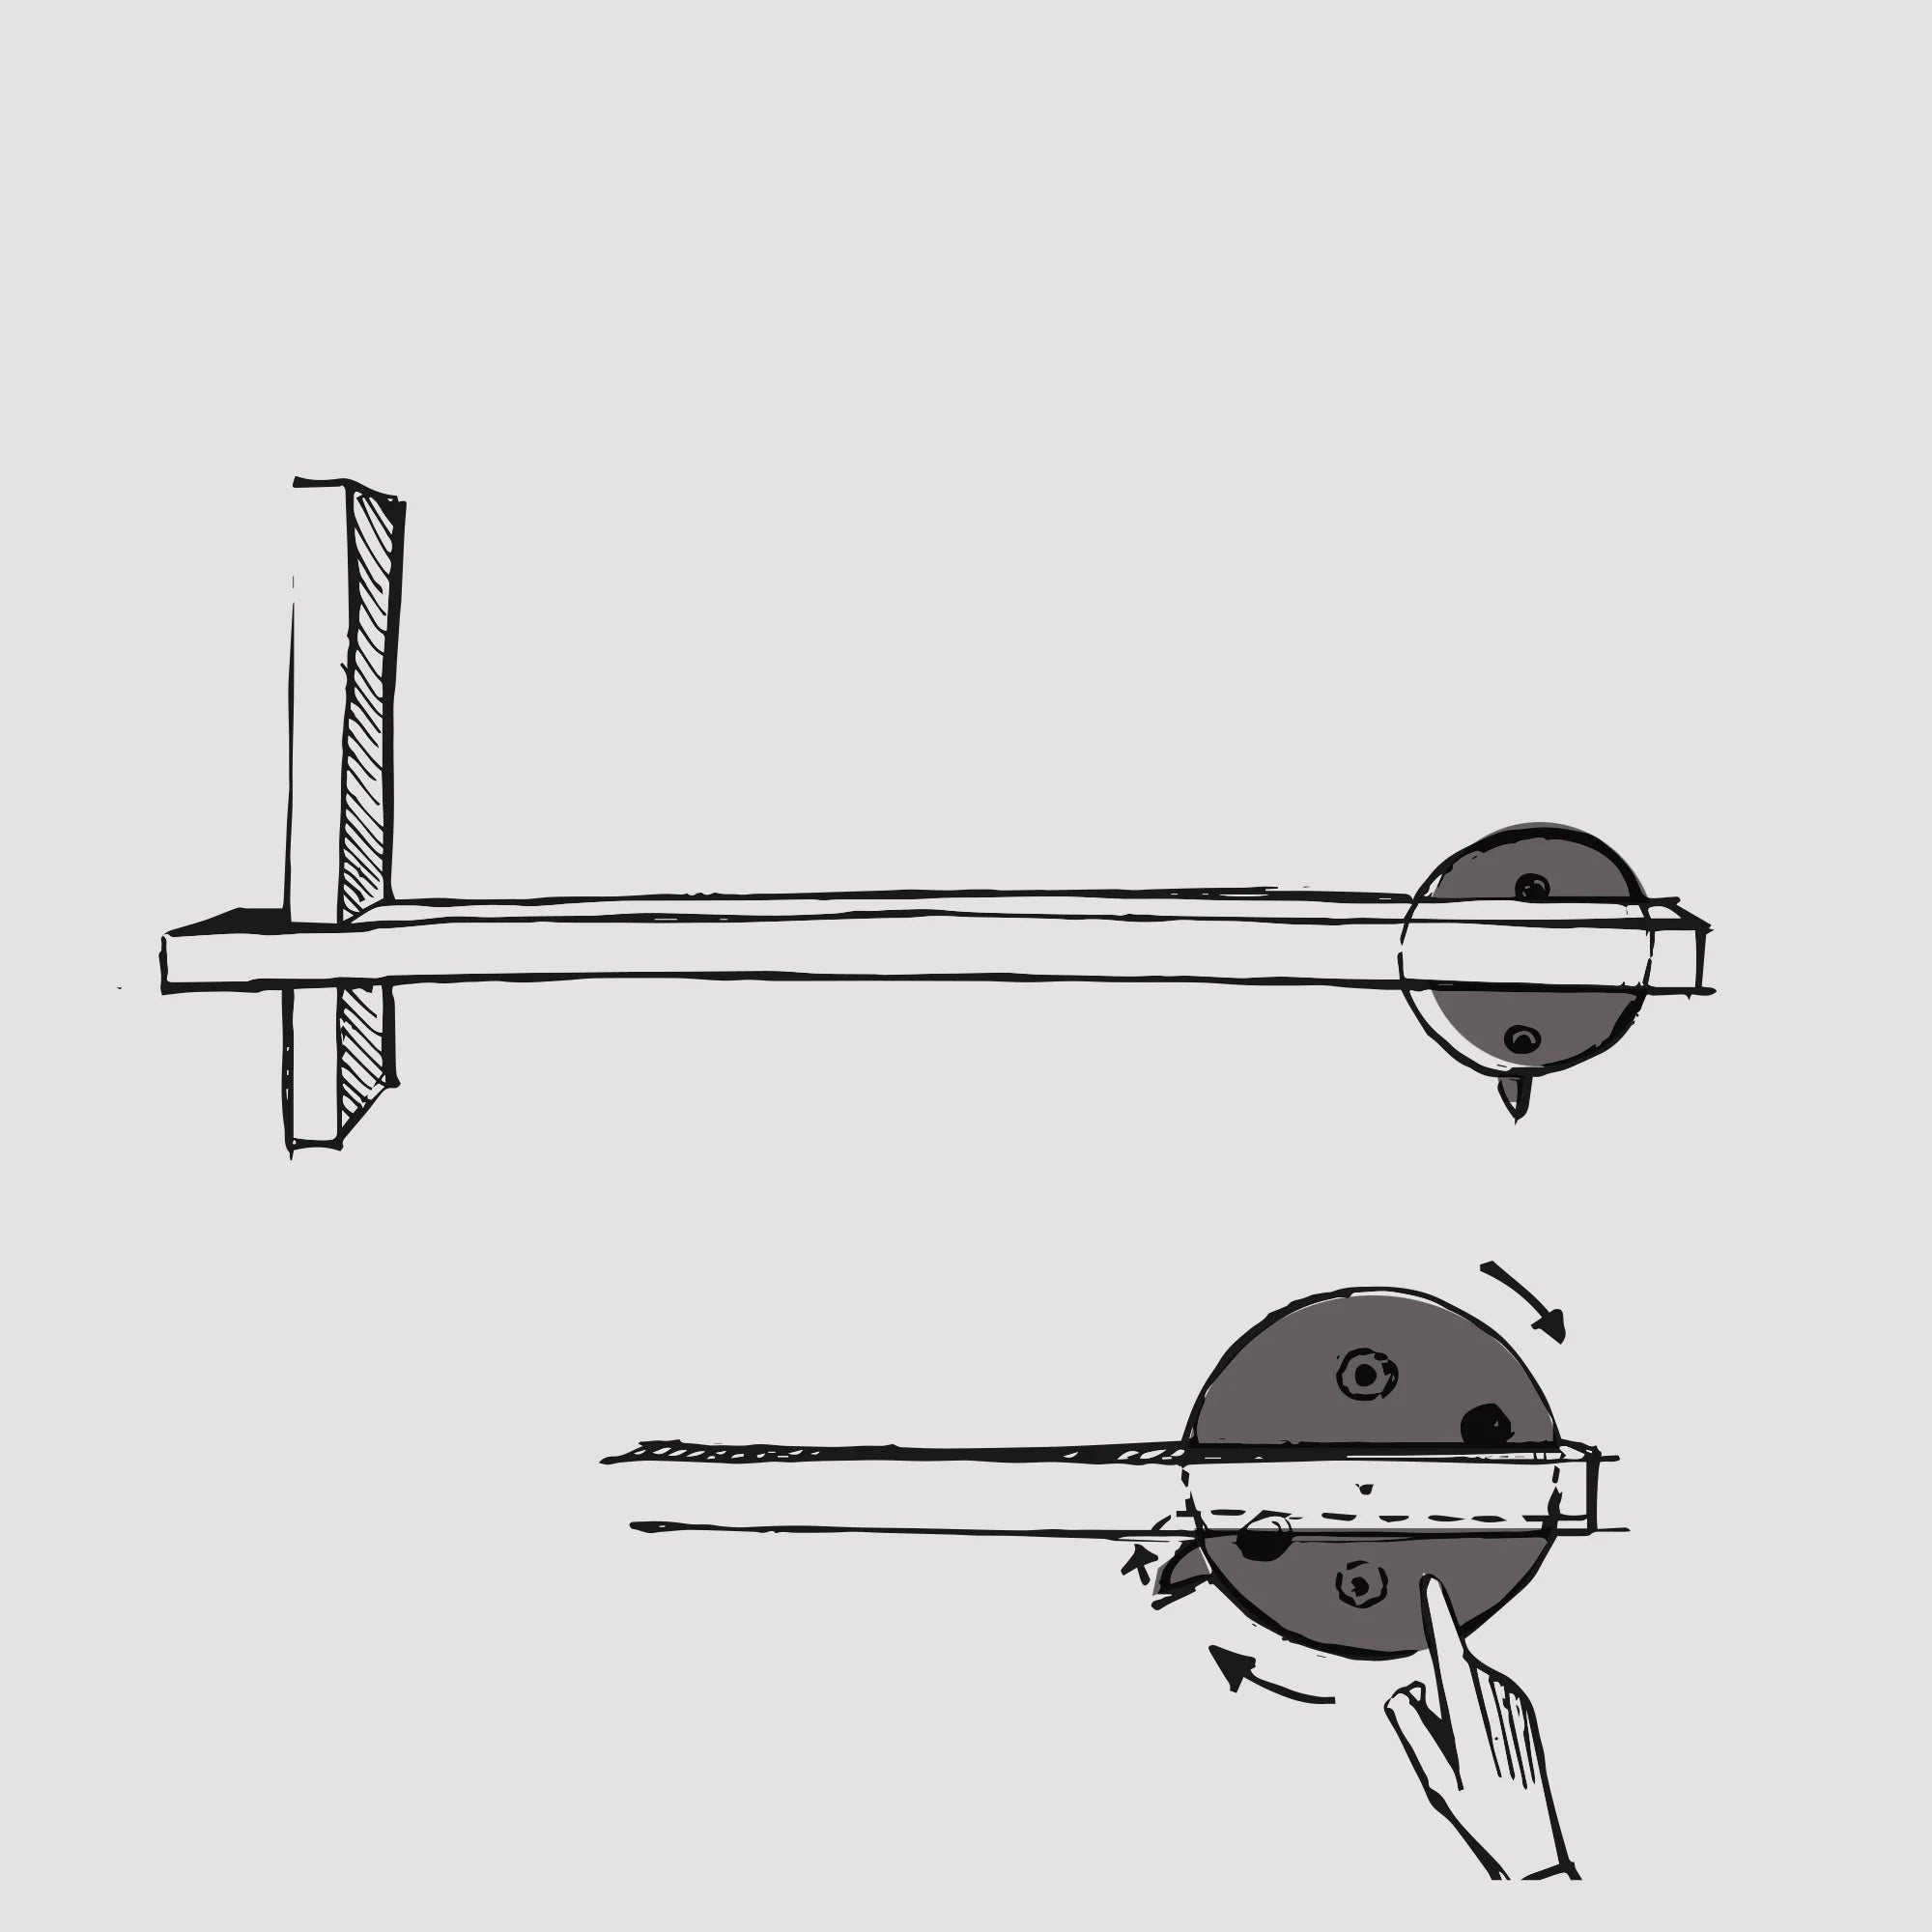
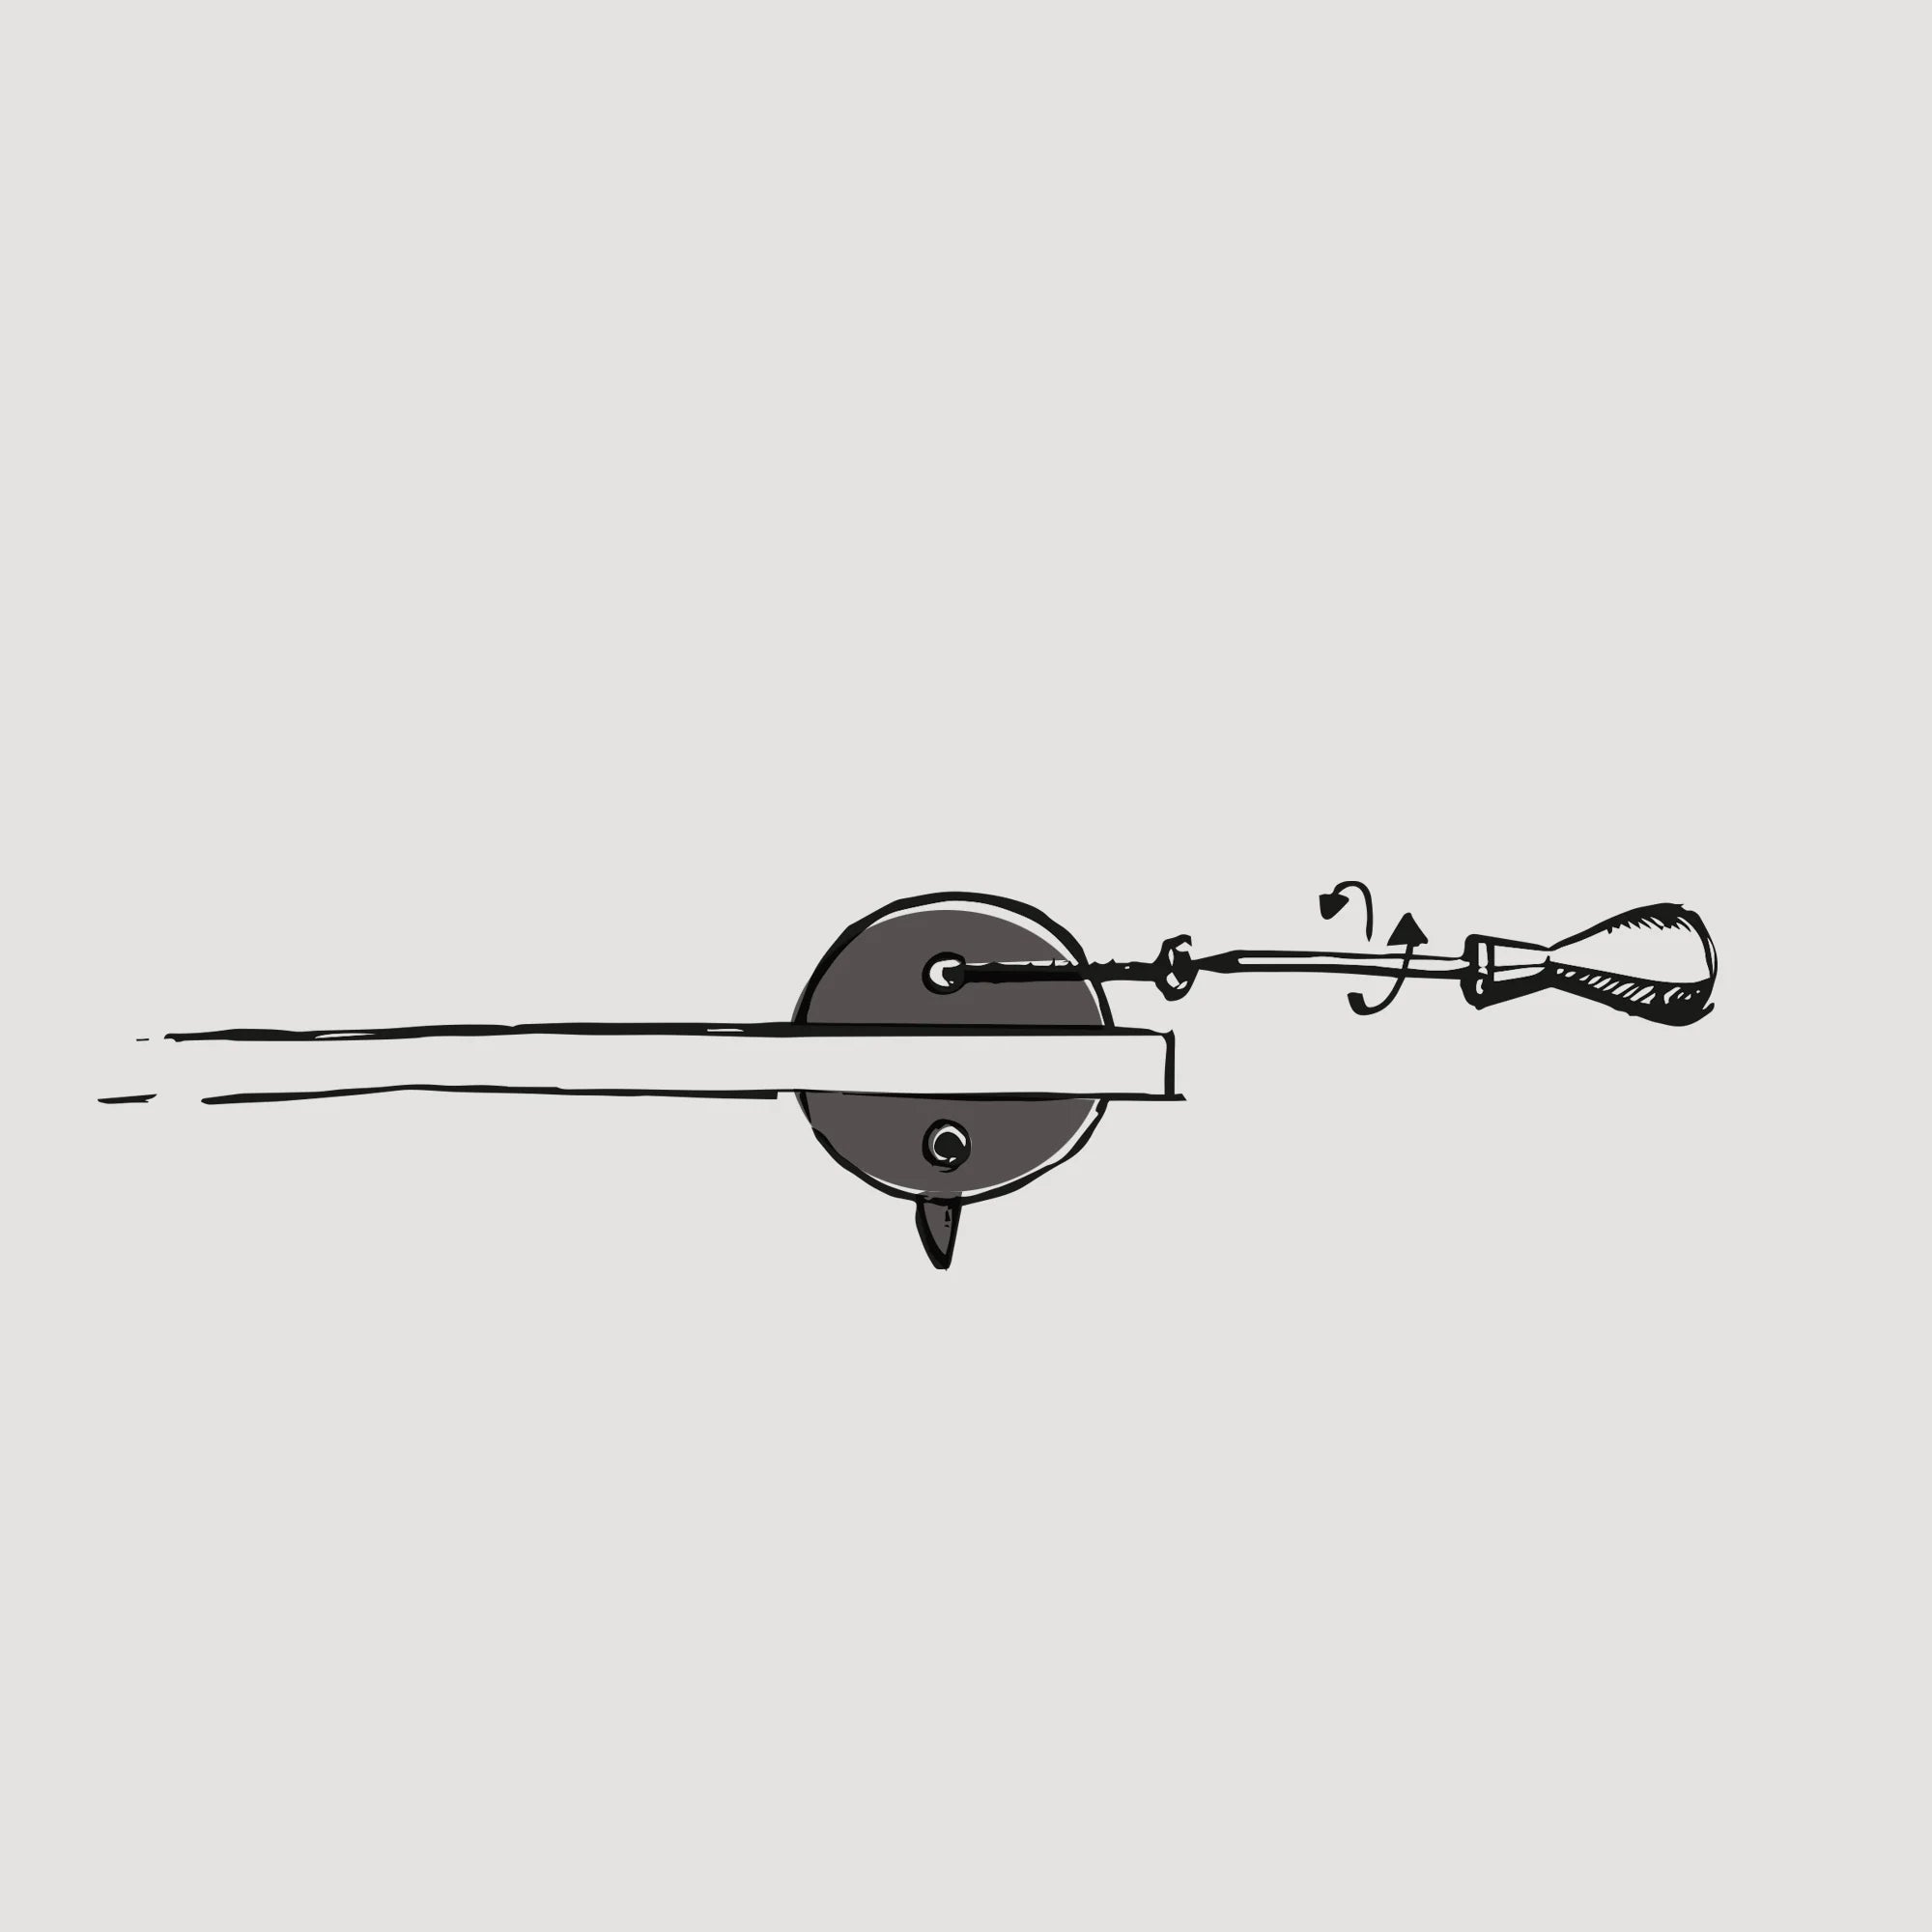
To conceal the wall connections of the shelf, turn the mounting rings to the left so that the notch hides behind the edge of the longer horizontal part.
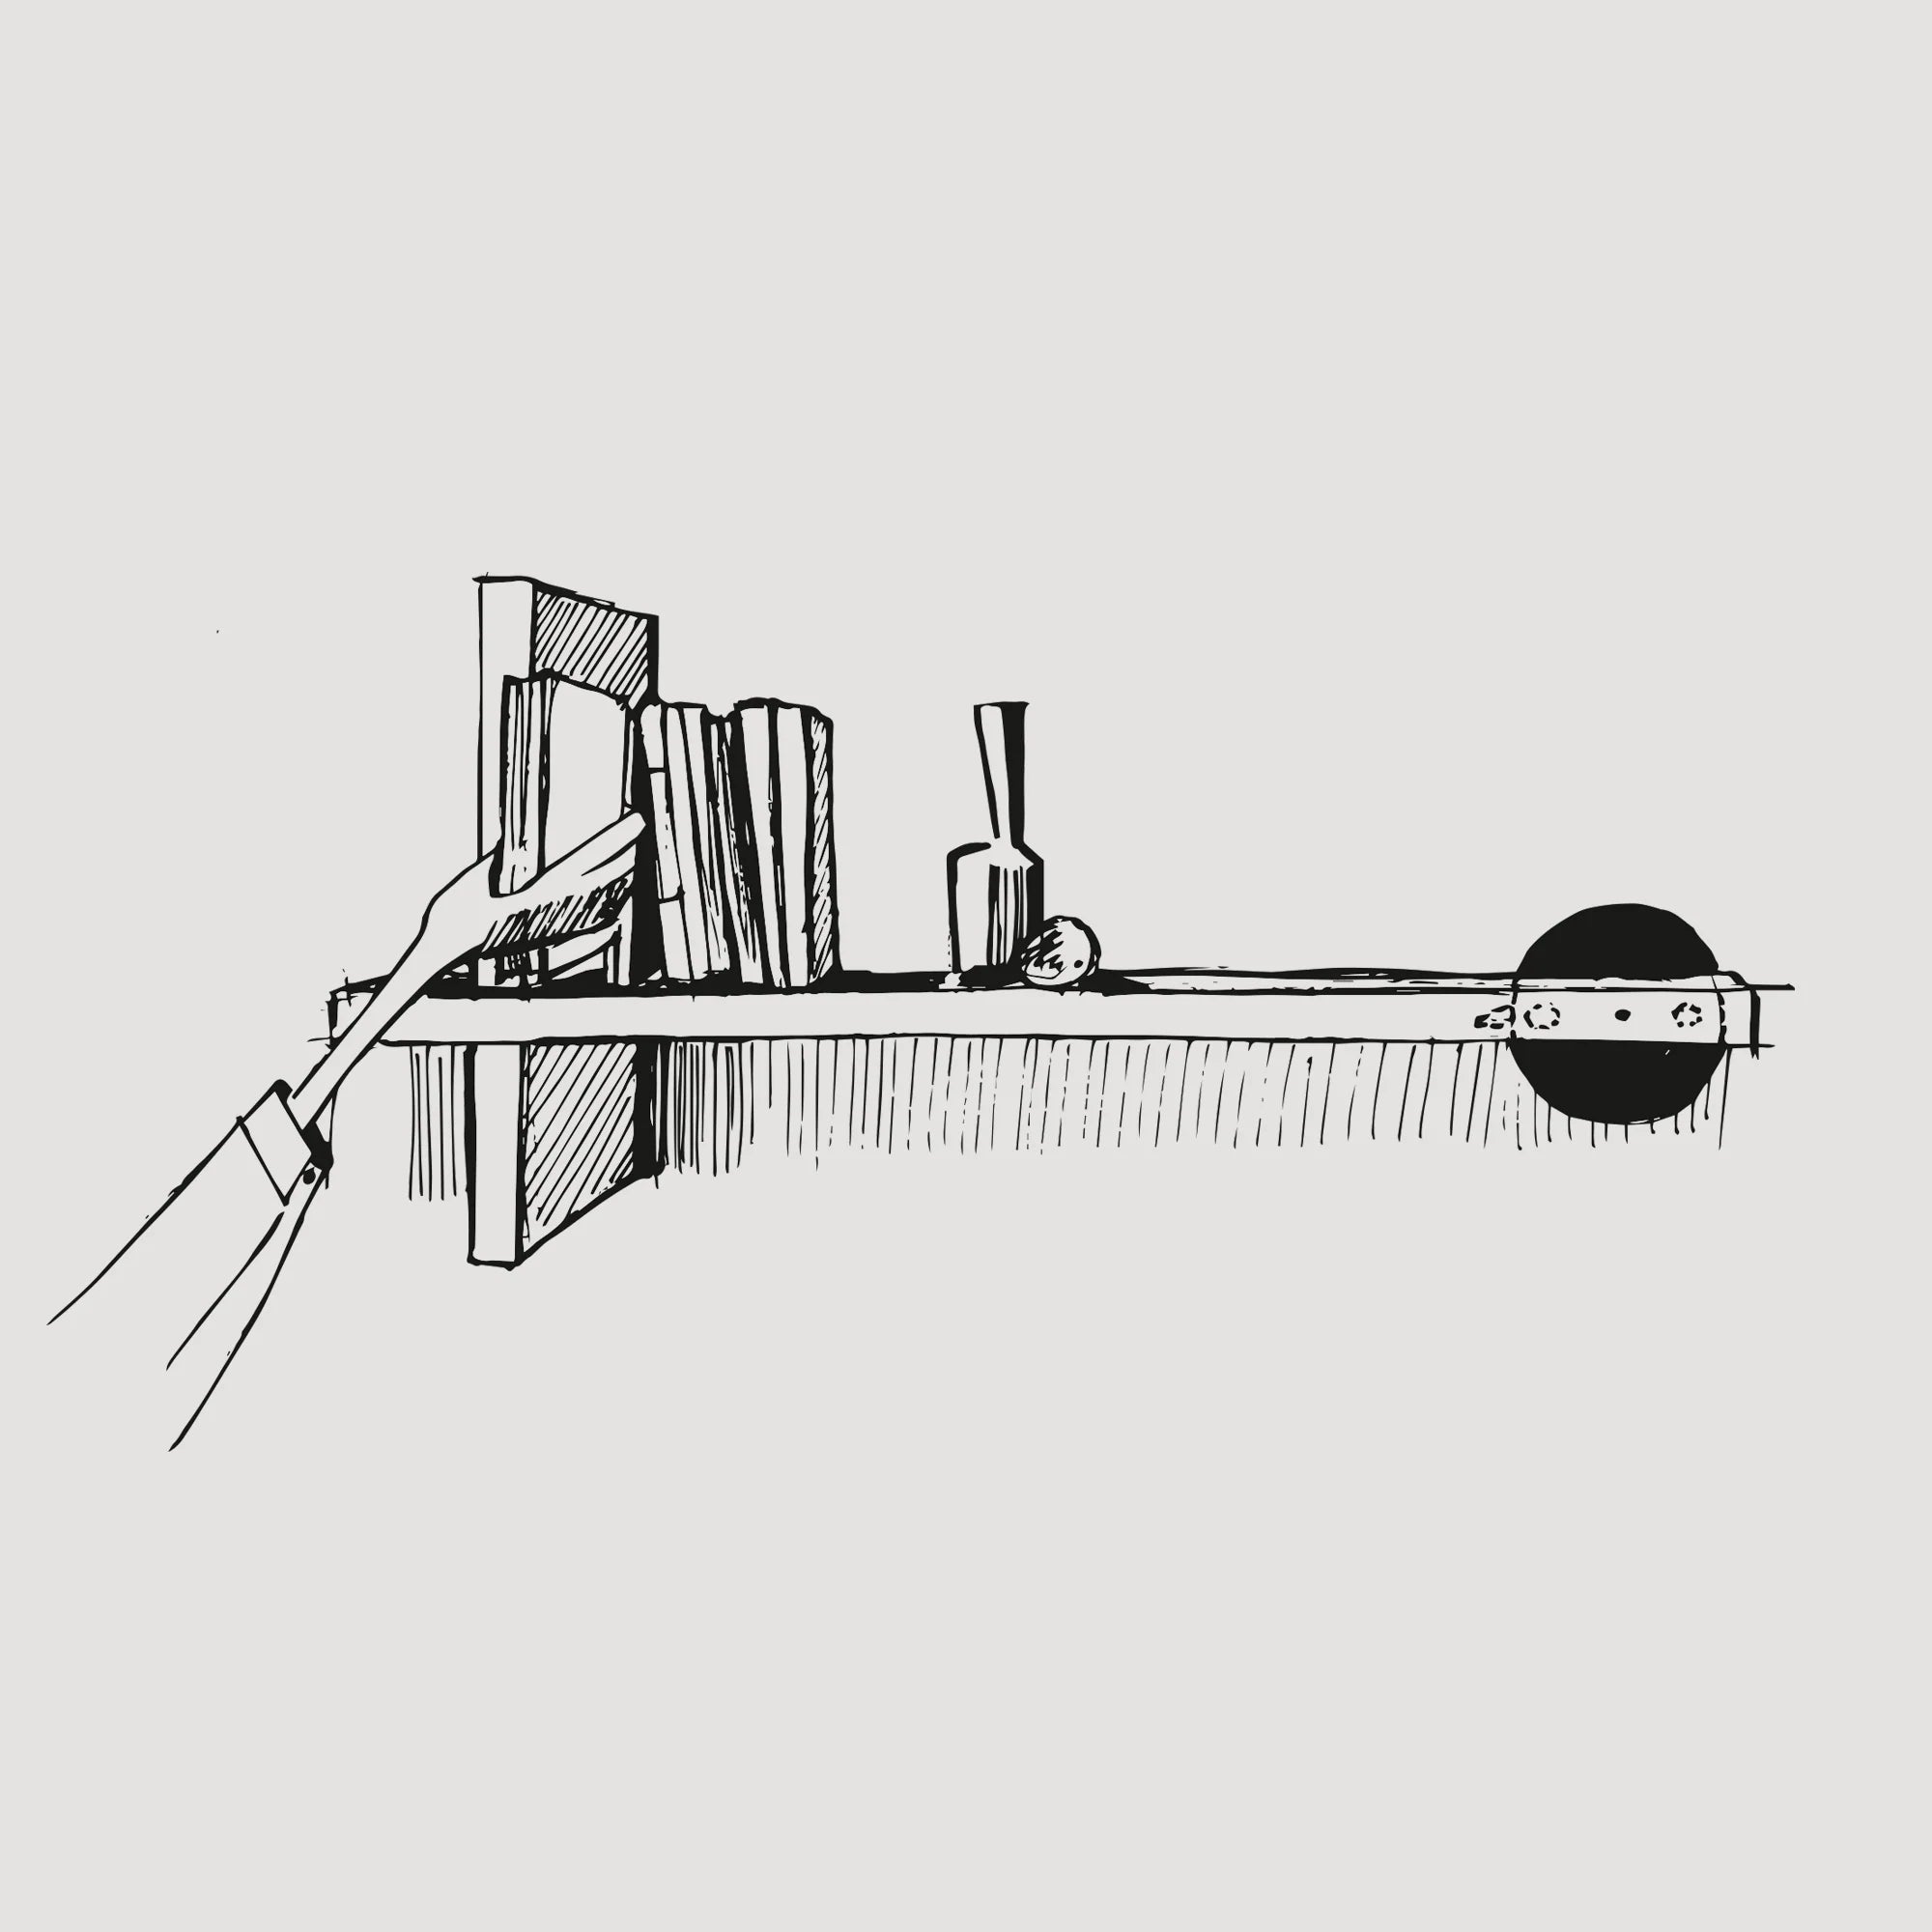
Done! Bring a new level of order to your home and enjoy displaying your favorite items.